PRO 32 & 48 X-AXIS ASSEMBLY
12
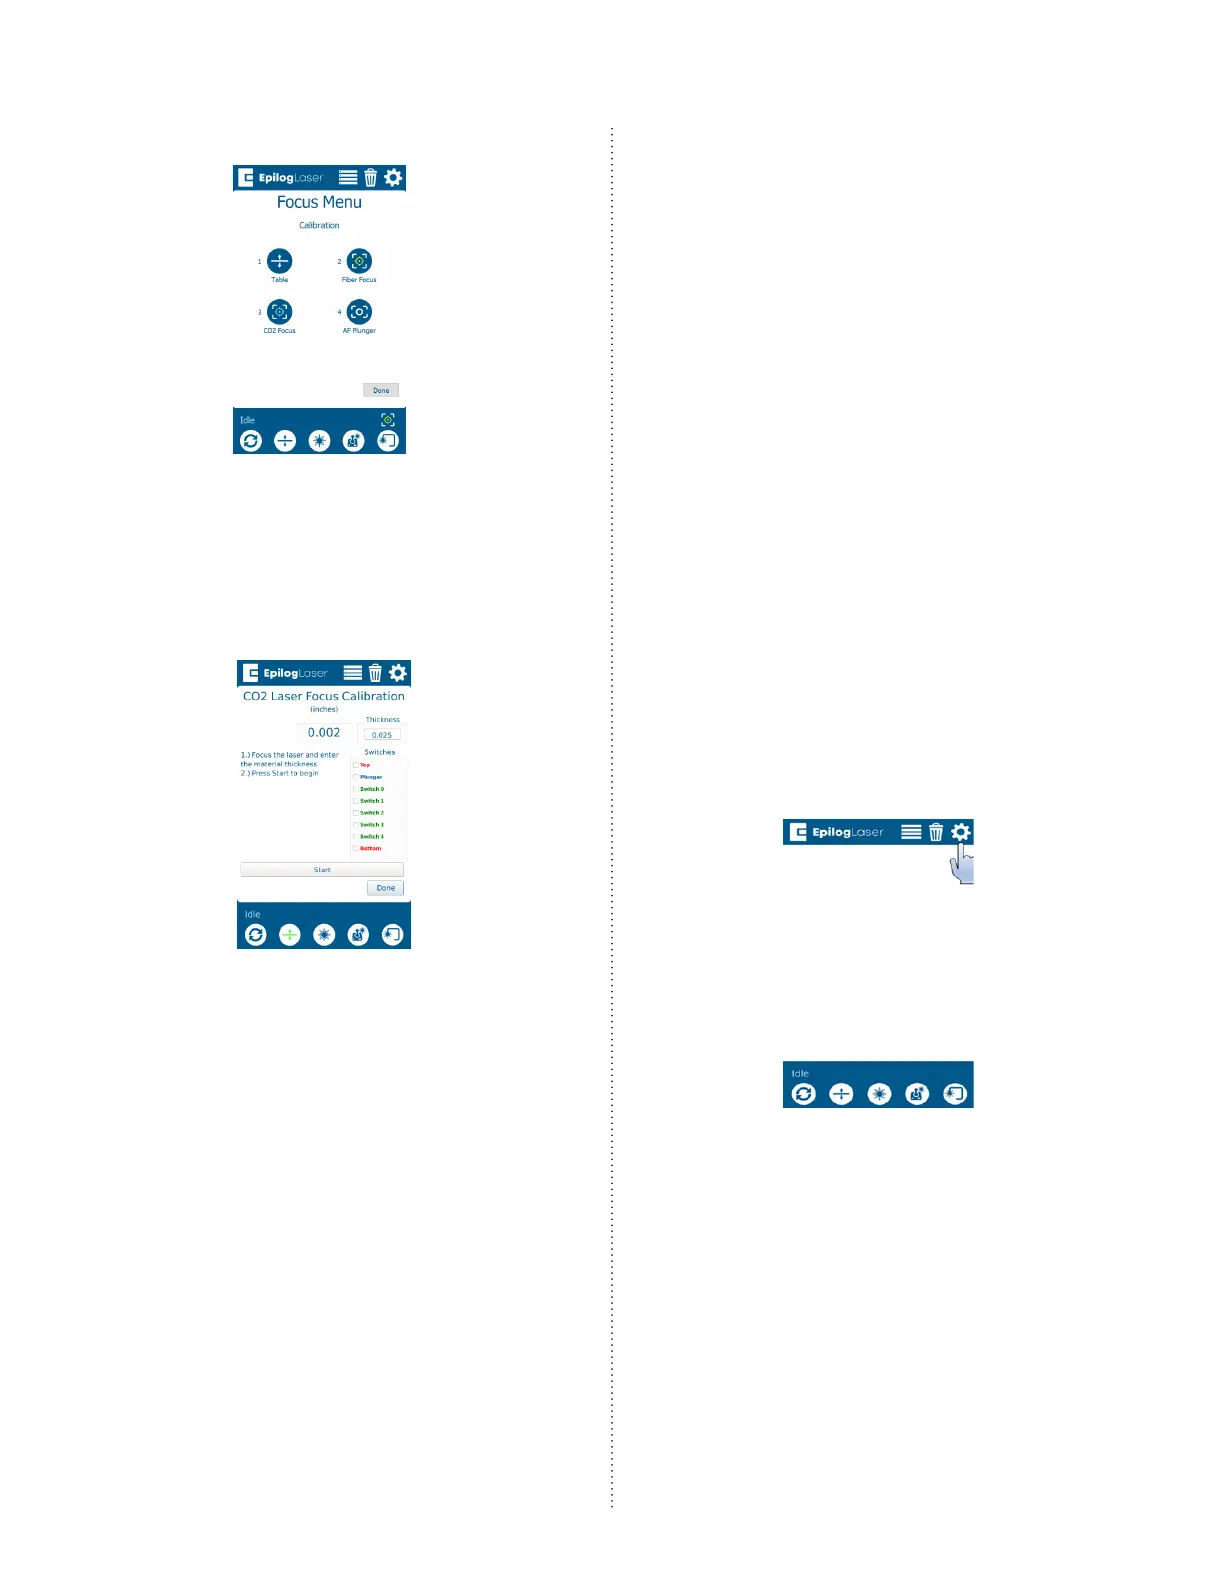
13. Press the CO2 Focus button:
14. Ensure that the material thickness used
during the previous step is entered in
the Thickness box. If using anodized
aluminum provided by Epilog Laser, the
default value of 0.025” corresponds to
the material.
15. Press the Start button. This calibration is
very fast as the engraver simply notes
and saves the current position of the
table.
16. Press Done.
Move to the Autofocus Calibration
procedure.
Autofocus Calibration
The autofocus calibration takes note of,
saves, and uses the CO2 focus calibration
value to ensure that the table moves to
the correct focal height when running a
job with the autofocus enabled. During this
calibration, the table will rise up, depress
the autofocus plunger, and then move
back to the appropriate focal height.
Before completing the table calibration
install the raster table.
Since the table will rise to depress the
autofocus plunger, use the Jog feature
to position the lens carriage in a position
which will prevent the autofocus plunger
and lens cone from coming into contact
with the le and or top ruler guides.
1. On the display, press the gear icon to
enter the Settings menu:
 Loading...


