PRO 32 & 48 X-AXIS ASSEMBLY
13
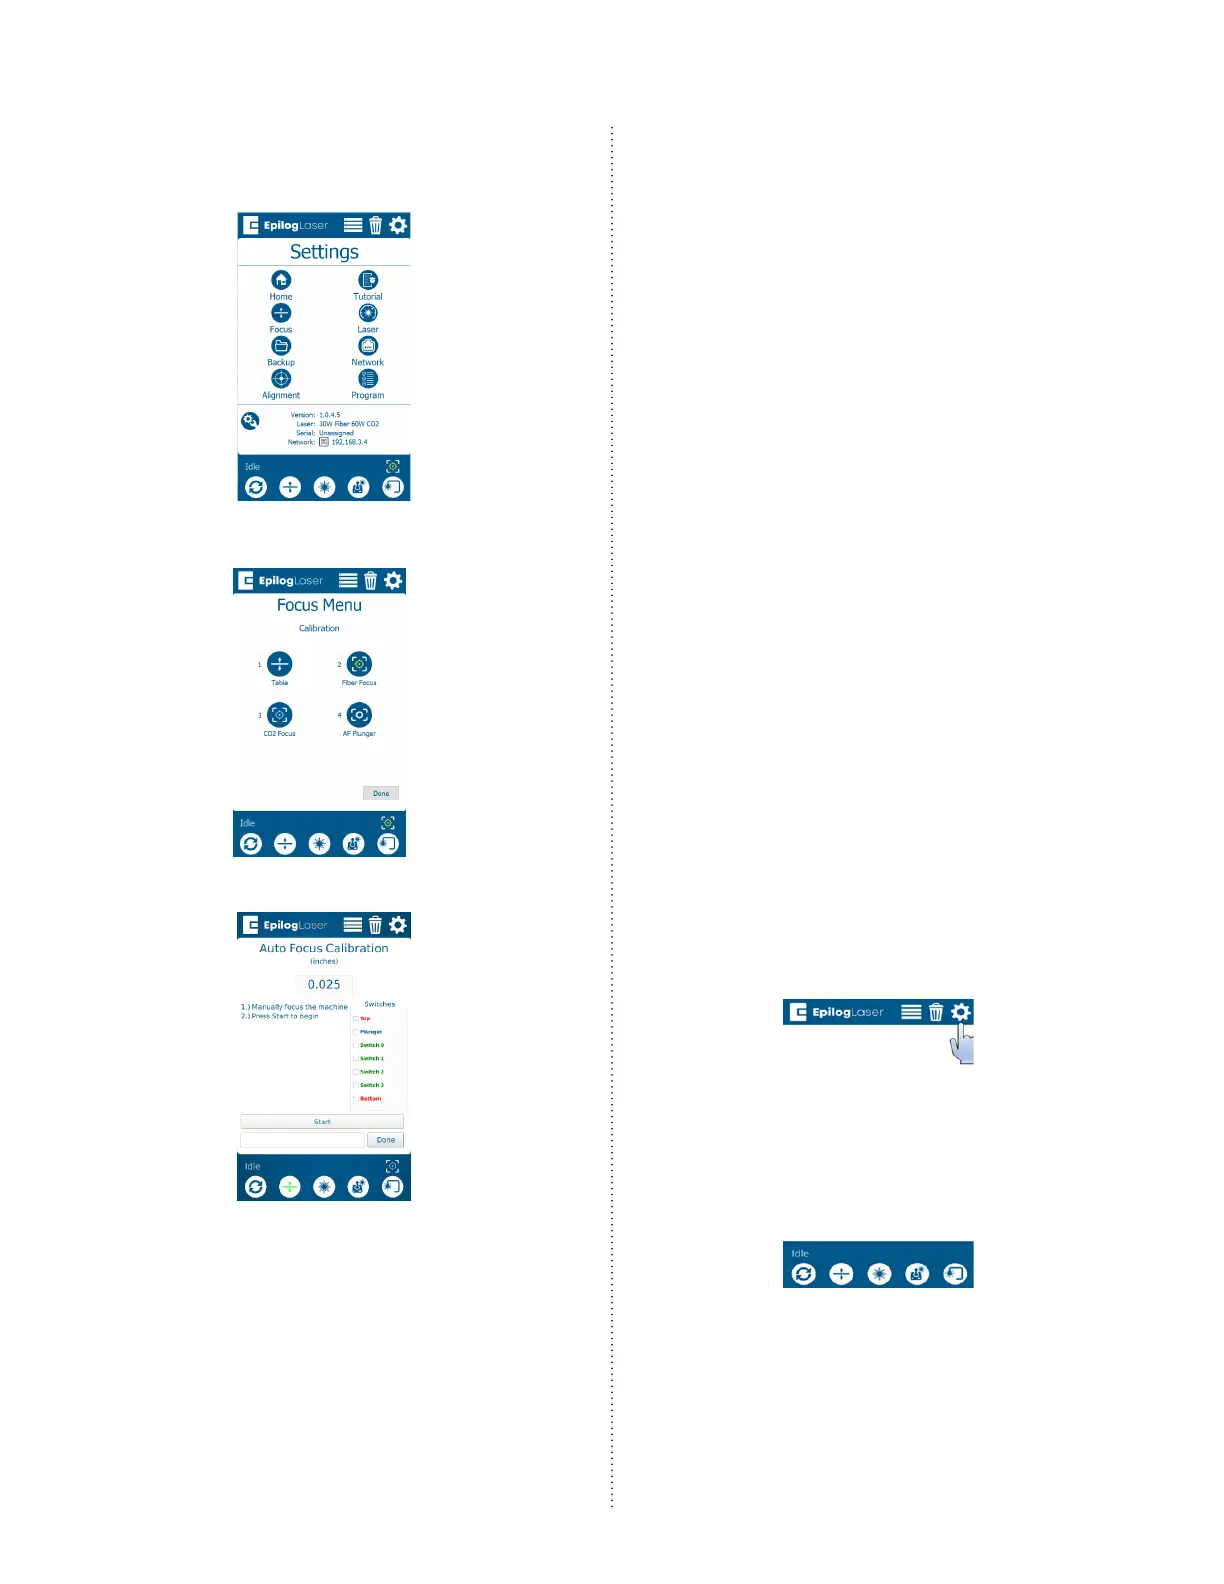
2. Once in the Settings menu, press
the Focus button to enter the Focus
Commands/Calibrations menu:
3. Press the AF Plunger button:
4. Press the Start button.
5. Allow the engraver to complete the
calibration. Once complete, a success
message should appear.
Focus Calibrations for
Fiber- Only Engravers
Focus calibration must be completed in
the order outlined in this procedure.
Table Calibration
The table calibration is a crucial step in
the laser focus calibration. During this
procedure, the table moves from the top
to the bottom of the z-axis, locating the
magnetic sensors along the z-axis PCB. This
step must be completed for a successful
and accurate focus calibration.
Before completing the table calibration
install the raster table.
Since the table will rise to depress the
autofocus plunger, use the Jog feature
to position the lens carriage in a position
which will prevent the autofocus plunger
and lens cone from coming into contact
with the le and or top ruler guides.
1. On the display, press the gear icon to
enter the Settings menu:
 Loading...


