EasyManuals Logo

Epilog Laser Fusion User Manual

Epilog Laser Fusion
10 pages
To Next Page IconTo Next Page
To Previous Page IconTo Previous Page
Page #7 background imageLoading...
Page #7 background image
Adjusting the Table Level
Fusion and FiberMark Fusion
Revision Date: 9/10/2014 pg. 7 of 10
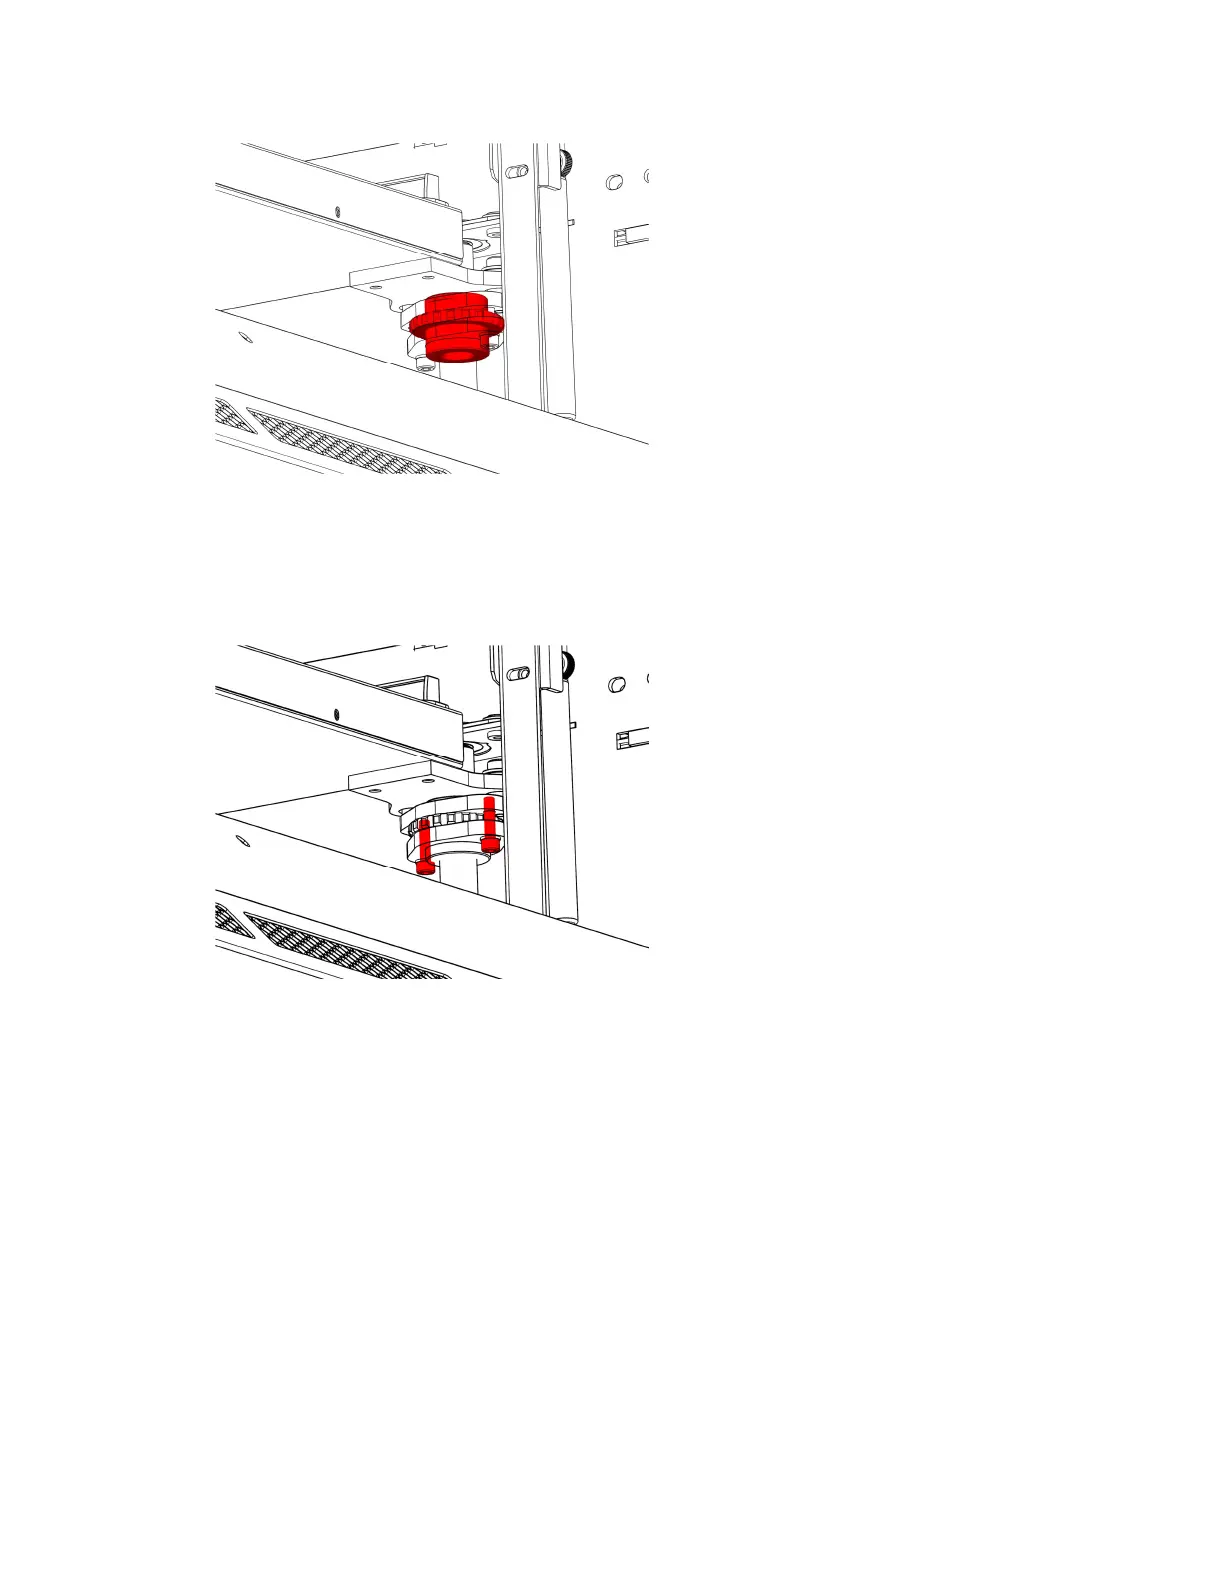
Step 6: Lock the Adjustment Wheel in Place.
Tighten the two 3/32” Allen screws on the bottom of the Table Level Adjuster.
This will lock the level in place.
Procedure C:
Step 1: Move the Lens Carriage
Check the table level on each corner of the engraver.

Other manuals for Epilog Laser Fusion

Questions and Answers:

Question and Answer IconNeed help?

Do you have a question about the Epilog Laser Fusion and is the answer not in the manual?

Epilog Laser Fusion Specifications

General IconGeneral
Laser TypeCO2
Max Material Thickness12.25" (311 mm)
ResolutionUp to 1200 DPI
ConnectivityEthernet, USB
Operating ModesRaster, Vector or Combined
InterfaceTouchscreen control panel
Power Supply110V or 220V, depending on model
CoolingWater-cooled laser tubes
SoftwareEpilog Laser Dashboard
Supported File FormatsAI, BMP, DXF, EPS, GIF, JPG, PDF, PLT, PNG
Warranty1 year limited warranty
Z Table TravelVaries by model (typically 12 in)
ExhaustRequired, external blower recommended

Related product manuals