EasyManuals Logo

Epilog Laser Helix User Manual

Epilog Laser Helix
5 pages
To Previous Page IconTo Previous Page
Page #5 background image
Pull belt
close to
I-beam
i. Loop the belt end around the black pulley on the
left side of the machine.
j. Place the belt end onto the left side of the lens
assembly. Tighten the screws on the plate.
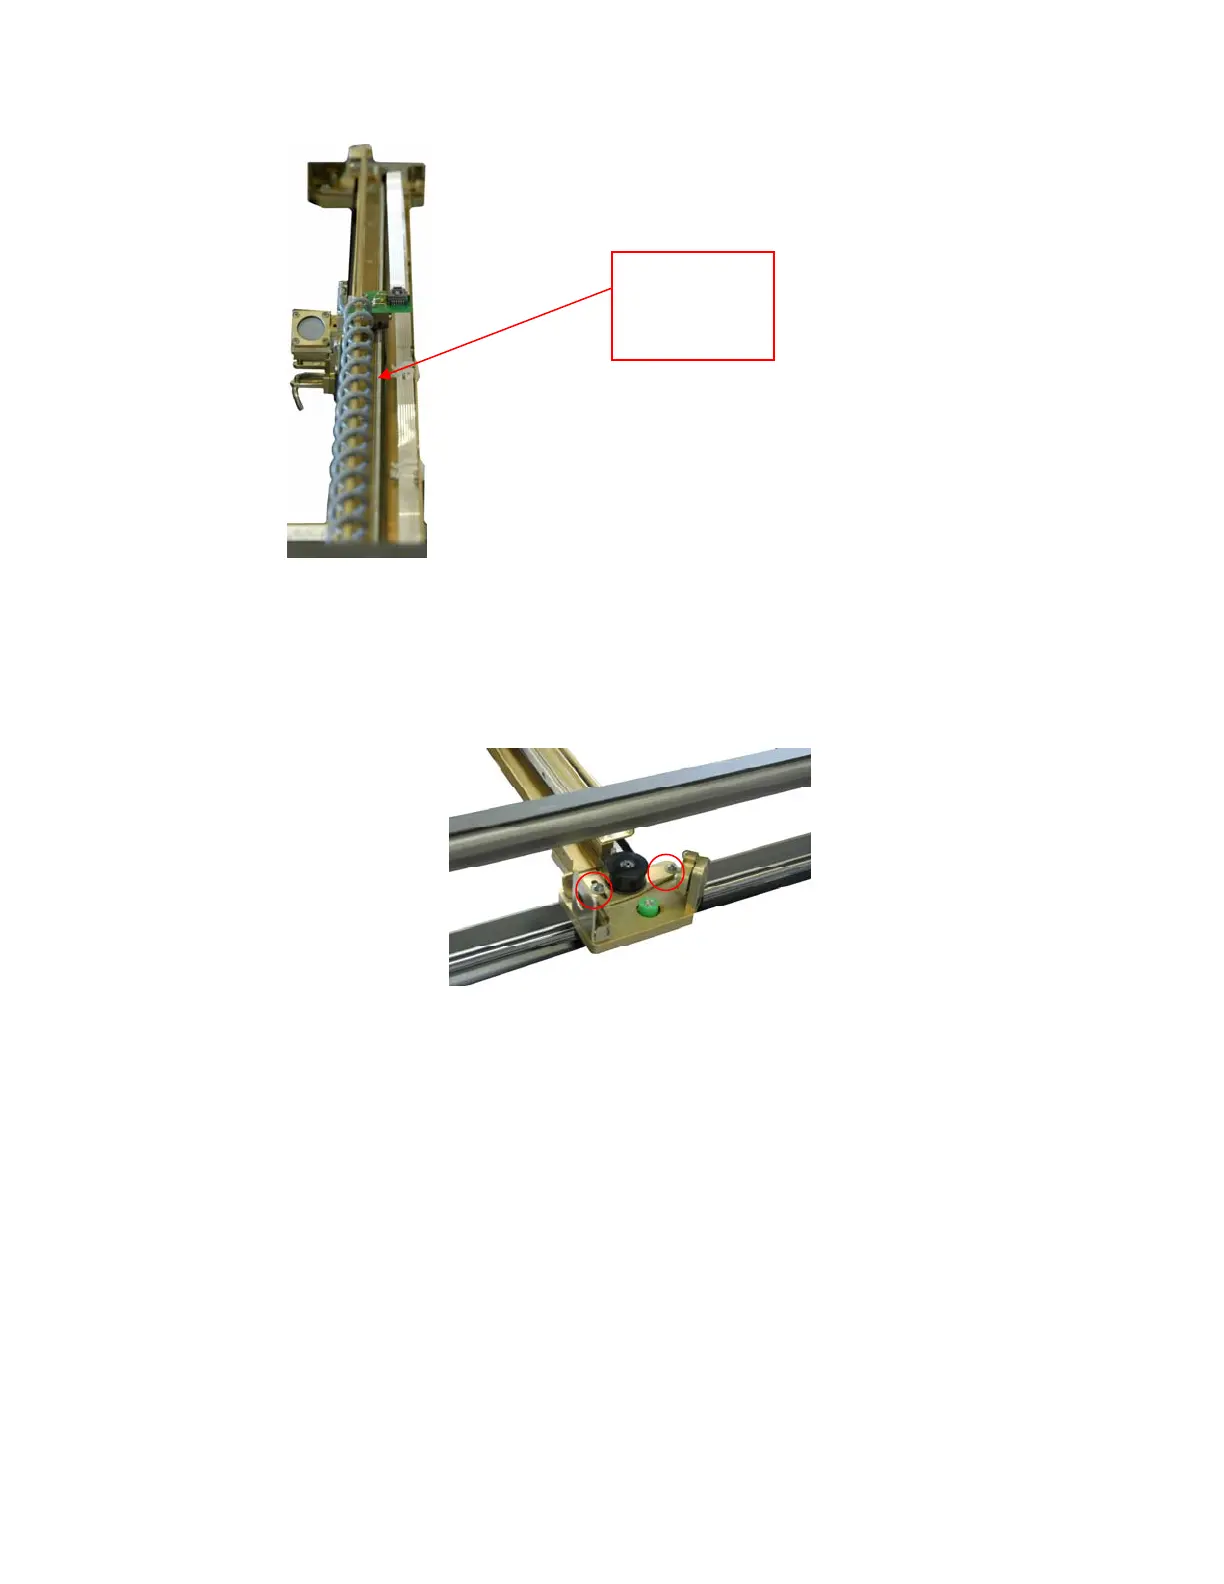
9. Loosen the two pulley screws on the left side of the
X-beam. The pulley will snap into place and will
tighten the belt.
10. Gently pull the pulley assembly to the left while
tightening the two screws.
11. Replace the X-beam cover. Tighten the two screws in
the front of the X-Axis Assembly and the five screws
in the back.
12. Replace side panels.
If you have any questions, please contact Epilog’s
Technical Support
Phone 303.215.9171
Fax 303.531.7594
E-Mail tech@epiloglaser.com

Other manuals for Epilog Laser Helix

Questions and Answers:

Question and Answer IconNeed help?

Do you have a question about the Epilog Laser Helix and is the answer not in the manual?

Epilog Laser Helix Specifications

General IconGeneral
Laser TypeCO2
Resolutionup to 1200 dpi
Cooling SystemAir-cooled
SoftwareEpilog Dashboard
Warranty2 years
Laser Power30, 40, 50, 60 watts
Max Material Thickness8" (203 mm)
ConnectivityUSB
Operating System CompatibilityWindows
Operating ModesRaster, Vector, Combined
Power Supply50/60Hz
Supported File FormatsAI, EPS, PDF, DXF, BMP, GIF, JPEG, PNG, TIFF
Work Area24" x 18" (610 x 457 mm)

Related product manuals