EasyManuals Logo

Epilog Laser MINI User Manual

Epilog Laser MINI
17 pages
To Next Page IconTo Next Page
To Previous Page IconTo Previous Page
Page #4 background imageLoading...
Page #4 background image
Epilog Laser Tube Upgrade
Mini / Helix
Revision Date: 9/27/2013 pg. 4 of 17
Step 5:
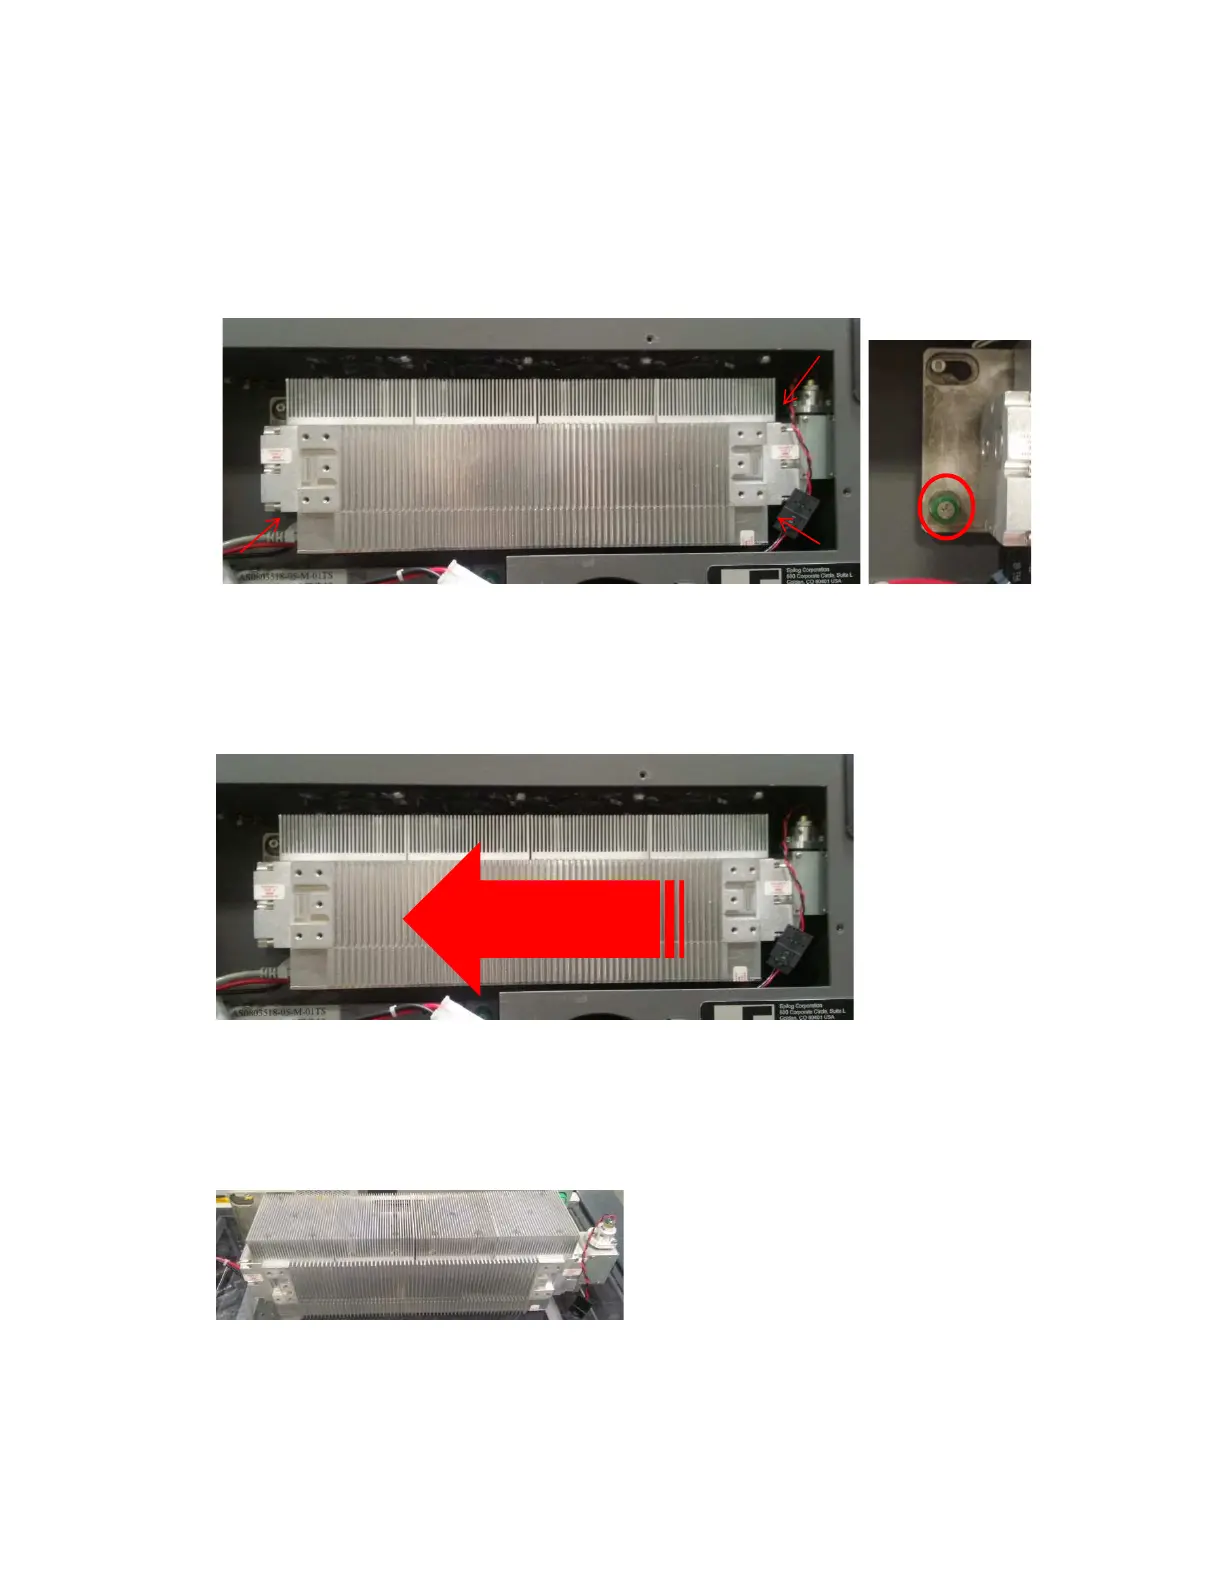
Locate and unscrew the three (3) green thumb screws with a Philips Head Screw
Driver. Please note that the screws are captive and will not come completely out of the
bracket.
Step 6:
Slide the laser tube to the left. The entire unit will slide up to a half an inch
(12mm).
Step 7:
You may now carefully lift the laser tube up and out of the engraver and place it
on a flat table.
CAUTION: The laser tube can weigh between 10 and 20 lbs. (4.5 to 9 kg).
Please take proper precautions when lifting heavy objects.

Other manuals for Epilog Laser MINI

Questions and Answers:

Question and Answer IconNeed help?

Do you have a question about the Epilog Laser MINI and is the answer not in the manual?

Epilog Laser MINI Specifications

General IconGeneral
CoolingAir-cooled
Laser Wattage Options30, 40, 50 or 60 watts CO2
Laser TypeCO2
ResolutionUp to 1200 DPI
ConnectivityUSB
Software CompatibilityCorelDRAW, Adobe Illustrator, AutoCAD
Operating ModesRaster, Vector
Supported File FormatsAI, BMP, DXF, EPS, GIF, JPG, PNG
Power Requirements110V or 220V

Related product manuals