Proof Sign-off:
I. Ishigami A.Kobayashi DAI
E. Otera
DAI K.Ramsey
R4C8790
Rev. E
A2 size A2SHEET.FM
7/30/02
To confirm that the optional interface card is installed correctly, print a status sheet.
See “4 Testing and Connecting the Printer.”
Testing and Connecting the Printer
Plugging in the Printer
Make sure that the printer is turned off.
Insert the power cord into the left side of
the printer. Then plug the other end into
a properly grounded electrical outlet.
Connecting the Printer to a Computer
Use a shielded, twisted-pair parallel interface cable that is IEEE-1284 compatible, or
a USB Revision 1.1 cable.
System requirements for USB connection are as follows:
❏ Apple
®
Macintosh
®
system that has a USB interface guaranteed by Apple
Computer, Inc.
❏ Microsoft
®
Windows
®
system that has a USB interface guaranteed by each
manufacturer, and the preinstalled Windows Millennium Edition, 98, XP, and
2000 or the upgraded Windows Me, XP, and 2000 from the preinstalled
Windows 98.
Note:
❏
Be sure to connect a computer that supports bidirectional communication.
❏
When using an inappropriate cable or connecting peripheral devices between the printer
and the computer, the connection may be unstable.
❏
You cannot connect Macintosh computers to the parallel interface of the printer.
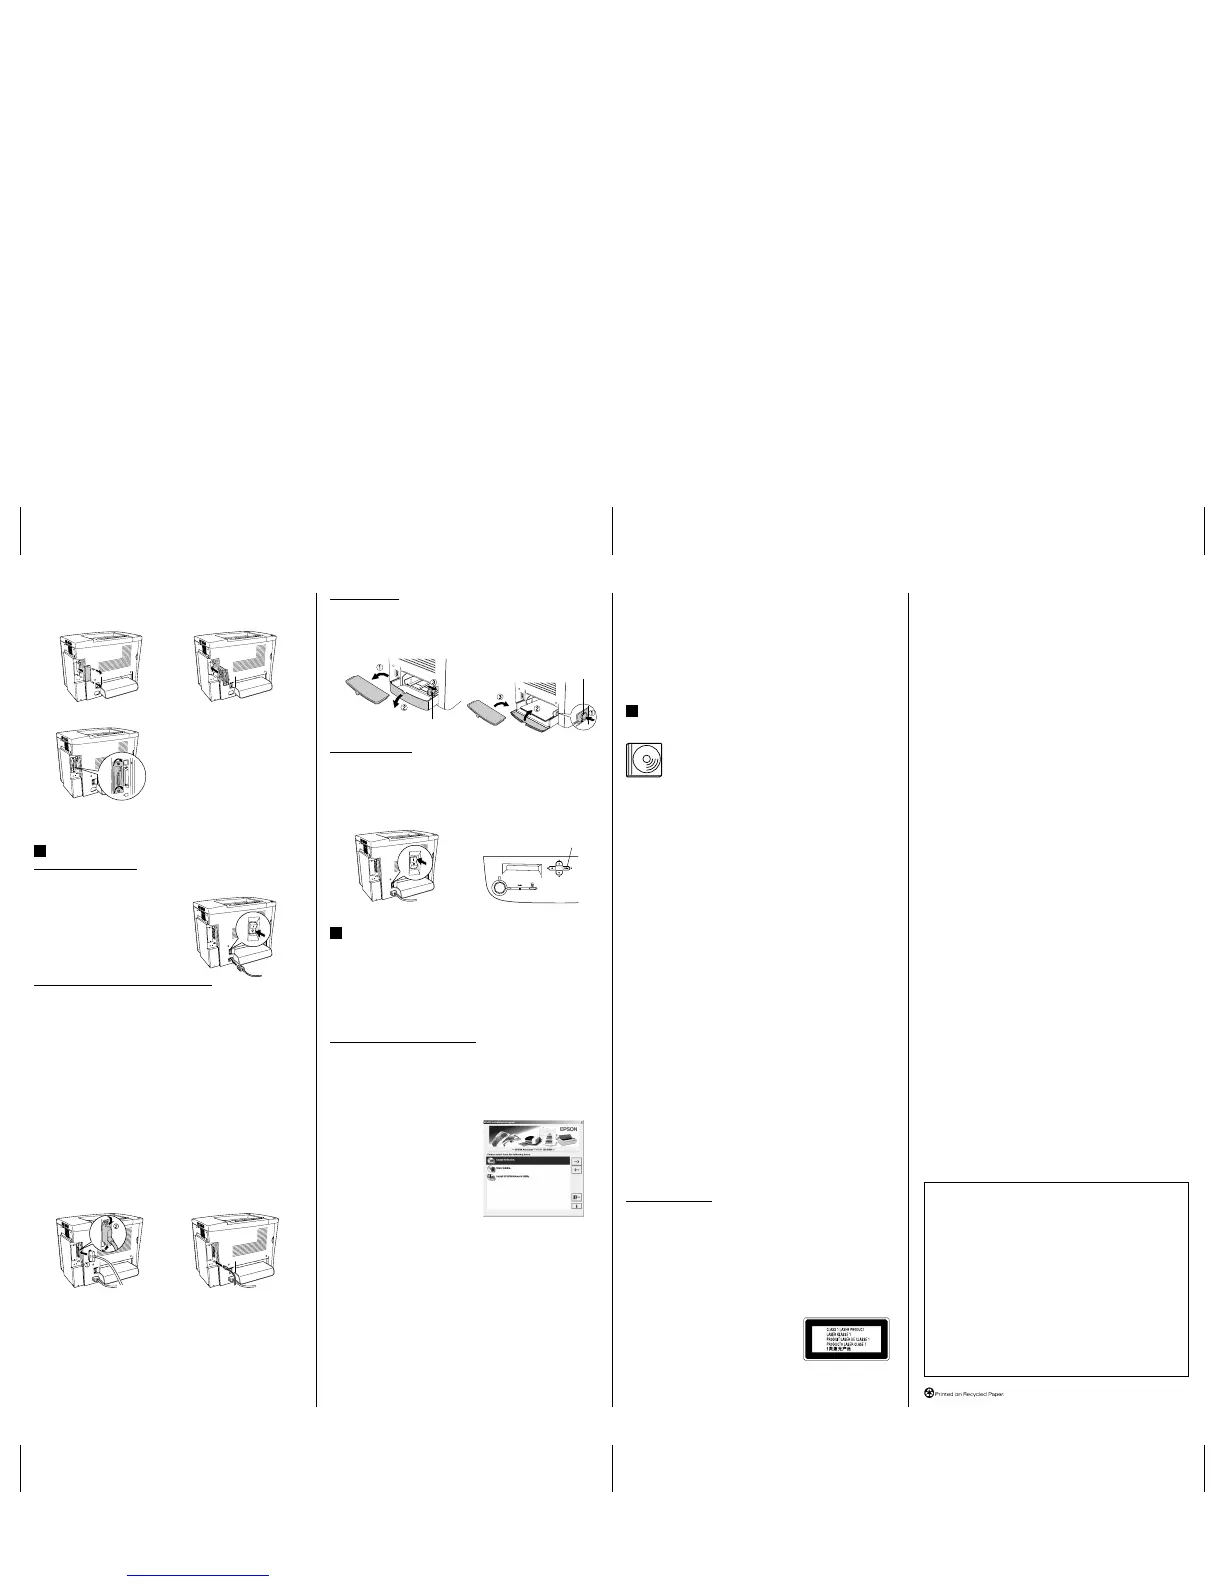
1. Make sure that both the printer and the computer are off.
2. Attach the parallel or USB interface cable to the printer as shown below.
Note:
When the cable has a grounding wire, secure the wire with the screw below the connector.
3. Plug the other end of the cable into the computer’s parallel or USB interface
connector. See your computer’s instruction manual for more information.
1. Turn off the printer.
2. Remove the cover. 3. Insert the interface card.
4. Secure the screws.
<Parallel> <USB>
4
Loading Paper
Load the A4 or Letter size paper into the MP tray as shown below. About the
available paper types, see “Available paper types” in the online
Reference Guide
.
Testing the Printer
To confirm the current status of the printer, print a status sheet. The status sheet
contains information about the printer, the consumables, the current settings, and
the installed options, if any.
Installing the Printer Driver
When you install the printer driver, the following software can be installed.
❏ Printer driver
The printer driver gives you complete control settings over your printer with the
Microsoft Windows Me, 98, 95, XP, 2000, NT
®
4.0, and Mac OS
®
8.1 to 9.x. With
it, you can make various settings such as print quality and paper size.
❏ EPSON Status Monitor 3
The EPSON Status Monitor 3 allows you to view printer status information such
as the amount of toner remaining and check for any printer errors.
How to Install the Printer Driver
Follow the instructions below to install the printer driver for Windows and
Macintosh.
Note:
❏
Make sure that your printer is turned off.
❏
To install other software, please see the online Reference Guide.
1. Insert the printer software CD-ROM
that comes with your printer in your
CD-ROM drive. For Macintosh users,
double-click the
EPSON
icon.
2. Double-click
Install Software
. Then
follow the on-screen instructions.
Note for Windows users:
If the EPSON Installation Program screen
does not appear automatically, double-click the
My Computer
icon, right-click the
CD-ROM
icon, and click
OPEN
in the menu
that appears. Then double-click
Setup.exe
.
Note for Macintosh users:
❏
Your Macintosh must meet the Mac OS 8.1 to 9.x to use the driver included with the
printer.
❏
Turn off any anti-virus software before installing the printer driver.
About an Additional Driver (For Windows user)
When the printer is shared with some computers (clients) in a network and the print
server’s OS is Windows XP, 2000 or NT 4.0, you can install the printer driver for the
client’s OS in the server as an additional driver. This allows the clients to download
the appropriate printer driver from the printer server if necessary.
See “Setting Up Your Printer on a Network” in the online
Reference Guide
for details.
1. Prepare the MP tray as shown below. 2. Load the paper as shown below.
1. Turn on the printer. 2. Make sure the LCD panel shows
Ready. Press the button shown in the
figure below.
Pinch the paper guide to move it.
Press this button 3 times.
5
This screen is for Windows
Selecting your printer in the Chooser (For Macintosh user)
After you have installed the printer driver, you need to open
Chooser
to select your
printer. This procedure is necessary the first time you use a printer and when you
want to switch to another printer. Your Macintosh will always print using the last
printer selected.
About printer sharing
You can use the printer which is connected to a local computer by USB interface
through the network. See “Setting Up Your Printer on a Network” in the online
Reference Guide
for details.
To Know More About Your Printer
Reference Guide (HTML)
The CD-ROM shipped with your printer includes the online
Reference
Guide
as well as the printer driver.
Microsoft Internet Explorer 4.0 or later, or Netscape Navigator 4.0 or
later must be installed in your computer to read the online
Reference
Guide
.
❏ How to use the printer
❏ How to solve problems
❏ How to keep your printer in good condition
❏ Safety information and technical specifications
Administrator’s Guide (HTML)
Provides network administrators with information on both the printer driver and
network settings.
Quick Reference (PDF)
Provides you with solutions for paper jam problems, and other information about
your printer that you may need to refer to on a regular basis. We recommend
printing this guide and keeping it near the printer.
Printing the Quick Reference guide
Note:
Acrobat Reader 4.0 or later must be installed in your computer to open and read the Quick
Reference guide.
For Windows users
1. Insert the CD-ROM that comes with your printer in the CD-ROM drive.
2. Double-click
User Guides
on the EPSON Installation Program screen.
3. Click the arrow next to View Quick Reference.
4. The Quick Reference guide opens Acrobat Reader.
5. Select
Print
from the File menu and click
OK
. The Quick Reference guide is
printed.
For Macintosh users
1. Insert the CD-ROM that comes with your printer in the CD-ROM Drive.
2. Double-click the
EPSON
icon.
3. Double-click View Quick Reference.
4. The Quick Reference guide opens Acrobat Reader.
5. Select
Print
from the File menu and click
Print
. The Quick Reference guide is
printed.
Safety Information
Power cord
c
Caution:
Be sure the AC power cord meets the relevant local safety standards.
Laser safety labels
w
Warning:
The performance of procedures and adjustments other than those specified in this sheet
may result in hazardous radiation exposure.
Your printer is a Class 1 laser product as defined in
the IEC60825 specifications.
The label shown is attached to the back of the printer
in countries where required.
For European users
The EPSON AcuLaser Series are page printers which utilize a semiconductor laser.
There is no possibility of danger from the laser, provided that the printer is operated
according to the instructions in the guides provided.
Since radiation emitted by the laser is completely confined within protective
housings and external covers, the laser beam cannot escape from the machine during
any phase of user operation.
w
Warning:
The use of controls, or the performance of procedures and adjustments other than those
specified in this sheet may result in hazardous radiation exposure.
This is a semiconductor laser. The maximum power of the laser diode is 5 m
W and
the wavelength is 770 to 795nm.
Internal laser radiation
This is a Class III b Laser Diode Assembly that has an invisible laser beam.
The printer head unit is NOT A SERVICE ITEM, therefore, the printer head unit
should not be opened under any circumstances. An additional laser warning label
is affixed to the inside of the printer.
CDRH regulations
For information about the Center for Devices and Radiological Health of the U.S.
Food and Drug Administration, see the online
Reference Guide
on the CD-ROM.
Ozone safety
Ozone emission
Ozone gas is generated by laser printers as a by-product of the printing process.
Ozone is produced only when the printer is printing.
Ozone exposure limit
The recommended exposure limit for ozone is 0.1 parts per million (ppm) expressed
as an average time-weighted concentration over an eight (8) hour period.
The EPSON AcuLaser Series generates less than 0.1 ppm for eight (8) hours of
continuous printing.
Minimize the risk
To minimize the risk of exposure to ozone, you should avoid the following
conditions:
❏ Use of multiple laser printers in a confined area
❏ Operation in conditions of extremely low humidity
❏ Poor room ventilation
❏ Long, continuous printing together with any of the above
Printer location
The printer should be located so that the exhaust gases and heat generated are:
❏ Not blown directly into the user’s face
❏ Vented directly out of the building whenever possible
Max. Average Radiation Power: 5 mW at laser aperture
Wavelength: 770 to 795 nm
All rights reserved. No part of this publication may be reproduced, stored in a retrieval system, or
transmitted in any form or by any means, mechanical, photocopying, recording, or otherwise, without
the prior written permission of SEIKO EPSON CORPORATION.
No patent liability is assumed with respect to the use of the information contained herein. Neither is any
liability assumed for damages resulting from the use of the information contained herein.
Neither SEIKO EPSON CORPORATION nor its affiliates shall be liable to the purchaser of this product
or third parties for damages, losses, costs, or expenses incurred by purchaser or third parties as a result
of: accident, misuse, or abuse of this product or unauthorized modifications, repairs, or alterations to
this product, or (excluding the U.S.) failure to strictly comply with SEIKO EPSON CORPORATION’s
operating and maintenance instructions.
SEIKO EPSON CORPORATION and its affiliates shall not be liable against any damages or problems
arising from the use of any options or any consumable products other than those designated as Original
EPSON Products or EPSON Approved Products by SEIKO EPSON CORPORATION.
EPSON and EPSON ESC/P are registered trademarks and EPSON AcuLaser and EPSON ESC/P 2 are
trademarks of SEIKO EPSON CORPORATION.
Microsoft and Wind ows are registered trademarks of M icrosoft Corporation in the United Stat es and/or
other countries.
Apple and Macintosh are registered trademarks of Apple Computer, Inc.
Adobe and PostScript are trademarks of Adobe Systems Incorporated, which may be registered in certain
jurisdictions.
General Notice: Other product names used herein are for identification purposes only and may be trademarks of
their respective owners. EPSON disclaims any and all rights in those marks.
Copyright © 2002 by SEIKO EPSON CORPORATION, Nagano, Japan
Printed in Japan 02.XX-XX
Pinch the paper guide to move it.
 Loading...


