Do you have a question about the Epson DX5 X 1 and is the answer not in the manual?
This document outlines the calibration and maintenance procedures for the Epson DX5 X 1 Printhead, a component integral to a printing system. It covers various aspects from initial setup to troubleshooting, ensuring optimal performance and longevity of the printhead.
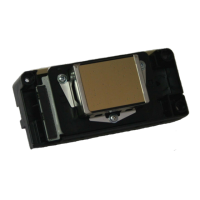
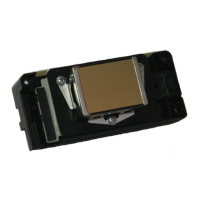
The primary function of the device, as described in this manual, is to facilitate high-quality printing using a single Epson DX5 printhead. It supports a range of resolutions, including 1440x1080 and 720 DPI, and operates with a 4-color ink system. The printhead is designed to work with various print modes, from 4-pass to 12-pass, allowing for flexibility in print speed and quality.
Key usage features of the printing system include its ability to output files via TCP/IP, enabling simultaneous ripping and printing. A convenient output preview function converts print files into small BMP images for quick review. The system offers granular control over the printhead, allowing users to turn individual printhead channels on or off. Intelligent printing features, such as skipping white areas, enhance efficiency. For continuous production, the system supports multi-printing, capable of printing single or different images consecutively.
To maintain print quality and prevent nozzle issues, the system incorporates automatic flash jetting, which cleans printheads during printing. A "Home flash jet" function prevents nozzles from clogging when the printer is idle. A color bar feature not only helps prevent clogging but also allows users to monitor nozzle status, with adjustable width and distance from the image. The system provides tools for aligning printheads, adjusting step differences, and correcting bi-direction differences during printing. Users can select printing directions, including uni-direction to the left, uni-direction to the right, and bi-direction. An "Edge feather" function is available to lighten pass lines, improving print aesthetics. The cleaning system is automated, eliminating the need for manual tools like syringes. Operation is further streamlined by a control panel, enhancing user convenience.
Installation of the printing system involves several steps, starting with careful unpacking and positioning to avoid strong shaking. After disassembling the packaging, users must verify all parts against the packing list. The printer is then lifted and moved to its installation site, followed by a check to ensure it is level. All parts stabilizing the carriage holder must be removed, and spare parts installed. The carriage should be moved manually to the right and then to the left to check for abnormal resistance and ensure proper positioning of the belt and encoder sensor. Proper grounding of the printer is crucial, with specified voltage and resistance limits. The USB cable connects the printer to the computer, and all wires and data cables must be securely plugged in. Installation of output and RIP software is required. The carriage is then moved to the middle of the printing platform, and the printer is turned on, with the user ready to press the emergency button if any issues arise. A test file is sent to print to check the printer's condition. Printheads and dampers are installed, ink tubes connected to special solvent, and an auto-clean function is used to clean the printhead. Ink bottles are loaded, and the auto-clean function draws ink from the bottles to the printhead. A nozzle check is performed, and a copy of the test is recommended for future reference. Finally, printhead alignment is carried out before printing can commence.
Maintenance features are extensively detailed to ensure the printhead's longevity and consistent performance. Normal cleaning involves using "Standard" or "Depth" modes via the software interface. For nozzle clogging, a specific procedure is outlined: disconnecting the tube connector from the cartridge to the damper, using "Standard" clean mode twice to suck out ink, connecting an extend tube to the damper and a special flush, using "Depth" clean mode three times to clean the damper and printhead, removing the extend tube and allowing it to air dry, using "Depth" clean mode again to empty flush from the damper and printhead, reconnecting the damper to the ink incoming tube, refilling ink, and finally, performing a test print.
Daily maintenance includes printing a nozzle check before turning off the machine to confirm the printhead's normal condition. The software should be turned off, allowing the carriage to return to the Home position automatically. Before turning on the machine each day, a sponge stick with appointed flush is used to clean the cap and wiper.
For short-term shutdowns (3-7 days), the tube connector on top of the damper is disconnected, and "Standard" clean mode is used twice to empty ink from the damper. An extend tube is connected to the damper and a special flush, and "Depth" clean mode is used twice to clean the damper and printhead. The extend tube is then removed and allowed to air dry, followed by using "Depth" clean mode to empty flush from the damper and printhead. The ink incoming tube is sealed with a tube cover, and the cartridge is returned to the Home position, ensuring the capping pad perfectly seals the printhead.
Long-term shutdowns (more than a week) require printing a status report before turning off the machine to confirm the printhead's good condition. The tube connectors on top of the dampers are disconnected, allowing ink to flow back to the cartridge. An extend tube is used to connect to a special flush, and "Depth" clean mode is used to clean the damper and printhead, one color at a time, with a cap covering the other three color channels. The extend tube is then removed and allowed to air dry, followed by using "Depth" clean mode to empty flush from the damper and printhead. The four ink tubes (K, C, M, Y) are removed from the cartridge and connected to flush using an extend tube. The "Ink Fill" mode on the control panel is used with the ink pump to flush the ink tube until it is clear. The tube is then removed from the flush, and "Ink Fill" mode is used to empty the flush inside the ink tube, cleaning each K, C, M, Y tube one by one. After cleaning, caps and fresh wrap are used to seal the ink tubes. Finally, the four cartridges are removed, sealed with fresh wrap, and stored properly. The carriage is returned to the Home position, ensuring the cap perfectly seals the printhead.
The manual also covers troubleshooting common issues, such as initialization failures, carriage repositioning problems, position errors during printing, errors and interruptions, color missing, and vertical banding, providing steps to diagnose and resolve these issues.
| Type | Printhead |
|---|---|
| Model | DX5 |
| Native resolution | 1440 dpi |
| Min. droplet size | 3.5 pl |
| Color | CMYK |