Do you have a question about the Epson LW-400 and is the answer not in the manual?
Adjusts backlight, contrast, language, and measurement units for the display.
Instructions for installing AA alkaline batteries into the product.
Guidance on connecting the optional AC adapter for power.
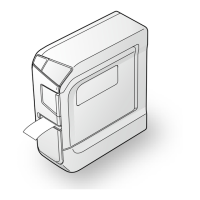
Steps to install a tape cartridge correctly for printing.
How to feed tape through the slot after inserting a cartridge for printing readiness.
Modifies the size of the text characters for labels.
Selects different font types for label text.
Applies styles like italic, bold, or outline to the font.
Encloses label text within decorative frames.
Sets the desired length for the printed label.
Controls the spacing between letters for better readability.
Adjusts the horizontal width of characters.
Formats text to print vertically on the label.
Prints text in a mirrored format for specific applications.
Accesses a menu for specialized label formatting options.
Switches between uppercase and lowercase text.
Removes individual characters from the label text.
Erases all entered text for the current label.
Manually inserts line breaks in the text.
Inserts punctuation marks into the label text.
Includes special symbols from various categories.
Selects characters with diacritical marks.
Generates labels with sequential numbering.
Stores up to 50 created labels for later use.
Formats labels specifically for index tabs.
Options for creating flag and wrapped labels for cables.
Generates labels with various barcode formats.
Displays a text-based preview of the label before printing.
Executes the printing process for the created label.
Prints the same label multiple times.
Controls the darkness of the printed text.
Instructions for correctly applying printed labels to surfaces.
Guidelines for cleaning the exterior and print head.
Explains common error messages and their solutions.
Addresses common operational issues and their resolutions.
Provides contact information and resources for customer support.
Details on Epson's recycling program for end-of-life products.
Information on ordering tape cartridges and other accessories.
Technical details including dimensions, weight, and power requirements.
| Print Technology | Thermal transfer |
|---|---|
| Max Resolution | 180 dpi |
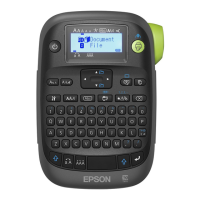
| Keyboard Type | QWERTY |
| Tape Widths Supported | 6 mm, 9 mm, 12 mm |
| Display | LCD |
| Power Source | AC adapter |