Unpacking
1. Installing the Software 2. Setting up the Scanner
For Windows
1. Insert the scanner software CD in the CD-ROM drive.
2. The EPSON Installation Program dialog box appears. Select your
preferred language and click .
3. Select Install Scanner Software, and click .
Note:
If the EPSON Installation Program dialog box does not appear,
double-click the
My Computer icon. Click the CD-ROM icon, then select
Open from the File menu. Then double-click Setup.exe.
4. Make sure all the software in the list is selected and click OK.
5. Then, follow the on-screen instructions until all the software is installed.
When a message appears informing you that installation is complete,
click OK.
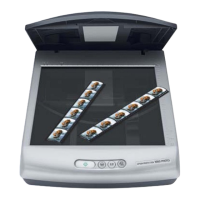
For Perfection 1650 Photo users
To install Adobe
®
Photoshop
®
Elements, insert the CD in the CD-ROM
drive. Then, follow the on-screen instructions.
Note:
If the CD does not launch automatically, double-click the
My Computer icon
on the desktop, double-click the CD-ROM icon, and double-click
Setup.exe
in the Adobe Photoshop Elements folder.
This completes the scanner software installation. Next,
set up the scanner as described in “2. Setting up the
Scanner.”
For Macintosh
1. Insert the scanner software CD in the CD-ROM drive.
2. Double-click your preferred language icon in the EPSON folder.
Note:
If the EPSON folder does not appear on your desktop, double-click the
EPSON icon on your desktop.
3. Double-click the Installer icon.
4. The Installer dialog box appears. Be sure to install all the software in
the list.
5. Click Start and follow the on-screen instructions.
For Perfection 1650 Photo users
Follow the steps below to install Adobe Photoshop Elements.
1. Insert the CD in the CD-ROM drive.
2. Double-click the Install Photoshop Elements icon in the Adobe
Photoshop Elements folder in the folder of your preferred language.
3. Then, follow the on-screen instructions to install Photoshop Elements.
This completes the scanner software installation. Next,
set up the scanner as described in “2. Setting up the
Scanner.”
1. Unlock and plug in the scanner
1. Slide the transportation lock to the right and connect the AC adapter as
shown below.
Note:
If you plan to use the optional Film Adapter or the integrated TPU, install
it first.
2. Open the document cover or the integrated TPU (for Perfection 1650
Photo users) so you can see the startup operation.
3. Plug the other end of the power cord into an electrical outlet.
c
Caution:
It is not possible to change the AC adapter's input and output
voltage. If the label on the AC adapter does not show the correct
voltage, contact your dealer. Do not plug in the power cord.
Note:
This scanner does not have a power button. It turns on when you
connect the AC adapter and then plug in the power cord.
4. Make sure the carriage moves slightly and the fluorescent lamp on the
carriage turns on.
5. The indicator light stays on in green, meaning the scanner has
completed initialization.
c
Caution:
Whenever you unplug the scanner, wait at least 10 seconds before
plugging it back in. Rapidly plugging and unplugging the scanner can
damage it.
Note:
❏ The scanner turns off the fluorescent lamp if it does not receive any
commands from the computer within 15 minutes.
❏ Be sure to unplug the scanner once you have finished using it. The
scanner turns off when unplugged.
2. Connect the USB cable
1. Connect one end of the USB cable to the scanner’s USB port.
2. Connect the other end of the USB cable to the USB port on your
computer.
3. The scanner is recognized automatically. For Windows users, the dialog
box appears during the recognition process.
Now you are ready to use your scanner.
Note for Windows 2000 users:
When you connect the scanner, the
dialog box on the right appears. Click
Yes
to continue.
3. Check the installation and setup
Follow these steps to make sure the installation and setup are completed
properly, and the scanner operates correctly.
1. Press the ] Start button on the scanner.
2. If the EPSON Smart Panel window appears, your scanner is now set
up and ready to use.
Note:
Depending on your scanner type, the available applications in the
window are different.
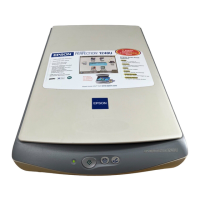
scanner software CD
scanner
power cord
USB cable
film holder
transportation lock
DC inlet
document cover
(integrated TPU)
carriage
(in the home position)
light
USB port
ar
u
on
Photo Print button
Scan to E-mail button
Scan to Web button
Read this side first!
Setup
Read the Safety Instructions on the back of this sheet when setting up and
using this scanner.
English
Color Image Scanner
w
Warnings must be followed
carefully to avoid bodily injury.
c
Cautions must be observed to
avoid damage to your
equipment.
Notes contain important information
and useful tips on the operation of your
scanner.
Warnings, Cautions, and Notes
4014273-00
x00
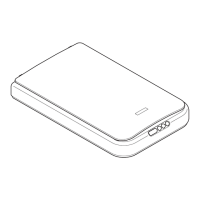
AC adapter
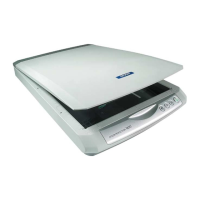
Make sure the following parts are included and not damaged. If you find any missing or damaged items, contact your EPSON dealer immediately.
For the Perfection 1650 Photo
scanner
Most illustrations shown on this sheet are for the Perfection 1650, so they may be different
in appearance from your scanner. The instructions are the same, except as noted.
The AC adapter is designed to match
the voltage of the country of purchase.
Insert the scanner software CD in the CD-ROM drive and install the software BEFORE
connecting the scanner to your computer.
The power cord is designed to match
the voltage of the country of purchase.
Downloaded from: http://www.usersmanualguide.com/