Taking Pictures 33
2
2
2
2
2
2
2
2
2
English
2. Select the needle to be adjusted using the JOG dial, and press the
ENTER button.
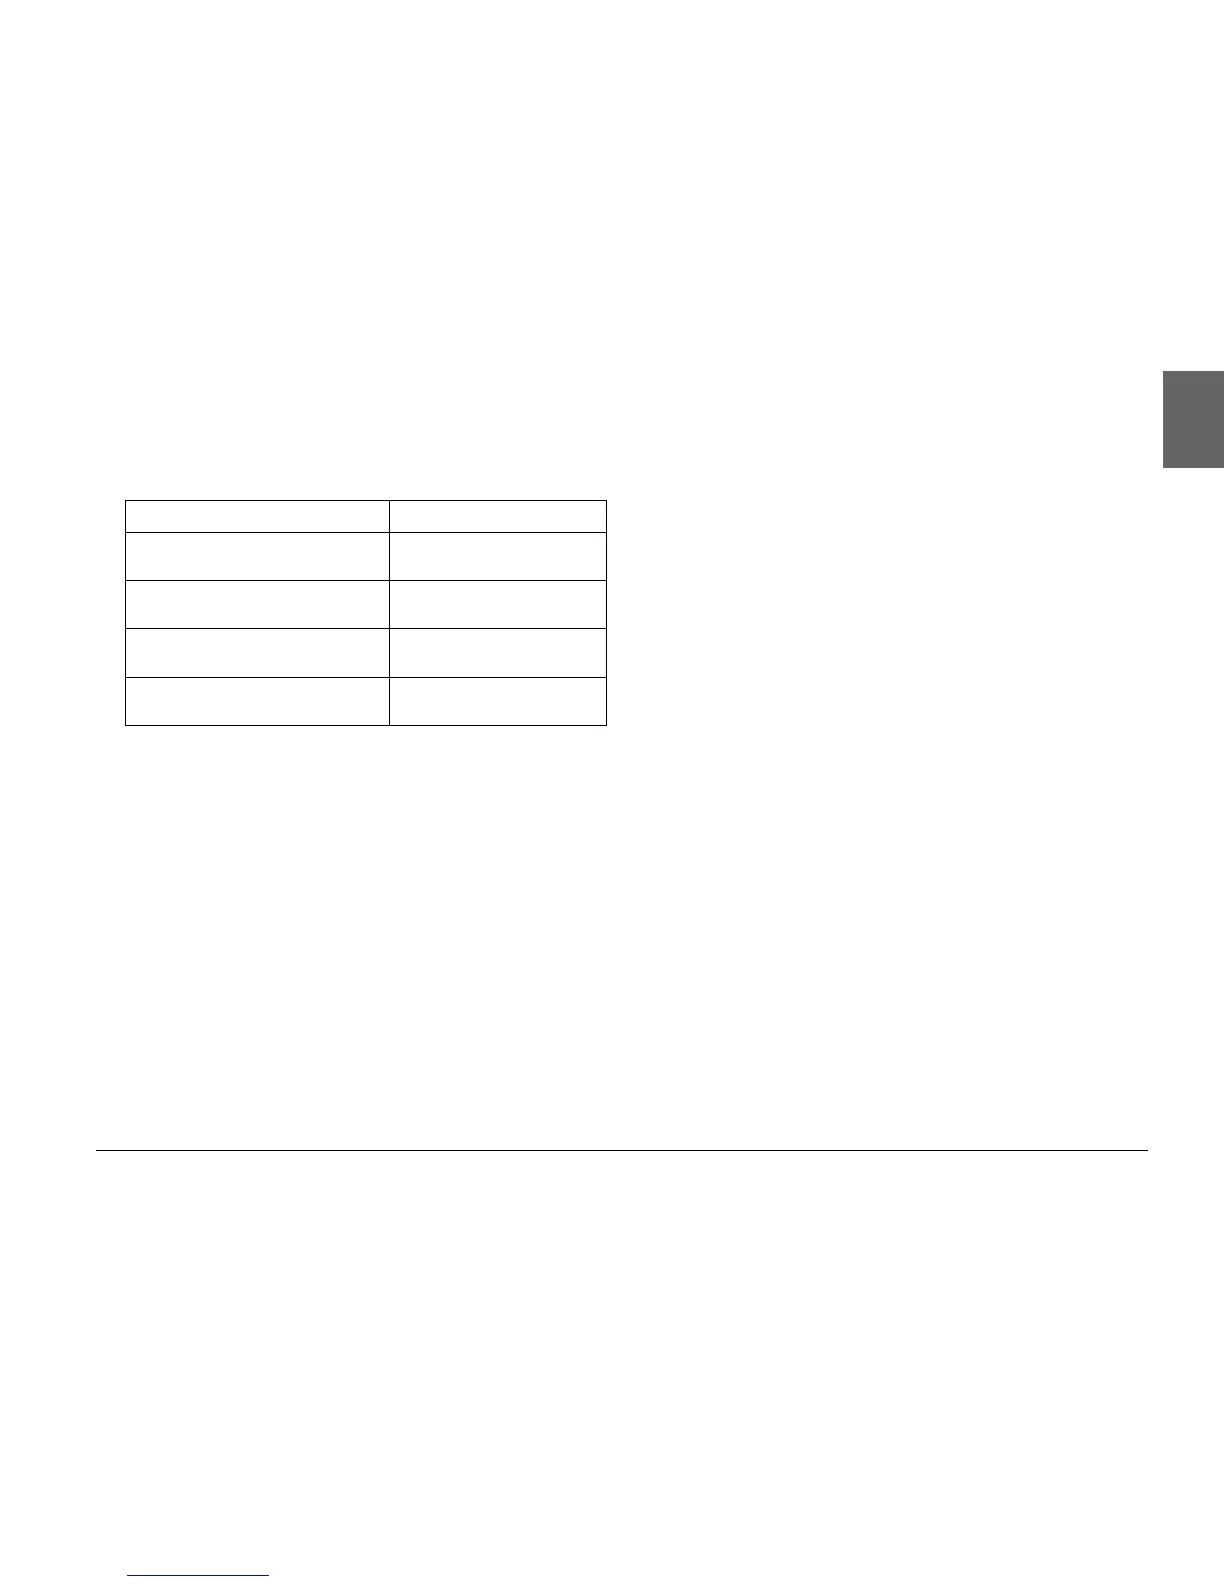
The needles indicate the following factors.
Note:
For setting details, see “About Indicator Needles” on page 24.
3. Move the left or right arrow using the JOG dial and press the ENTER
button. The selected needle is moved by one scale each time you
press the ENTER button.
4. Repeat step 3 until the needle returns to its original position.
5. Select Finish using the JOG dial and press the ENTER button.
6. To calibrate another needle, repeat steps 2 to 5.
To finish the needle calibration, select Finish using the JOG dial and
press the ENTER button.
The selected needle returns to the current value, and the screen
returns to the Camera Settings menu.
Needle display Function
E (long needle on the top of the
meter)
Number of remaining photos
R (short needle on the right-side of
the meter)
Photo quality
E (short needle on the bottom of the
meter)
Remaining battery power
A (short needle on the left-side of the
meter)
White balance