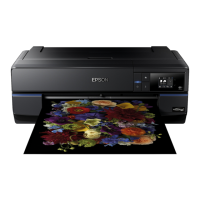
Do you have a question about the Epson SC-P800 Series and is the answer not in the manual?
Remove all protective materials before proceeding with setup.
Do not open ink cartridge packages until ready for installation.
Connect the printer and plug it into a power source.
Turn the printer on and tilt the scanner unit.
Use the ink cartridges supplied with the printer for initial setup.
Initial cartridges use ink to charge the print head; may print fewer pages.
Choose your preferred language from the options provided.
Wait for unlock, shake, unpack, and push cartridges into place.
Close the cover and wait for the initialization process to complete.
Allow Epson applications access if a firewall alert appears.
Visit epson.sn to install software and configure network settings.
Insert the CD and follow the on-screen instructions.
Visit ipr.to/d to install Epson iPrint and configure network settings.
Open and slide out the paper feeders.
Load paper with the printable side facing up and adjust for size.
Configure the paper type and size settings on the printer.
Access the online manual for detailed information and guides.
Find solutions for common issues and maintenance procedures.
Configure network settings for printer connectivity.
| Maximum Print Resolution | 2880 x 1440 dpi |
|---|---|
| Number of Ink Colors | 9 |
| Minimum Droplet Size | 3.5 picoliters |
| Duplex | Manual |
| Weight | 19.5 kg |
| Operating System Compatibility | Windows, Mac OS |
| Ink Type | Epson UltraChrome HD Ink |
| Number of Nozzles | 180 nozzles per color |
| Ink Cartridge Configuration | Individual Ink Cartridges |
| Media Sizes | Up to 17 inches wide |
| Paper Formats | A2, A3+, A3, A4, Letter, 8 x 10 in, 10 x 12 in, 10 x 15 cm, 13 x 18 cm, 13 x 20 cm, 20 x 25 cm, 3.5 x 5 in, 4 x 6 in, 5 x 7 in, 16:9 wide size, User defined |
| Print Margin | 0 mm top, 0 mm right, 0 mm bottom, 0 mm left |
| Connectivity | USB 2.0, Ethernet, Wi-Fi |
| Mobile and Cloud printing services | Epson Connect, Google Cloud Print |
| Dimensions | 250 mm |


 Loading...