JA
平行調整
EN Parallel Adjustment TC
平行調整
[ 12 ]
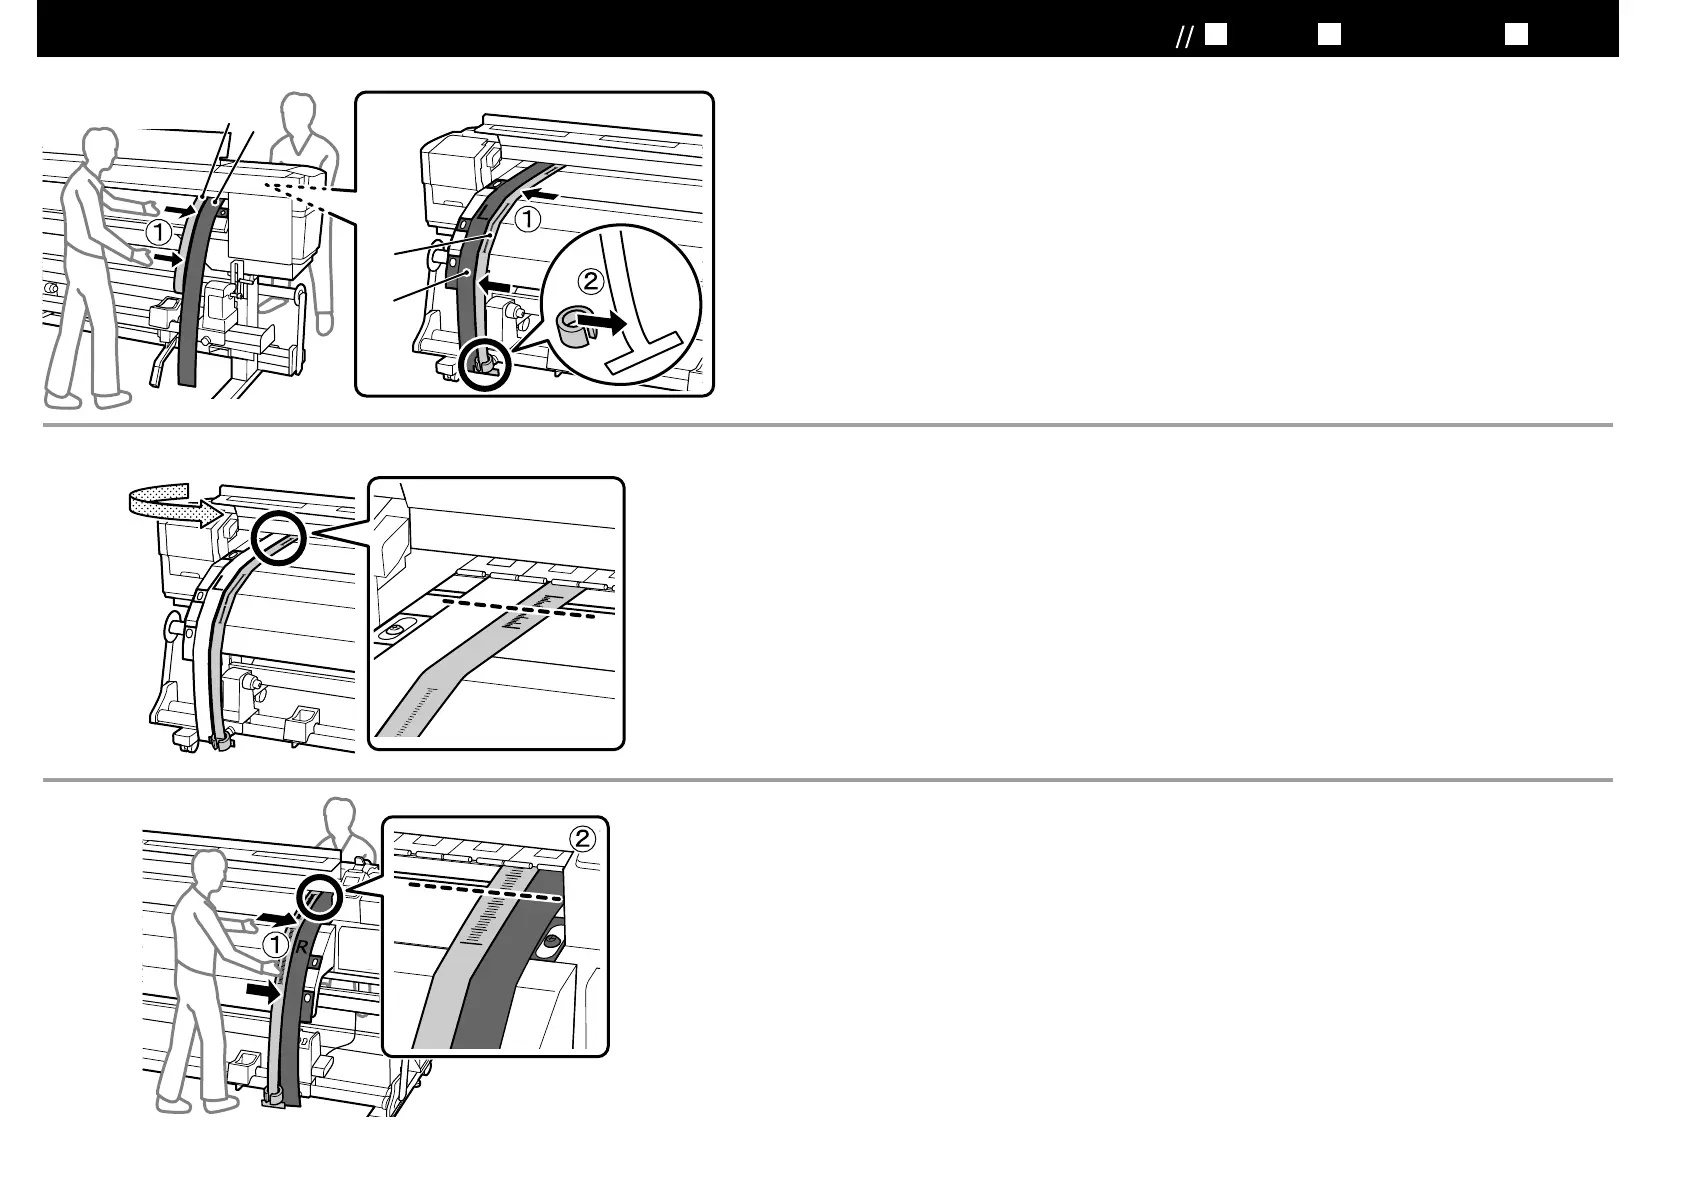
❏フィルム a の振れが収まったら、プラテン上の白線の手前側が通る目盛りの数値を記録します。1.❏
❏フィルム a からカウンターウェイトを取り外します。2.❏
フィルム a を本機背面から引き抜き、R 側のフィルム b まで移動して、再び本機に通します。3.❏
Once Film “a” stops swinging, note the value for location where it is crossed by the front of white line on the platen.1.
Remove the counterweight from Film “a”.2.
Remove Film “a” by pulling it out from the back of the printer, then move it to Film “b” (side R) and reinsert.3.
“a”
“a”
“a”
“b” (R
)
❏本機の前後で、フィルム a を L 側のフィルム b にぴったり沿わせます。1.❏
❏フィルム a にカウンターウェイトを取りつけます。2.❏
Place Film “a” so that it lines up with the edge of Film “b” (side L) at front side and back side of the printer, leaving no 1.
gaps between the edges of the films.
Attach the counterweight to Film “a”.2.
“a”
“b” (L
)
“a”
[ 13 ]
❏本機の前後でフィルム a を R 側のフィルム b にぴったりと沿わせて、カウンターウェイトを取り付けます。1.❏
❏フィルム a の振れが収まったら、プラテン上の白線の手前側が通る目盛りを確認します。❏2.❏
L 側と値が異なるときは、手順 [14] に進んでください。同じときは、手順 [15] に進んでください。
Align Film “a” with the edge of Film “b” (side R) at the front and back sides of the printer, leaving no gaps, and attach 1.
the counterweight.
Once Film “a” stops swinging, note the value for location where it is crossed by the front of white line on the platen. 2.
If the value differs from that for Side L, proceed to Step 14. If the two values are the same, proceed to Step 15.
“a”
“b” (R
)
“a”
L
14
15
[ 11 ]
21
 Loading...