EasyManuals Logo

Epson SC-S70600 Series Setup Guide

Epson SC-S70600 Series
40 pages
To Next Page IconTo Next Page
To Previous Page IconTo Previous Page
Page #23 background imageLoading...
Page #23 background image
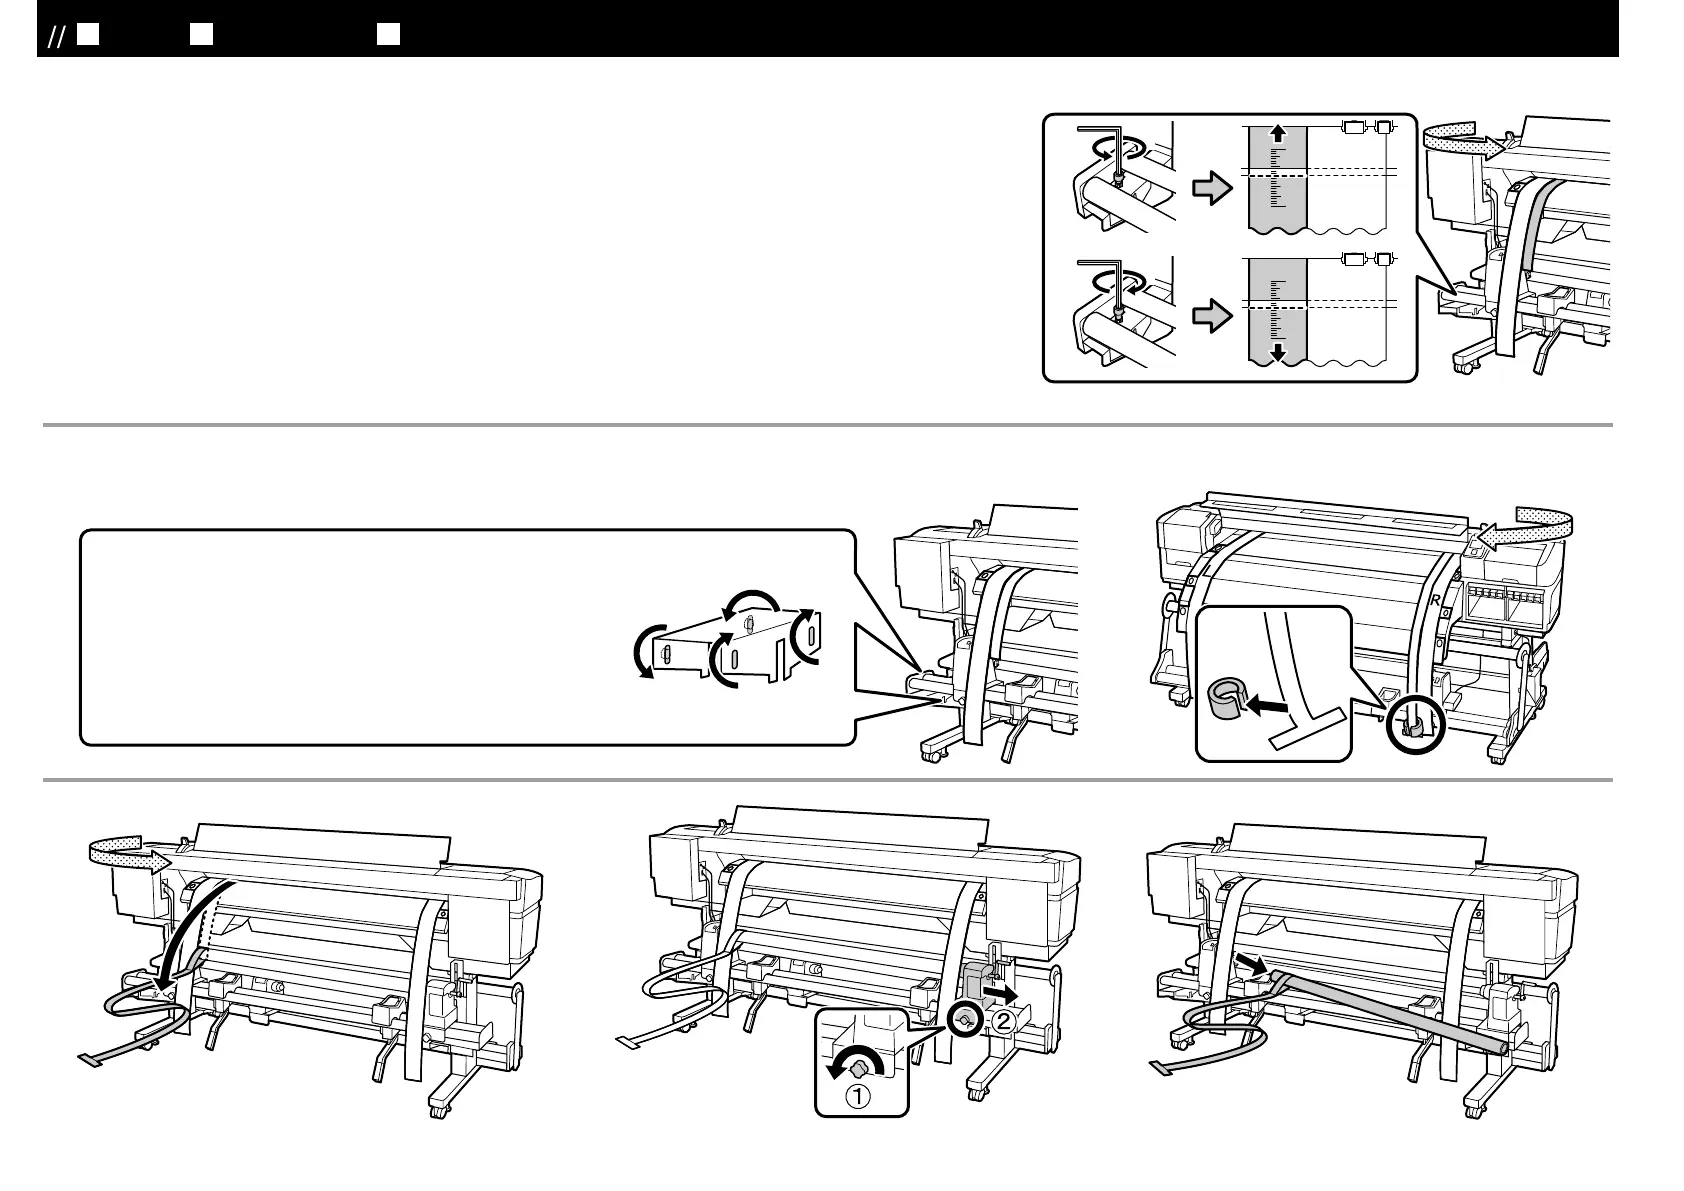
仮止めにしていた 4 本のネジを締めてしっかり固定します。
Fully tighten the four screws that you provisionally tightened.
󱻢󱃅󰆛󰅚󰄊󱃅󰰠
4
󱝇󱂇
[ 15 ] [ 16 ]
[ 14 ]
本機前面でフィルム a の目盛りを確認しながら、本機背面で調整を行います。
調整ネジを反時計回りに回すと目盛りが奥に、時計回りに回すと目盛りが手前に動きます。
ネジ 1❏回転で、約 1mm❏動かすことができます。目盛りの値が L 側と一致したら調整は終了です。
Make adjustments at the rear of the printer while checking the scale printed on Film a at the front of the printer.
Rotate the adjustment screw counterclockwise to move back or clockwise to move ahead about one millimeter with each turn of
the screw. The adjustment is complete when the value is the same as that for Side L.
󰭮󱟈󰐉󰒭󲂨󰐲󰉮󱋲󰥙
a
󰰠󰅚󱥝󱟈󰐉󱉮󲂨󱱷󱞸󱥓󰃏
󱱜󰅚󱶳󰄊󱰈󱥓󰃏󱝇󱂇󰹝󲄐󰅚󱶳󰄊󱰈󰹝󰓴󰄊󱰈󰑾󱝇󱂇󱀯󰹝
1 mm
󰭮󰃓󱌿
L
󰰠󰃓󰱩󰅚
󱟈󰷜󱥓󰃏
JA
平行調整
EN Parallel Adjustment TC
平行調整
[ 17 ] [ 18 ] [ 19 ]
23

Other manuals for Epson SC-S70600 Series

Questions and Answers:

Question and Answer IconNeed help?

Do you have a question about the Epson SC-S70600 Series and is the answer not in the manual?

Epson SC-S70600 Series Specifications

General IconGeneral
BrandEpson
ModelSC-S70600 Series
CategoryPrinter
LanguageEnglish

Related product manuals