B
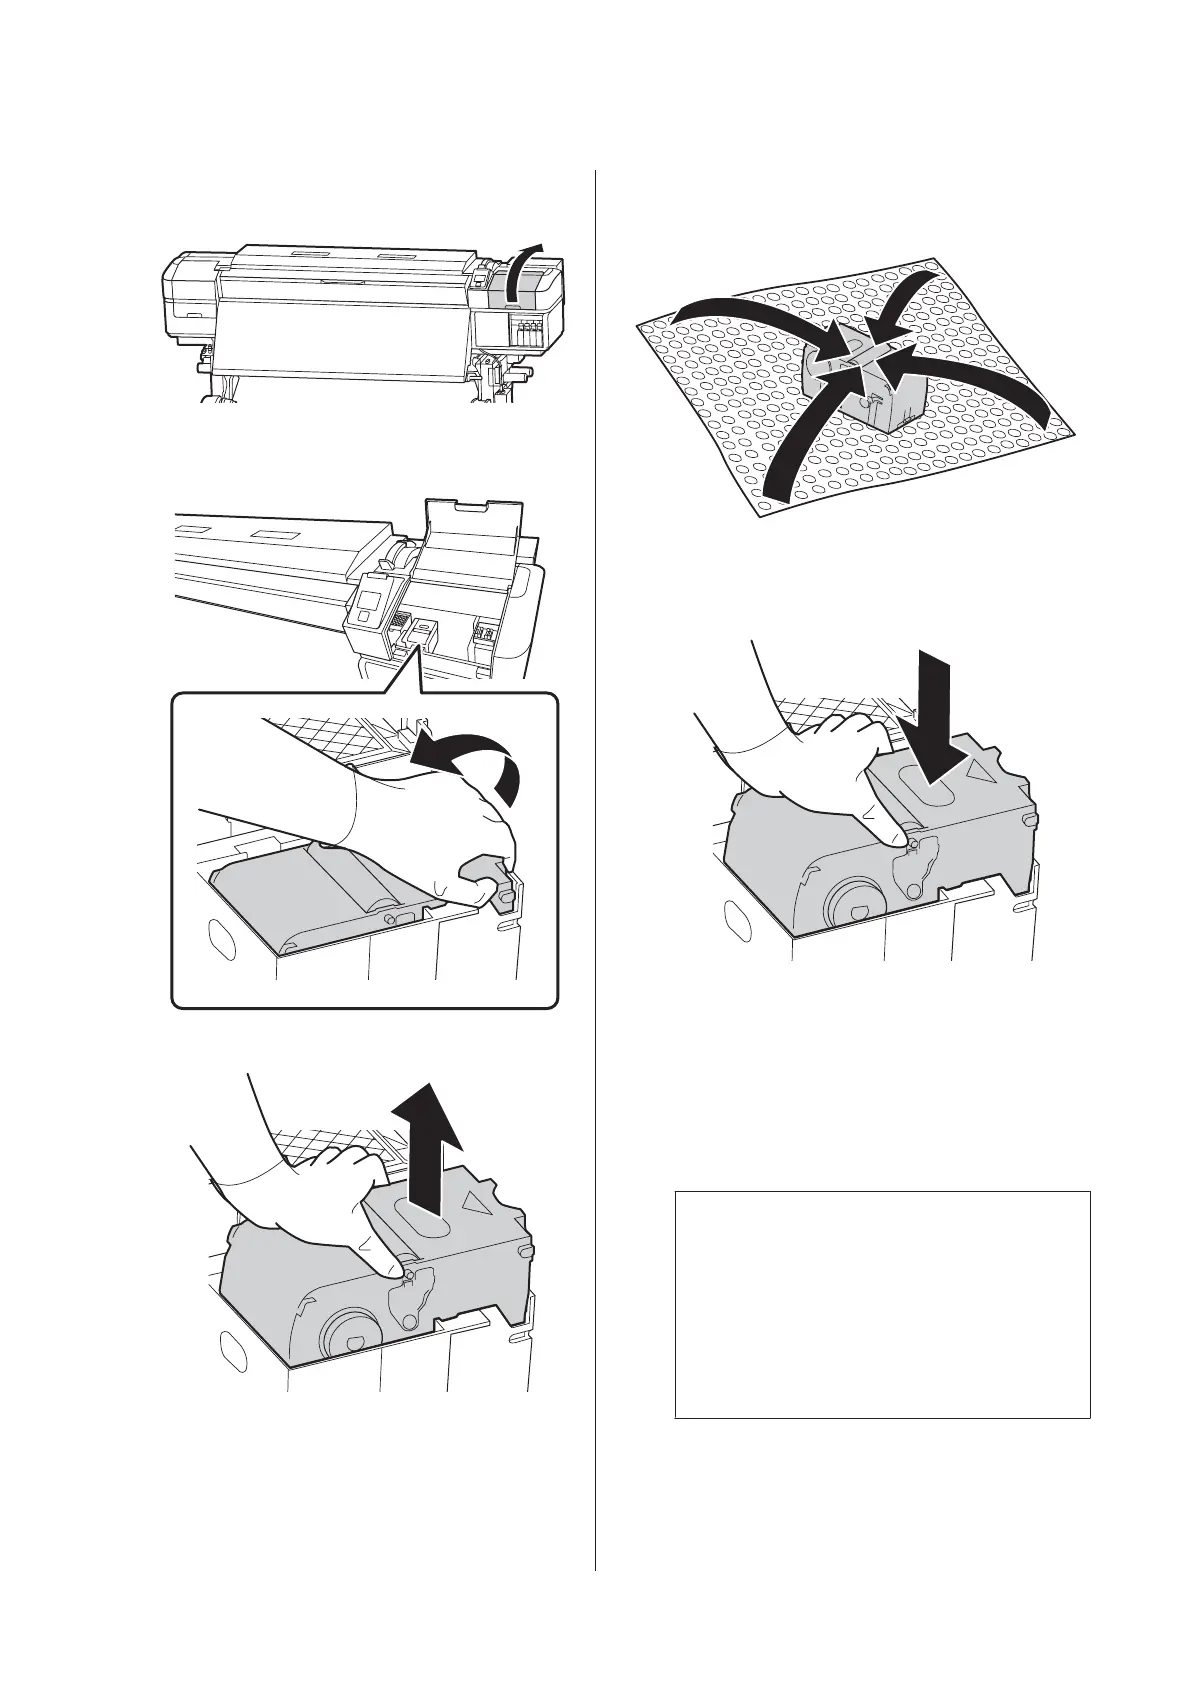
After the print head moves to the left end of the
printer, open the right maintenance cover.
C
Place your fingers in the groove on the back of the
wiper unit, and tilt it forward a little.
D
Grip the sides, and pull it straight up to lift it out.
E
To avoid soiling your surroundings with ink,
wrap the used wiper unit in the packaging
supplied with the new wiper unit.
F
Insert the new wiper unit.
Place on the attachment point and press down
until you hear a click.
G
After replacing the wiper unit, press the Z
button.
H
Lift up the tab on the flushing pad, and remove
it.
Place the removed flushing pad on the metal tray
so that ink does not adhere to the surroundings.
c
Important:
Leave the used flushing pad that has been
removed on the metal tray until it is disposed
of. If such a part is directly placed on the
printer, it may leave stains that may be
difficult to remove due to the characteristics of
the ink.
SC-S80600 Series/SC-S80600L Series/SC-S60600 Series/SC-S60600L Series/SC-S40600 Series Operator's Guide
Maintenance
43

 Loading...