106
2. Press the Aspect button on the remote control.
The shape and size of the displayed image changes, and the name of the aspect ratio appears
briefly on the screen.
3. To cycle through the available aspect ratios for your input signal, press the Aspect button
repeatedly.
Note: To remove black bars when projecting from a computer, set the Resolution setting to Wide or
Normal in the Signal menu, depending on your computer's resolution.
Parent topic: Image Aspect Ratio
Related references
Input Signal Settings - Signal Menu
Available Image Aspect Ratios
You can select the following image aspect ratios, depending on the input signal from your image source.
Note: The available aspect ratio settings vary depending on the input signal.
Note: Black bands and cropped images may project in certain aspect ratios, depending on the aspect
ratio and resolution of your input signal.
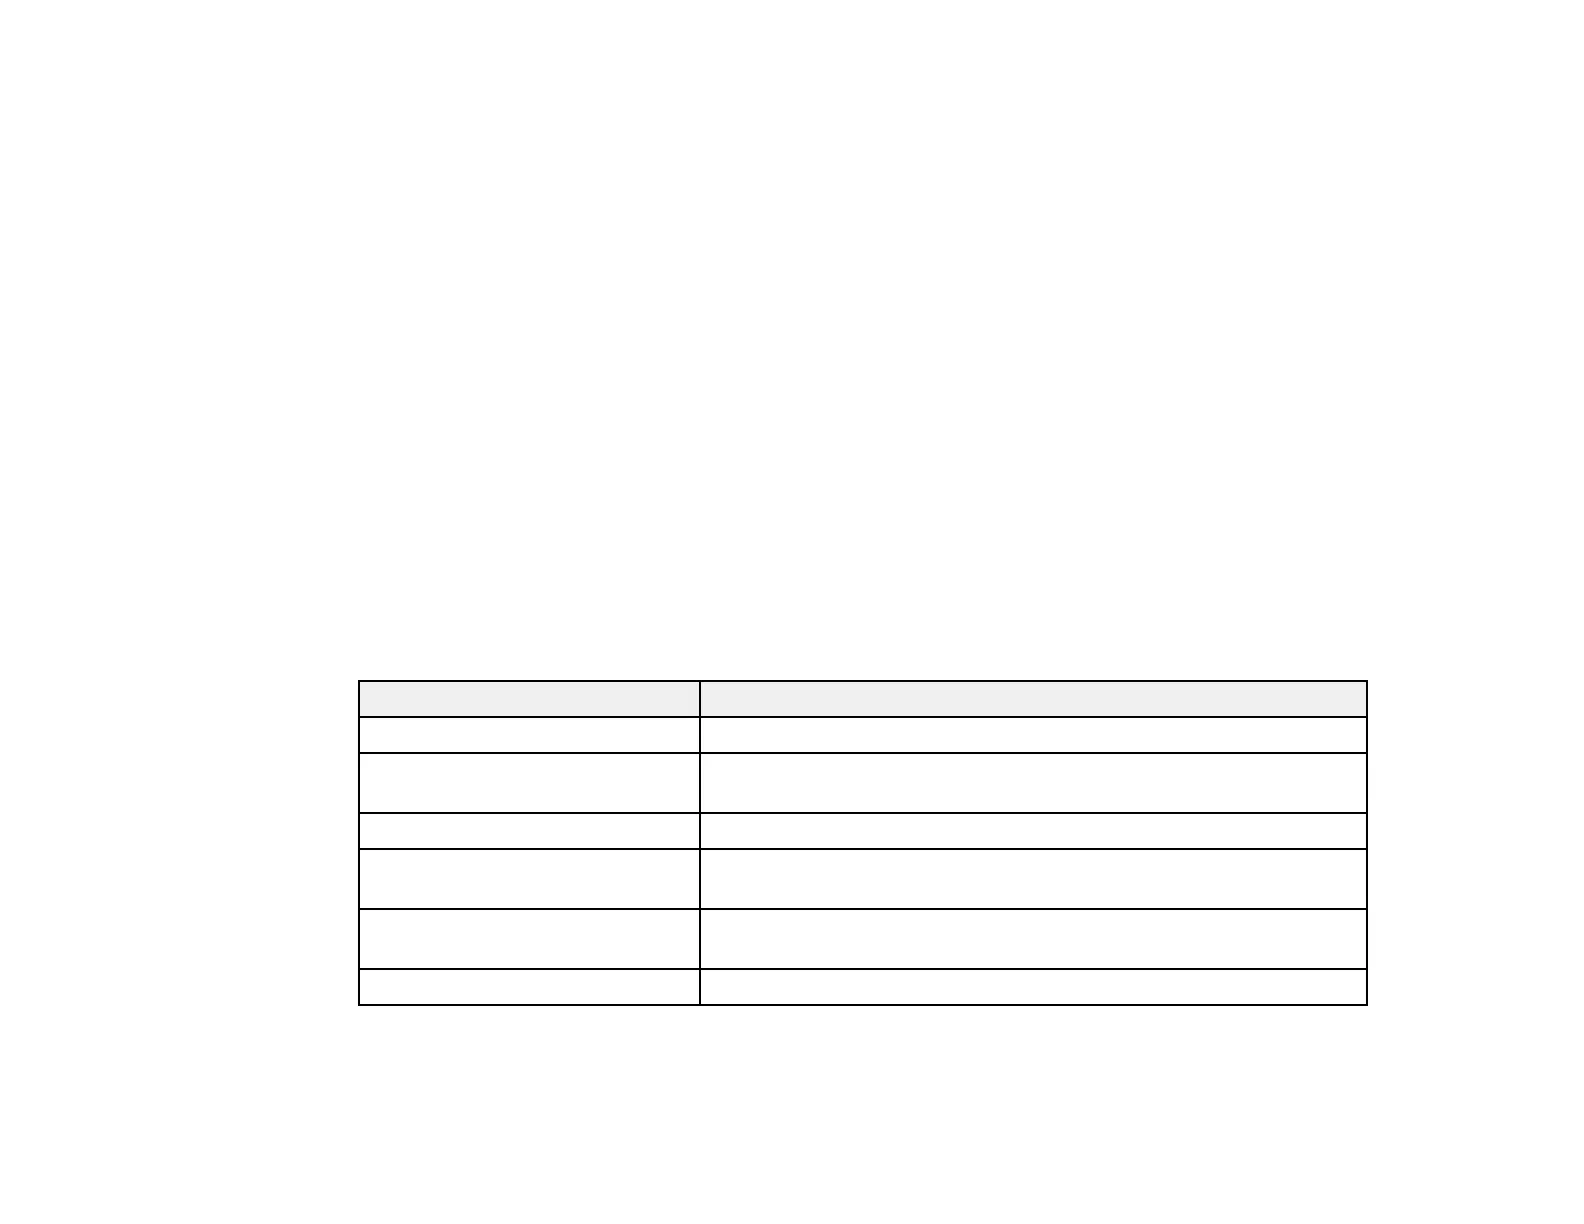
Aspect ratio setting Description
Auto Automatically sets the aspect ratio according to the input signal.
Normal Displays images using the full projection area and maintains the
aspect ratio of the image.
16:9 Converts the aspect ratio of the image to 16:9.
Zoom Displays images using the full width of the projection area and
maintains the aspect ratio of the image.
Full Displays images using the full width of the projection area, but does
not maintain the aspect ratio.
Native Displays images as is (aspect ratio and resolution are maintained).
Parent topic: Image Aspect Ratio

 Loading...