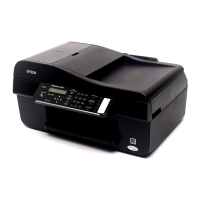
Do you have a question about the Epson WorkForce 310 Series and is the answer not in the manual?
Connect the printer to a power outlet using the provided cable.
Activate the printer by pressing the power button.
Choose your preferred language for the printer interface.
Specify your country or region for correct settings.
Configure Daylight Saving Time settings based on your region.
Choose the desired format for displaying the date.
Input the current date using the numeric keypad.
Select between 12-hour or 24-hour time format.
Input the current time using the numeric keypad.
Specify AM or PM if using a 12-hour time format.
Press OK to finalize all entered settings.
Lift the scanner and open the ink cartridge cover.
Gently shake and unpack the ink cartridges before installation.
Remove only the yellow tape from each ink cartridge.
Place each ink cartridge into its corresponding color slot.
Press each installed ink cartridge down until it clicks into place.
Close the ink cartridge cover firmly until it clicks.
Gently lower the scanner unit back down.
Press OK to start the ink charging process.
Open the paper support and extend its arms.
Pull out the output tray and raise the stopper.
Squeeze and slide the paper edge guide to the left.
Insert paper with the printable side facing up.
Move the edge guide to fit the loaded paper stack.
Instructions for network setup are in the Quick Guide.
Guide to connecting the printer directly to a computer via USB.
Verify the printer is not connected to the computer.
Insert the WorkForce 310 Series software CD.
Launch the setup program from the CD.
Select the USB driver installation option and proceed.
Connect the printer to the computer using a USB cable.
Follow prompts to finish setup, fax header, and registration.
Remove the software CD after installation is complete.
Verify the printer is not connected to the Mac.
Insert the WorkForce 310 Series software CD.
Double-click the Epson icon on the CD.
Click Install and follow the on-screen instructions.
Choose the direct USB connection driver option.
Connect the printer to the Mac using a USB cable.
Add the printer to the system's printer list.
Follow prompts to install remaining software and register.
Remove the software CD after installation is complete.
Instructions for network setup and basic operations.
Access user guides, FAQs, and troubleshooting.
Visit Epson's website for drivers, FAQs, and troubleshooting.
Contact Epson for phone support in the U.S. and Canada.
Information on Epson's range of papers.
Details on ink cartridge numbers and types.
| Print Technology | Inkjet |
|---|---|
| Maximum Print Resolution | 5760 x 1440 optimized dpi |
| Maximum Scan Resolution | 1200 x 2400 dpi |
| Paper Handling | 100-sheet input tray |
| Connectivity | USB 2.0 |
| Ink Colors | Cyan, Magenta, Yellow, Black |
| Functions | Print, Copy, Scan |
| Ink Type | DURABrite Ultra Ink |
| Scanner Type | Flatbed |
| Paper Sizes | A4, A5, A6, B5, Letter, Legal |
| Display | Two-line LCD |
 Loading...