Do you have a question about the Epson WorkForce 630 and is the answer not in the manual?
Instructions for unpacking the printer and its accessories, including cautions about protective materials and vacuum packing.
Steps to connect the power cable and turn on the printer, with a caution about connecting to a computer.
Guide to selecting language, country/region, date, and time settings on the printer control panel.
Instructions for lifting the scanner, opening the cover, and installing ink cartridges with proper handling.
Steps for loading various paper sizes into the paper cassette, adjusting guides, and inserting the cassette.
Instructions for connecting the phone cord to the printer for fax functionality, including DSL filter notes.
Guidance on connecting the printer via Wireless, Direct USB, or Wired Ethernet connections.
Steps for installing printer software using the product CD or online resources, for Windows and Macintosh.
Information on accessing the online User's Guide, software downloads, and Epson Supplies Central.
Contact details and methods for obtaining technical support from Epson via website or phone.
Guidance for common setup problems like unsuccessful network setup or printer detection after USB connection.
Information on purchasing genuine Epson paper and ink cartridges, including model numbers and where to buy.
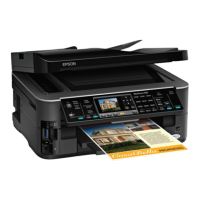
The Epson WorkForce 630 Series is a versatile all-in-one printer designed for home and office use, offering printing, copying, scanning, and faxing capabilities. This guide provides a comprehensive overview of its setup, operation, and maintenance.
The WorkForce 630 Series is an inkjet multifunction printer that allows users to perform a variety of tasks. It can print documents and photos in color or black and white, copy existing documents, scan images and documents to a computer, and send/receive faxes. The printer supports various paper sizes, including letter, A4, legal, and common photo sizes like 4x6, 5x7, and 8x10 inches.
For printing, the device utilizes individual ink cartridges for each color (Black, Cyan, Magenta, Yellow), which can be replaced independently as they run out. This design helps reduce waste and potentially save on ink costs. The printer also features an Automatic Document Feeder (ADF), which simplifies scanning and copying multi-page documents.
Connectivity options are flexible, allowing the printer to be connected to a computer via a USB cable, to a network wirelessly (Wi-Fi), or through a wired Ethernet connection. This enables multiple users to share the printer on a network. The control panel on the printer itself provides an intuitive interface for navigating menus, selecting settings, and initiating tasks directly from the device.
Setting up the WorkForce 630 Series begins with unpacking the device and removing all protective materials. This includes plastic strips and tapes that secure components during shipping. It's crucial not to open ink cartridge packages until instructed, as they are vacuum-packed for reliability.
After unpacking, the next step is to connect the power cable. The printer should not be connected to a computer yet. Once powered on, the control panel needs to be raised to access the On button. The initial setup involves selecting language (English by default, with options to change), Country/Region, Daylight Saving Time settings, Date format, and Time format. These settings are navigated using the OK button and arrow keys on the control panel.
Ink cartridge installation is a critical part of the setup. The scanner unit must be lifted to access the cartridge holder. Users are instructed to gently shake each ink cartridge before unpacking and removing only the yellow tape. It's important not to remove any other seals to prevent leaks. The cartridges are then inserted into their corresponding color slots and pressed down until they click into place. After all cartridges are installed and the cartridge cover is closed, the scanner unit is lowered. The printer will then initiate an ink priming process, which takes several minutes. During this process, it's important not to turn off the printer to avoid wasting ink.
Loading paper is straightforward. The paper cassette is pulled out, and the edge guides are slid outward. A guide within the cassette needs to be positioned according to the paper size being used (e.g., 4x6-inch or Letter-size). Paper should be inserted with the glossy or printable side face-down. The edge guides are then slid against the paper, ensuring it's not too tight and that the paper is under the tabs on the guides. Finally, the paper cassette is gently reinserted, and the output tray is extended.
For faxing, the included phone cord connects the printer's LINE port to a telephone wall jack. If connecting to a DSL phone line, a DSL filter is required.
The printer offers various connection methods:
Software installation is performed using the product CD. Before installing, ensure the printer is NOT connected to the computer. For Windows users, if a "Found New Hardware" screen appears, it should be canceled, and the USB cable disconnected. The software installation guides users through the process, including installing drivers and utilities.
The WorkForce 630 Series is designed with several features to facilitate maintenance and ensure optimal performance.
One key maintenance aspect is ink cartridge replacement. The printer uses individual ink cartridges, meaning only the depleted color needs to be replaced. This helps manage ink consumption efficiently. The manual emphasizes not to open new ink cartridge packages until ready to install, as they are vacuum-packed to maintain reliability.
The printer's control panel and on-screen messages provide important feedback regarding the device's status, including error messages. If an error occurs, the LCD screen will display information to help diagnose and resolve the issue. For example, if network setup is unsuccessful, the screen will indicate this, and users can refer to the network name and password settings.
The Automatic Document Feeder (ADF) includes a plastic strip that is part of its mechanism and should not be removed. This highlights the importance of understanding which components are user-removable and which are integral to the device's function.
The software includes a User's Guide and on-screen help features (accessible via "Help" or "?" within the software). These resources are invaluable for troubleshooting, understanding advanced features, and performing routine maintenance tasks. For instance, if a firewall alert message appears during network setup, the guide advises to unblock or allow the network connection.
Epson also provides support resources, including a website for drivers and manuals, and technical support phone numbers for assistance with any issues. This comprehensive support system helps users maintain their printer effectively.
The printer is designed to use DURABrite® Ultra Ink, which is formulated for high-quality results. Epson recommends using genuine Epson ink and paper for optimal performance and reliability.
In summary, the Epson WorkForce 630 Series is a user-friendly and versatile multifunction printer that offers robust performance for various printing, copying, scanning, and faxing needs. Its intuitive setup, flexible connectivity, and comprehensive support resources make it a practical choice for both home and office environments.
| Safety | UL60950, CSA C22.2 No. 60950, EMI FCC Part 15 subpart B class B, CAN/CSA-CEI/IEC CISPR 22 class B |
|---|---|
| Color scanning | Yes |
| Dimensions (WxDxH) | 447 x 556 x 231 mm |
| All-in-one functions | Copy, Fax, Print, Scan |
| Connectivity technology | Wired & Wireless |
| Hardware scan resolution | 2400 x 2400 DPI |
| Color all-in-one functions | copy, print, scan |
| Compatible operating systems | - Windows 7, Windows Vista, Windows XP, Windows XP x64 - Mac OS X, 10.4.11, 10.5.8 and 10.6.x |
| Print technology | Inkjet |
| Maximum resolution | 5760 x 1440 DPI |
| Print speed (black, normal quality, A4/US Letter) | 15 ppm |
| Print speed (color, normal quality, A4/US Letter) | 7.2 ppm |
| Digital sender | No |
| Printing colors | Black, Cyan, Magenta, Yellow |
| Maximum duty cycle | - pages per month |
| Number of print cartridges | 4 |
| Copier resize | 25 - 400 % |
| Maximum copy resolution | - DPI |
| Maximum number of copies | 99 copies |
| Scan to | E-mail, File, Image |
| Scanner type | Flatbed scanner |
| Input color depth | 48 bit |
| Output color depth | 24 bit |
| Maximum scan resolution | 9600 x 9600 DPI |
| Faxing | Mono faxing |
| Fax memory | 180 pages |
| Modem speed | 33.6 Kbit/s |
| Fax transmission speed | 3 sec/page |
| Fax speed dialing (max numbers) | 60 |
| Total input capacity | - sheets |
| Maximum input capacity | 250 sheets |
| Maximum print size | 210 x 297 mm |
| Paper tray media types | Photo paper, Plain paper |
| ISO A-series sizes (A0...A9) | A4, A5, A6 |
| ISO B-series sizes (B0...B9) | B5 |
| Borderless printing media sizes | A4 |
| Display | LCD |
| Display diagonal | 2.5 \ |
| Market positioning | Home & office |
| Standard interfaces | Ethernet, USB 2.0, Wireless LAN |
| USB 2.0 ports quantity | 1 |
| Wi-Fi standards | 802.11b, 802.11g, Wi-Fi 4 (802.11n) |
| Internal memory | - MB |
| Compatible memory cards | microSDHC, miniSD, miniSDHC, MS Micro (M2), MS PRO, MS PRO Duo, MS Pro-HG Duo, SD, SDHC, xD |
| Sound power level (standby) | 38 dB |
| AC input voltage | 100 - 120 V |
| AC input frequency | 50 - 60 Hz |
| Power consumption (PowerSave) | 0.2 W |
| Power consumption (average operating) | 16 W |
| Storage temperature (T-T) | 20 - 40 °C |
| Operating temperature (T-T) | 10 - 35 °C |
| Storage relative humidity (H-H) | 5 - 85 % |
| Operating relative humidity (H-H) | 20 - 80 % |
| Sustainability certificates | ENERGY STAR |
| Weight | 7620 g |
|---|



 Loading...