177
screen. With Correction Off selected, any corrections you make will only be applied to your
printouts.
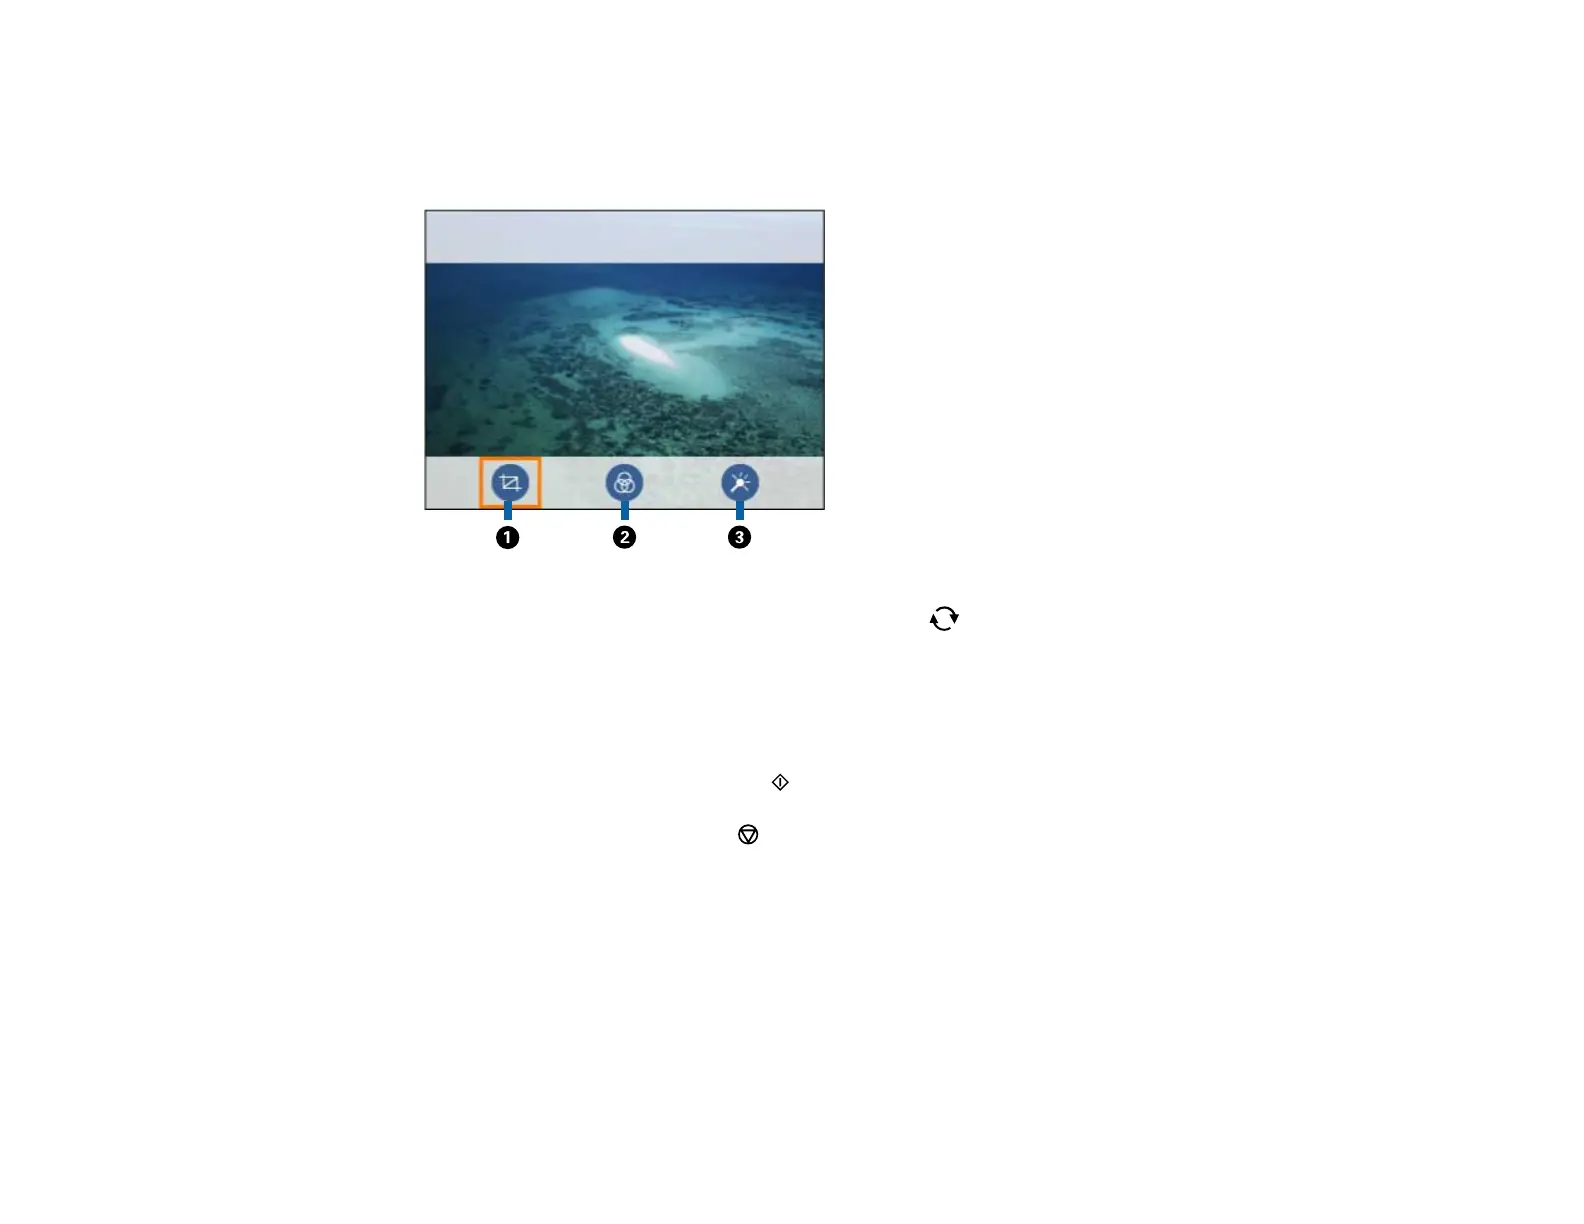
• Select the icons beneath the photo to edit it as necessary.
1 Adjusts the cropping area. Press the arrow buttons to move the cropping area. Press the +
or – button to change the frame size. Press the reset button to rotate the frame.
2 Applies a sepia or monochrome filter to the photo.
3 Adjusts brightness, sharpness, and saturation.
12. For each photo, press the + or – button to change the number of copies as necessary.
13. When you are ready to print, press the start button.
Note: To cancel printing, press the cancel button.
Parent topic: Viewing and Printing Photos
Memory Card or External USB Device Print Settings
Select the options you want to use when printing photos displayed on the LCD screen.
Note: Not all options or settings may be available, depending on other settings.
 Loading...