-- 2 2 --
dha4d1ea
3 I NSTALLATION
3.1 General
The in stallatio n shall be execu ted by a p rofessional.
WARNING!
Rotating parts can cause injury, take great care.
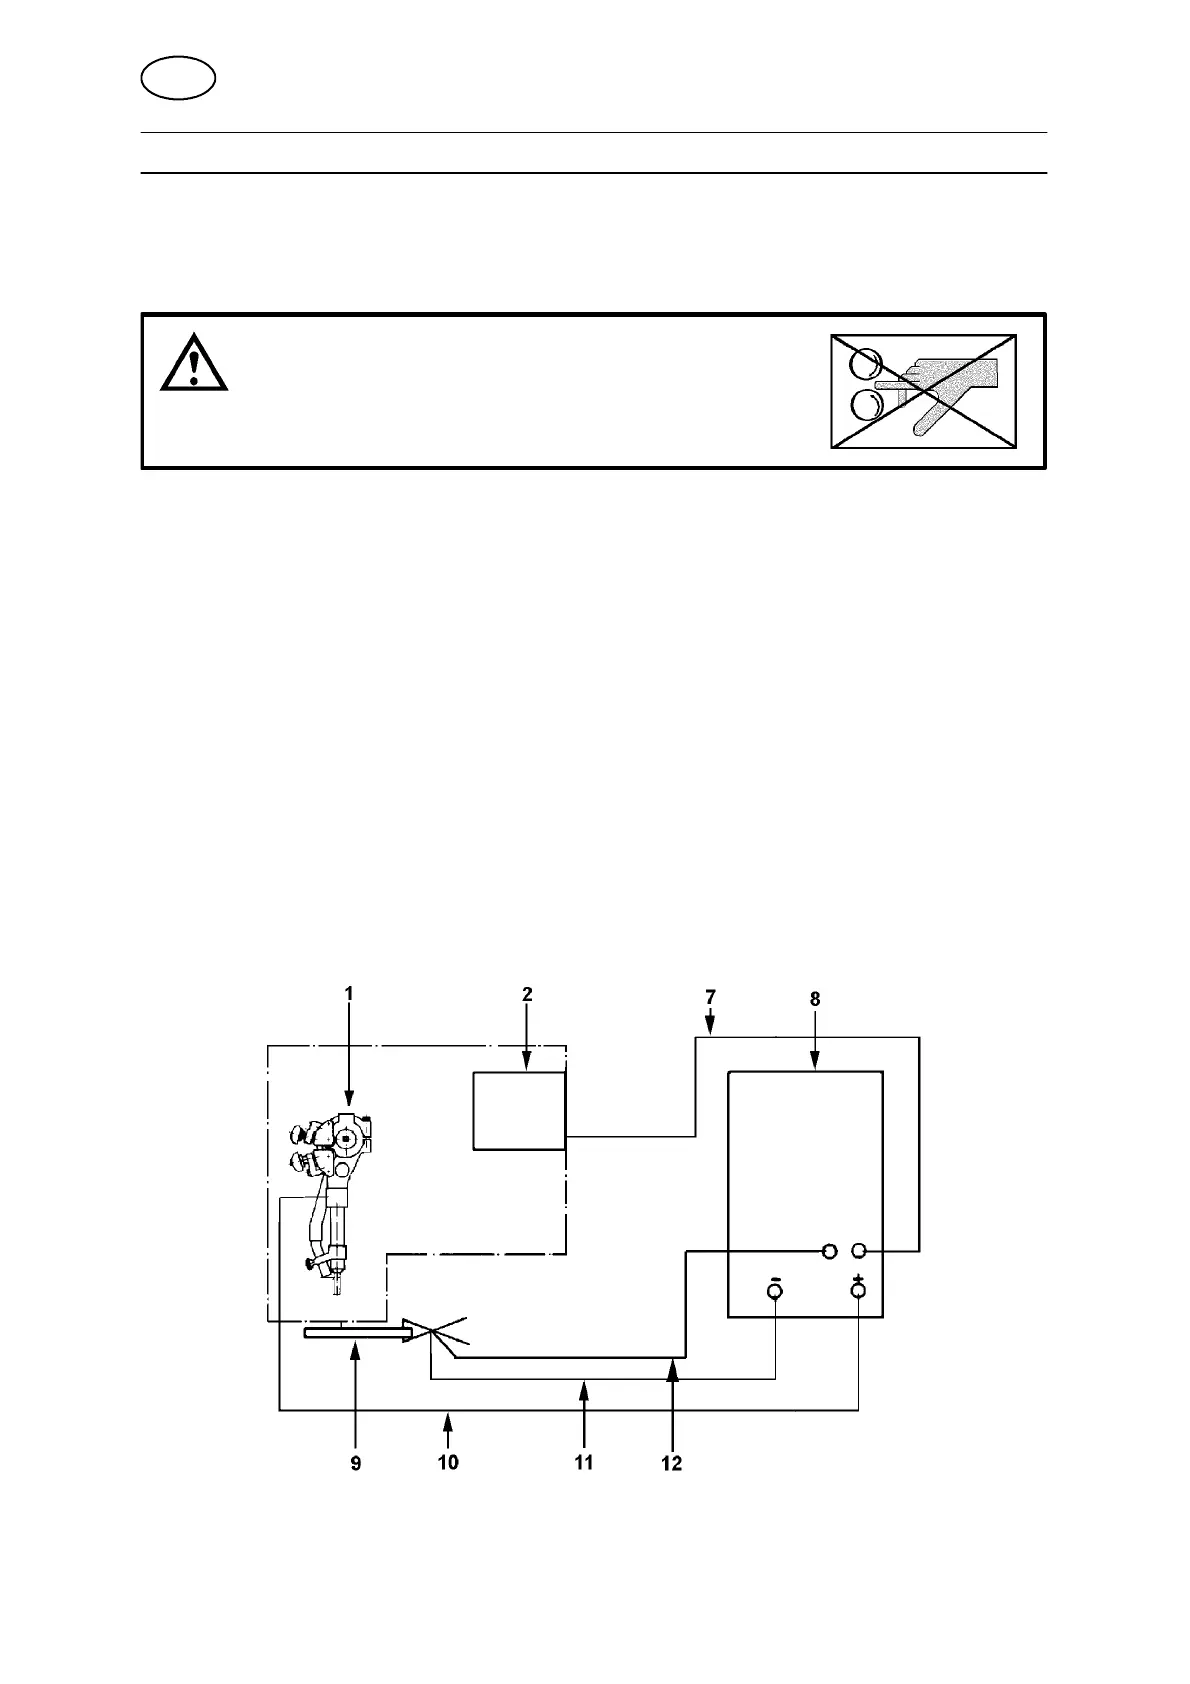
3.2 Connections
1. The connection of the A2--A6 Process Controller ( PEH) to the automatic welding
machine has been done on delivery.
For further information, see the A2--A6 Process Controller (PEH) instruction
manual.
2. Connect the A2 Multitrac as shown in the drawing.
SUBMERGED ARC WELDING
S Connect the control cable (7) between the power source (8) and the control
box A2--A6 Process Controller (PEH) (2).
S Connect the return cable ( 11) between the power source (8) and work piece (9).
S Connect the welding cable (10) between the power source (8) and the
automatic welding machine (1).
S Connect the measurement cable (12) between the power source (8) and
workpiece (9).
GB