4 INSTALLATION
0445 030 101
- 10 -
© ESAB AB 2017
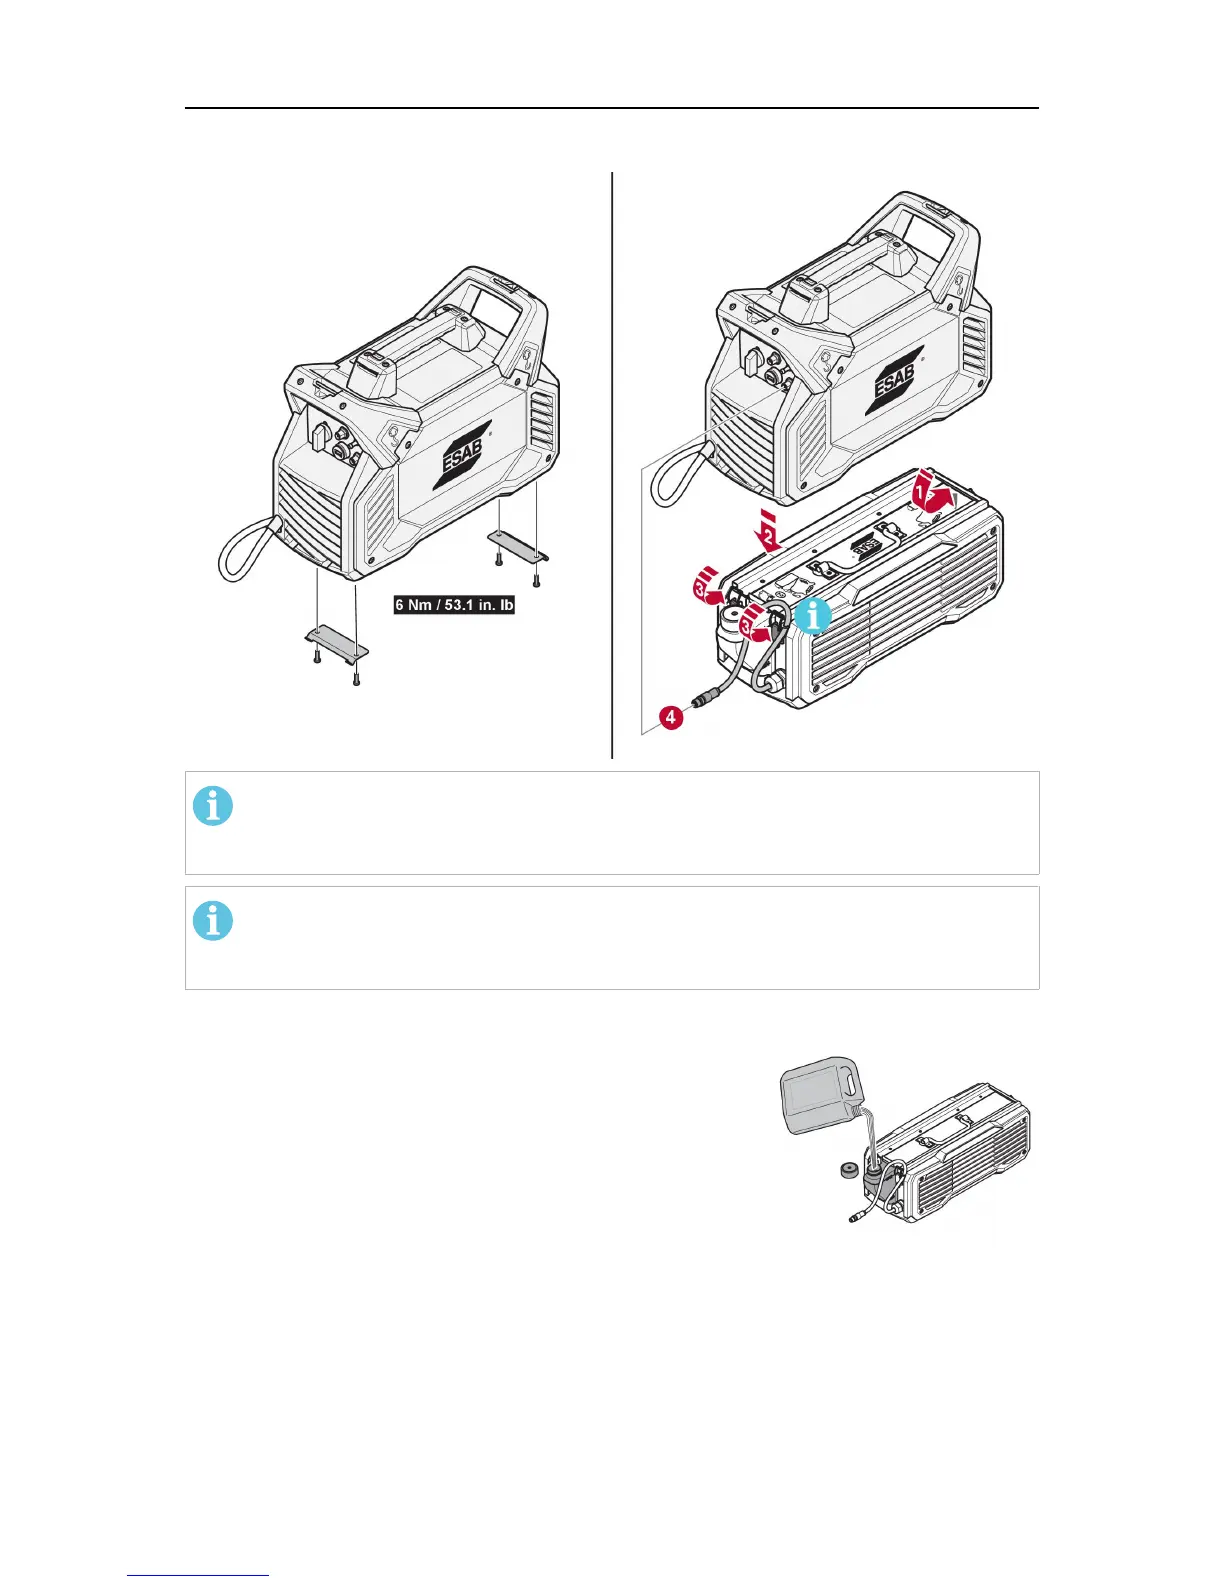
4.2 Installing welding equipment
NOTE!
Take care so that the interface cable does not get squeezed between the power
source and the cooling unit!
NOTE!
Power supply of the cooling unit is done from the welding power source via the
CAN cable (see the "OPERATION" chapter).
4.3 Torch installation
1. Fill with coolant into the cooling unit water tank.
2. Connect the TIG welding torch. Make sure the torch is
located at the same height as the cooling unit, so that the
coolant will spread quickly throughout the system.
3. Turn on the mains power supply to the welding power
source.
4. Select TIG welding on the power source.
5. Press the welding torch trigger switch.
6. Let the cooling unit water pump run for three minutes.
7. Check that the coolant level is between the upper and
lower markings on the water tank. Fill up if needed.