6 MAINTENANCE
0445 030 101
- 16 -
© ESAB AB 2017
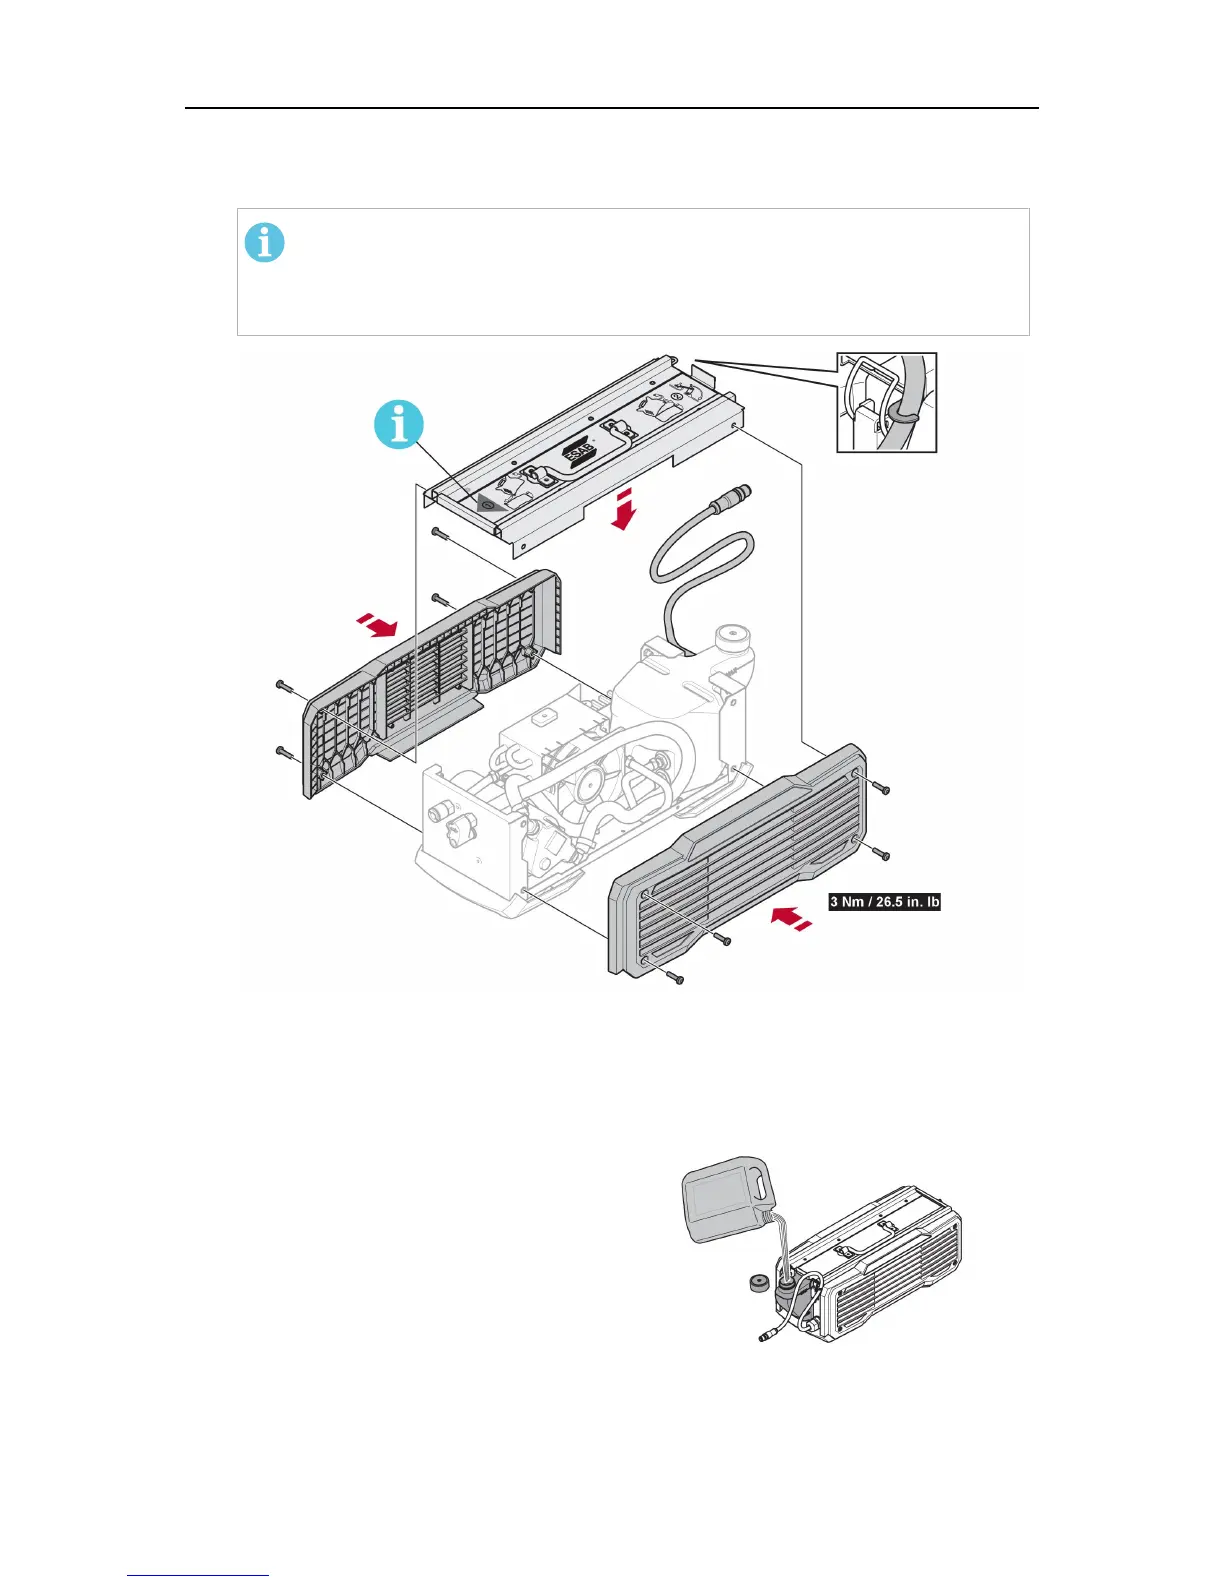
4. Reattach the cooling unit top panel. Route the internal CAN cable behind the cable
bracket in the top panel. Then reattach the side panels. Tighten the screws using the
correct tightening torque according to the illustration below.
NOTE!
Make sure the top panel is fitted in the correct direction! The yellow arrow
on the top panel decal should point towards the front of the cooler, i.e.
towards the short side where the coolant connectors are located.
5. Install the power source on top of the cooling unit and reconnect the interface cable,
see the"INSTALLATION" chapter.
6.2 Filling the coolant
Only use ESAB's ready mixed coolant, see the "ACCESSORIES" chapter.
• Fill with coolant. (The fluid level must not
exceed the upper marking but neither
must it be below the lower marking.)
The recommended coolant must be used in the system otherwise clumps can be created that
block the pump, water connections or elements. Use of any other cooling liquid than the
prescribed one might damage the equipment. In case of such damage, all warranty
undertakings from ESAB cease to apply.