EasyManua.ls Logo

Escort ELC-131D - Page 15

Escort ELC-131D
16 pages
Print Icon
To Next Page IconTo Next Page
To Previous Page IconTo Previous Page
Loading...
MKH
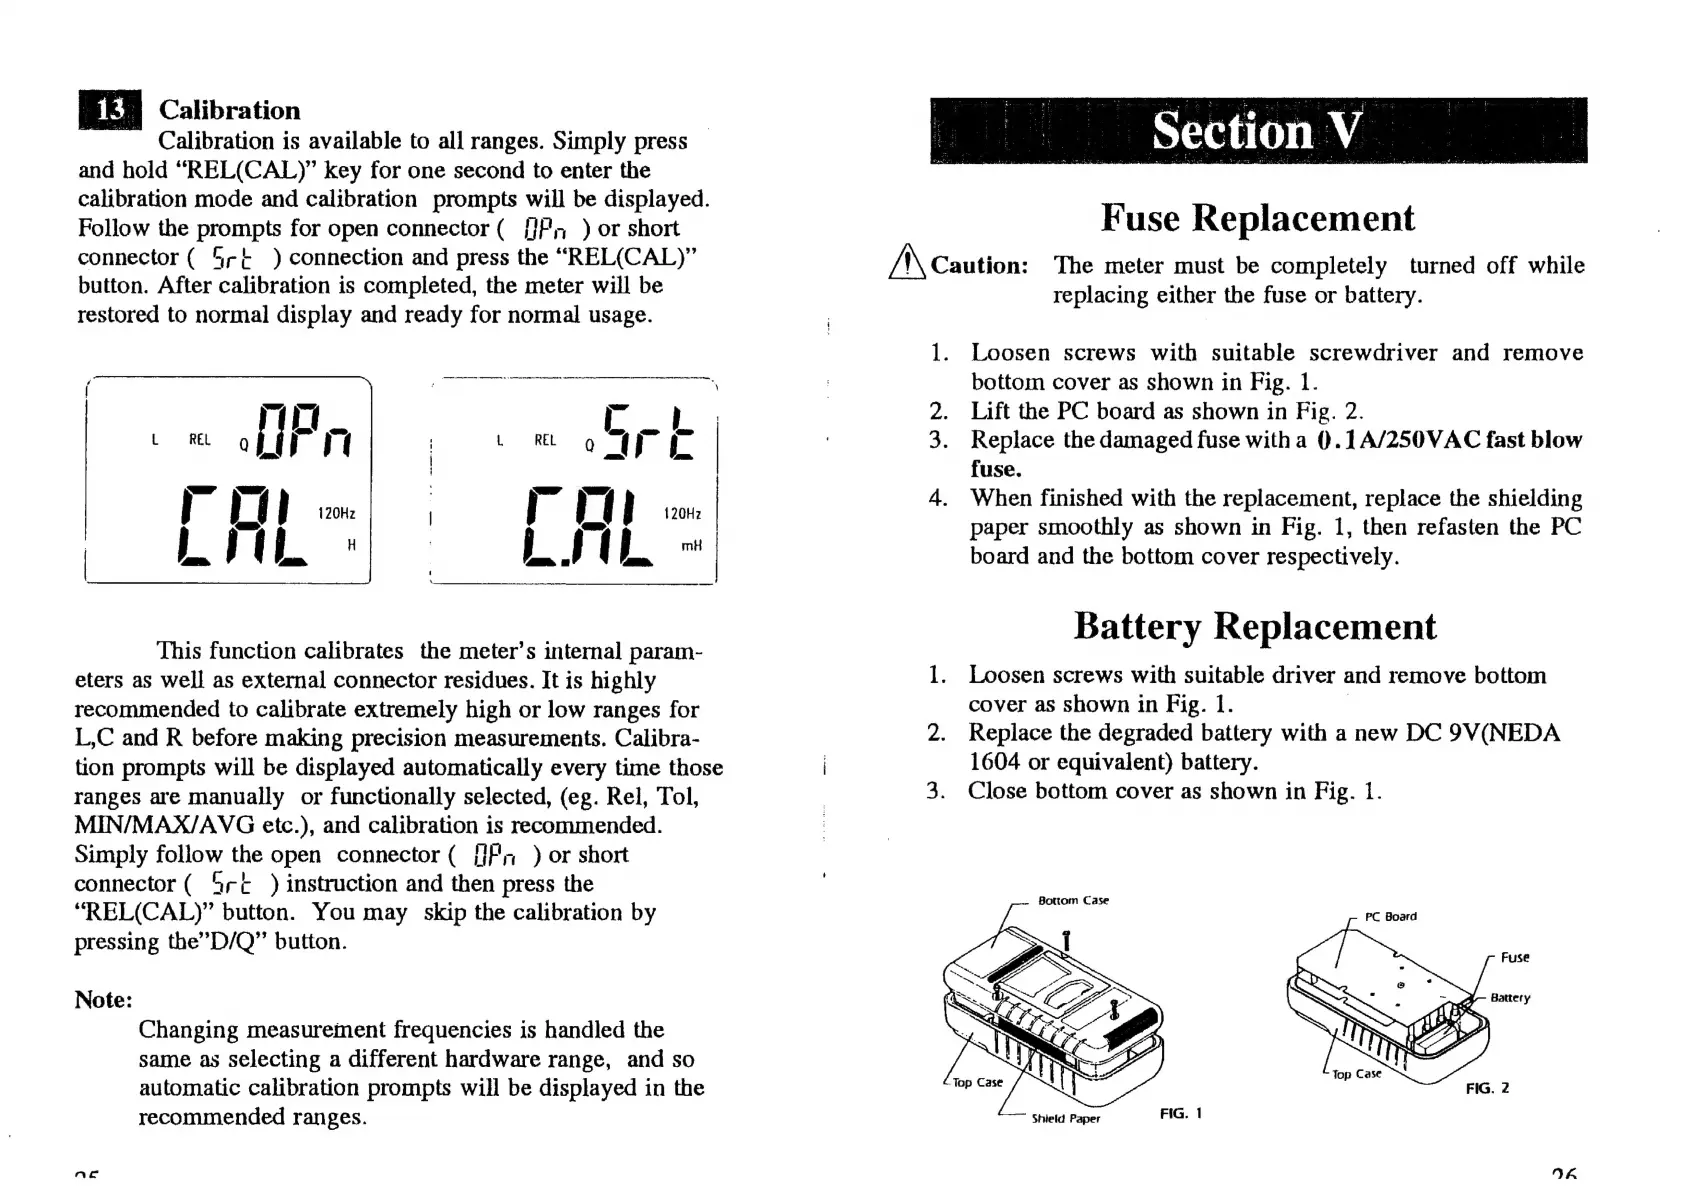
Calibration
re
ra
|
—
Calibration
is
available
to
all
ranges.
Simply
press
—
RE
Gip
OUR.
TIT
Section
V-
bou
EM
calibration
mode
and
calibration
prompts
will
be
displayed.
Follow
the
prompts
for
open
connector
(
[Fn
)
or
short
Fuse
Replacement
connector
(
5rt
)
connection
and
press
the
“REL(CAL)”
/N
Caution:
The
meter
must
be
completely
turned
off
while
button.
After
calibration
is
completed,
the
meter
will
be
replacing
either
the
fuse
or
battery.
restored
to
normal
display
and
ready
for
normal
usage.
|
1.
Loosen
screws
with
suitable
screwdriver
and
remove
Ton
io
si
AA
:
bottom
cover
as
shown
in
Fig.
1.
SR
2.
Lift
the
PC
board
as
shown
in
Fig.
2.
:
VRE
g
ET
I
3.
Replace
the
damaged
fuse
witha
Q.1A/250VAC
fast
blow
|
a
fuse.
B
Vi
}
oat
4.
When
finished
with
the
replacement,
replace
the
shielding
paper
smoothly
as
shown
in
Fig.
1,
then
refasten
the
PC
board
and
the
bottom
cover
respectively.
Battery
Replacement
1.
Loosen
screws
with
suitable
driver
and
remove
bottom
cover
as
shown
in
Fig.
1.
|
Replace
the
degraded
battery
with
a
new
DC
9V(NEDA
1604
or
equivalent)
battery.
3.
Close
bottom
cover
as
shown
in
Fig.
1.
This
function
calibrates
the
meter’s
internal
param-
eters
as
well
as
external
connector
residues.
It
is
highly
recommended
to
calibrate
extremely
high
or
low
ranges
for
L,C
and
R
before
making
precision
measurements.
Calibra-
tion
prompts
will
be
displayed
automatically
every
time
those
|
ranges
are
manually
or
functionally
selected,
(eg.
Rel,
Tol,
MIN/MAX/AVG
etc.),
and
calibration
is
recommended.
Simply
follow
the
open
connector
(
[[H5
)
or
short
connector
(
hre
)
instruction
and
then
press
the
“REL(CAL)”
button.
You
may
skip
the
calibration
by
pressing
the”D/Q”
button.
P
Bottom
Case
Note:
Changing
measurement
frequencies
is
handled
the
same
as
selecting
a
different
hardware
range,
and
so
automatic
calibration
prompts
will
be
displayed
in
the
recommended
ranges.
Shield
Paper
FIG.
1
VA
aks