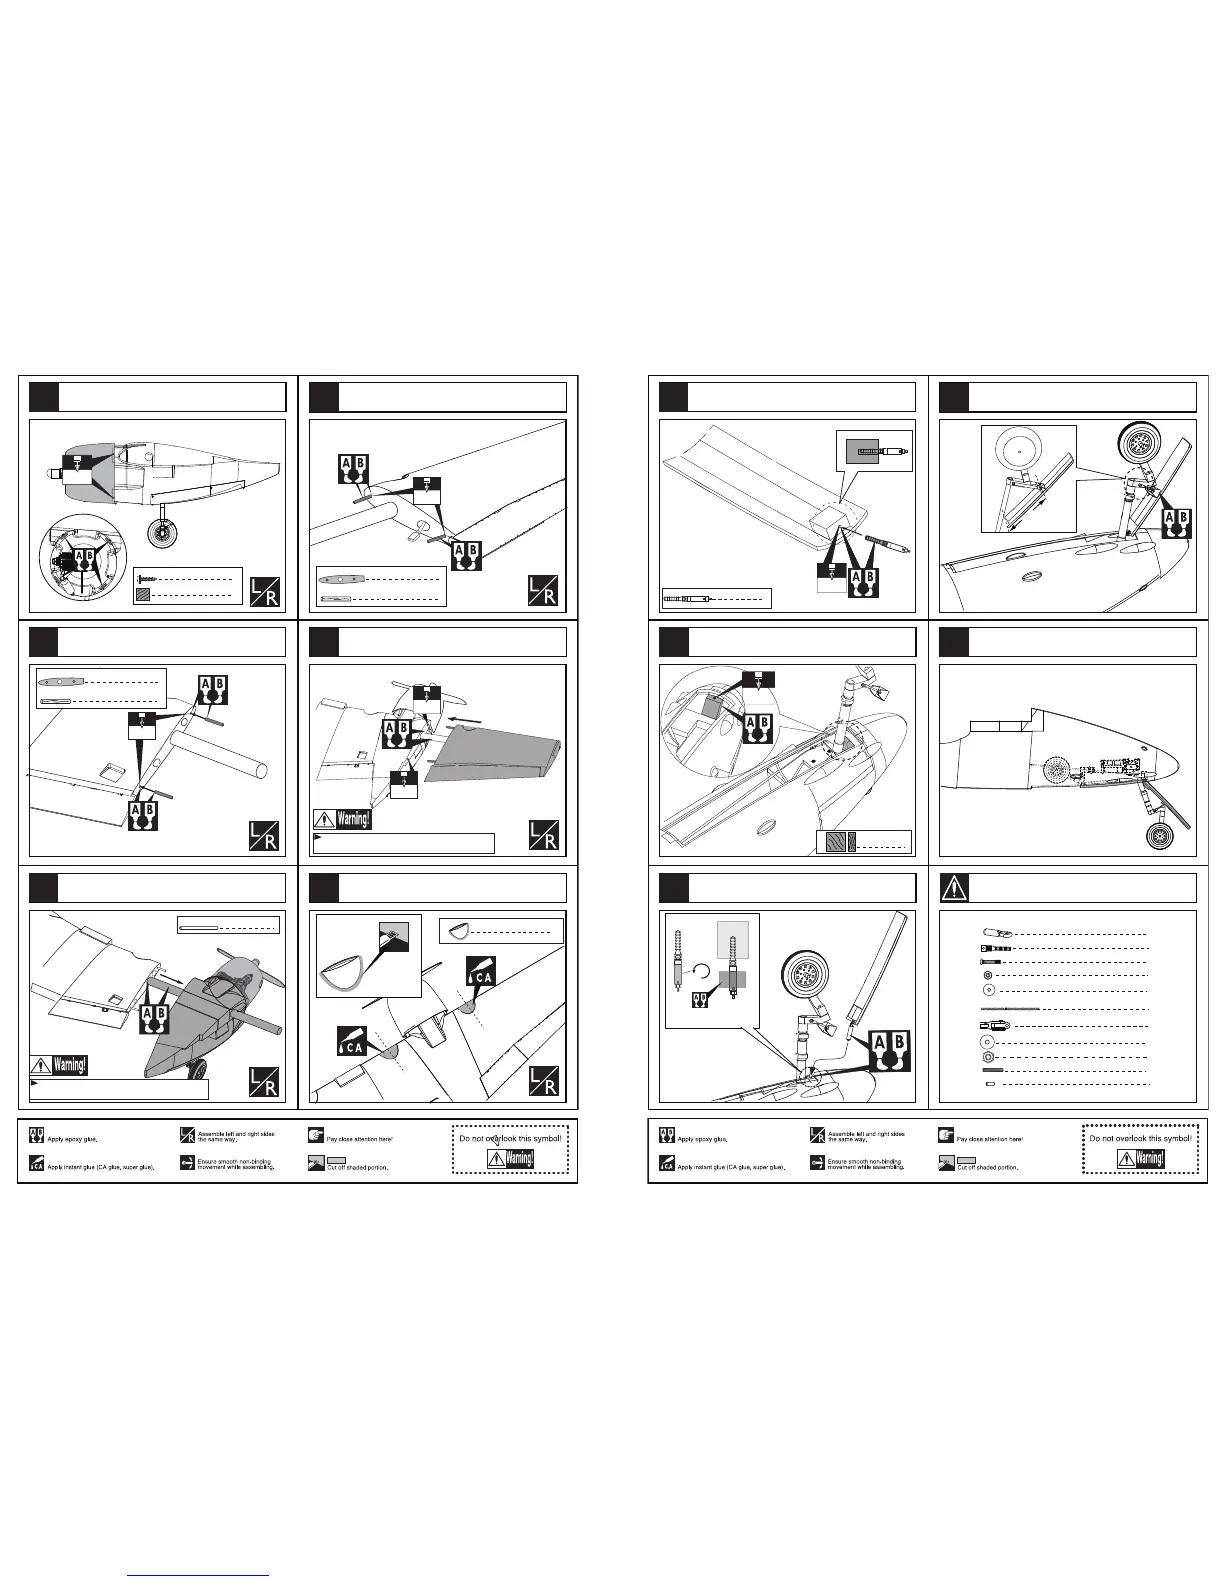
Securely glue together. If coming off during flights, you 'll
lose control of your airplane which leads to accidents!
2
Main wing joiner(30x620mm)
Insert servo leads and air lines through mid
wing to side fuselage.
1.5mm
8
TP Screw ( 2.3x12mm)
Ply (15x15x3mm)
8
4mm
4
Wood dowel (4x30mm)
1
Rib template (3mm ply)
4
Wood dowel (4x30mm)
1
Rib template (3mm ply)
4mm
4mm
4mm
4
PVC part
Epoxy the plies to the appropriate position under the the cowling
and assemble the cowling to side fuselage with TP Screw.
According to the rib template drill holes in the mid wing
and epoxy wood dowel in them.
Assemble the side fuselage to the mid wing as illustration.
According to the rib template drill holes in the main
wing and epoxy wood dowel in them.
Assemble the main wing to the side fuselage steadily.
Trim the PVC parts and glue them to appropriate
position with CA glue.
39
40
41
42
43
8
38
2
2
2
Clevis
Washer(3x15mm)
Lock Nut (3mm )
1
Shaft (3x80mm)
2
2
Clevis
Copper joiner
2
2
Screw (2x10mm)
Nut (2mm )
2
Washer(2x5mm)
2
Steel wire (0.5x1500mm)
Plastical tube (3x50mm)
3mm
3mm
Hinge
1
Wooden Block
(25x25x15mm)
1
95mm
2
Drill a hole in the wooden block and epoxy the hing in it.
Drill a hole in a wooden block and epoxy it to
appropriate position in the fuselage illustration.
Epoxy the nose gear door to the wooden block steadily.
Epoxy the nose gear to the nose gear door as illustration.
The sketch map when the nose gear up and down.
67
68
69
70
66
13
Accessory list for the coming installation steps.