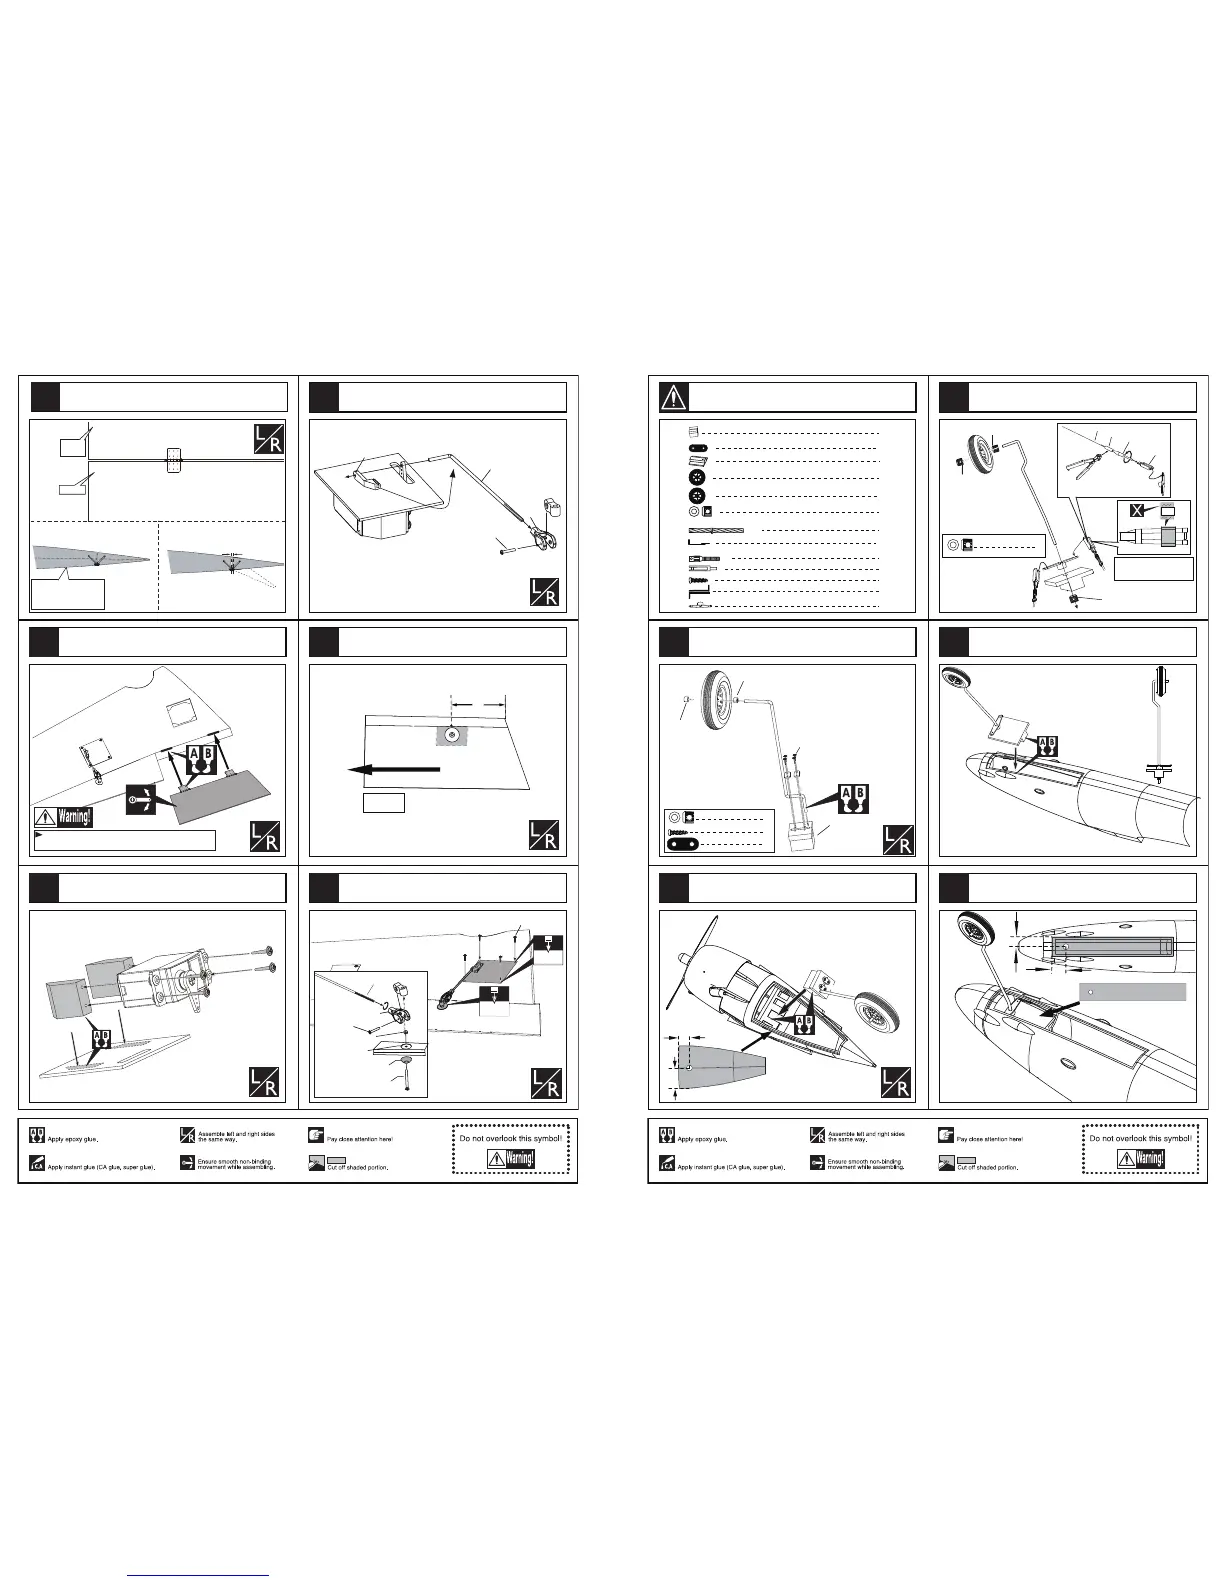
Securely glue together. If coming off during flights, you 'll
lose control of your airplane which leads to accidents!
82mm
wing tip
TP Screw (2.3x12mm)
3mm
1.5mm
Flap
1mm
Make sure they are in
the right position while
installing.
Trailing
edge
Clevis
Retainer
Rod (2x300mm)
Screw (2x10mm)
Rod (2x300mm)
Clevis
Washer(3x15mm)
Washer
Lock Nut (3mm )
Screw (3x35mm)
Screw (2x10mm)
Keep some space about 1mm width between
the trailing edge and flap.
Epoxy the flap to the main wing.
Install the flap servo as below.
Install the nylon control horn and connect the linkage.
The position of the control horn in the flap will be.
Secure the servo,install the nylon control horn
and connect the linkage.
17
18
19
20
21
4
16
42mm
Steel wire
Copper joiner
Aluminum tube
Clevis
Landing gear (5mm)
1
2
Copper joiner
Clevis
2
Collar (5mm)
7
2
Steel wire (0.5x1500mm)
1
Wheel (90 mm)
2
Wheel (110 mm)
TP Screw(2.6x14mm)
8
1
Landing gear (5mm)
1
Wooden Block(56x29x26mm)
Wooden Block(89x29x14mm)
1
Landing gear straps
4
2
Add a rubber ring to the
clevis for insuring safety
Ally nose arm
Collar (5mm)
Wooden supporter
Collar (5mm)
TP Screw (2.6x14mm)
Collar (5mm)
Collar (5mm)
Collar (5mm)
30mm
25mm
78mm
8
2.6x14mm TP Screw
Landing gear straps
4
Collar 4mm
4
Collar 4mm
3
Install the nose landing gear as below.
Install the main landing gear and fix the
wooden supporter steadily.
Epoxy the main landing gear to the side fuselage.
Epoxy the nose landing gear to appropriate position
inside the fuselage.
Drill a hole on the wheel pants and assemble it.
88
89
90
91
92
17
Accessory list for the coming installation steps.