2
Steel wire (0.5x1200mm)
1.5mm
4
TP Screw (2.6x14mm)
135mm
Cut off the surplus, the fancier can
assemble them back by their favorite,
but we’ll not provide the accessories.
2
2
2
Clevis
Copper joiner
Aluminum tube(3x6mm)
2
2
Screw (2x10mm)
Nut (2mm )
2
Washer(2x5mm)
Steel wire
Copper joiner
Aluminum tube
Lock Nut (2mm )
Screw (2x10mm)
Ball joint
Washer(2x5mm)
Wooden Block(20x20x10mm)
1
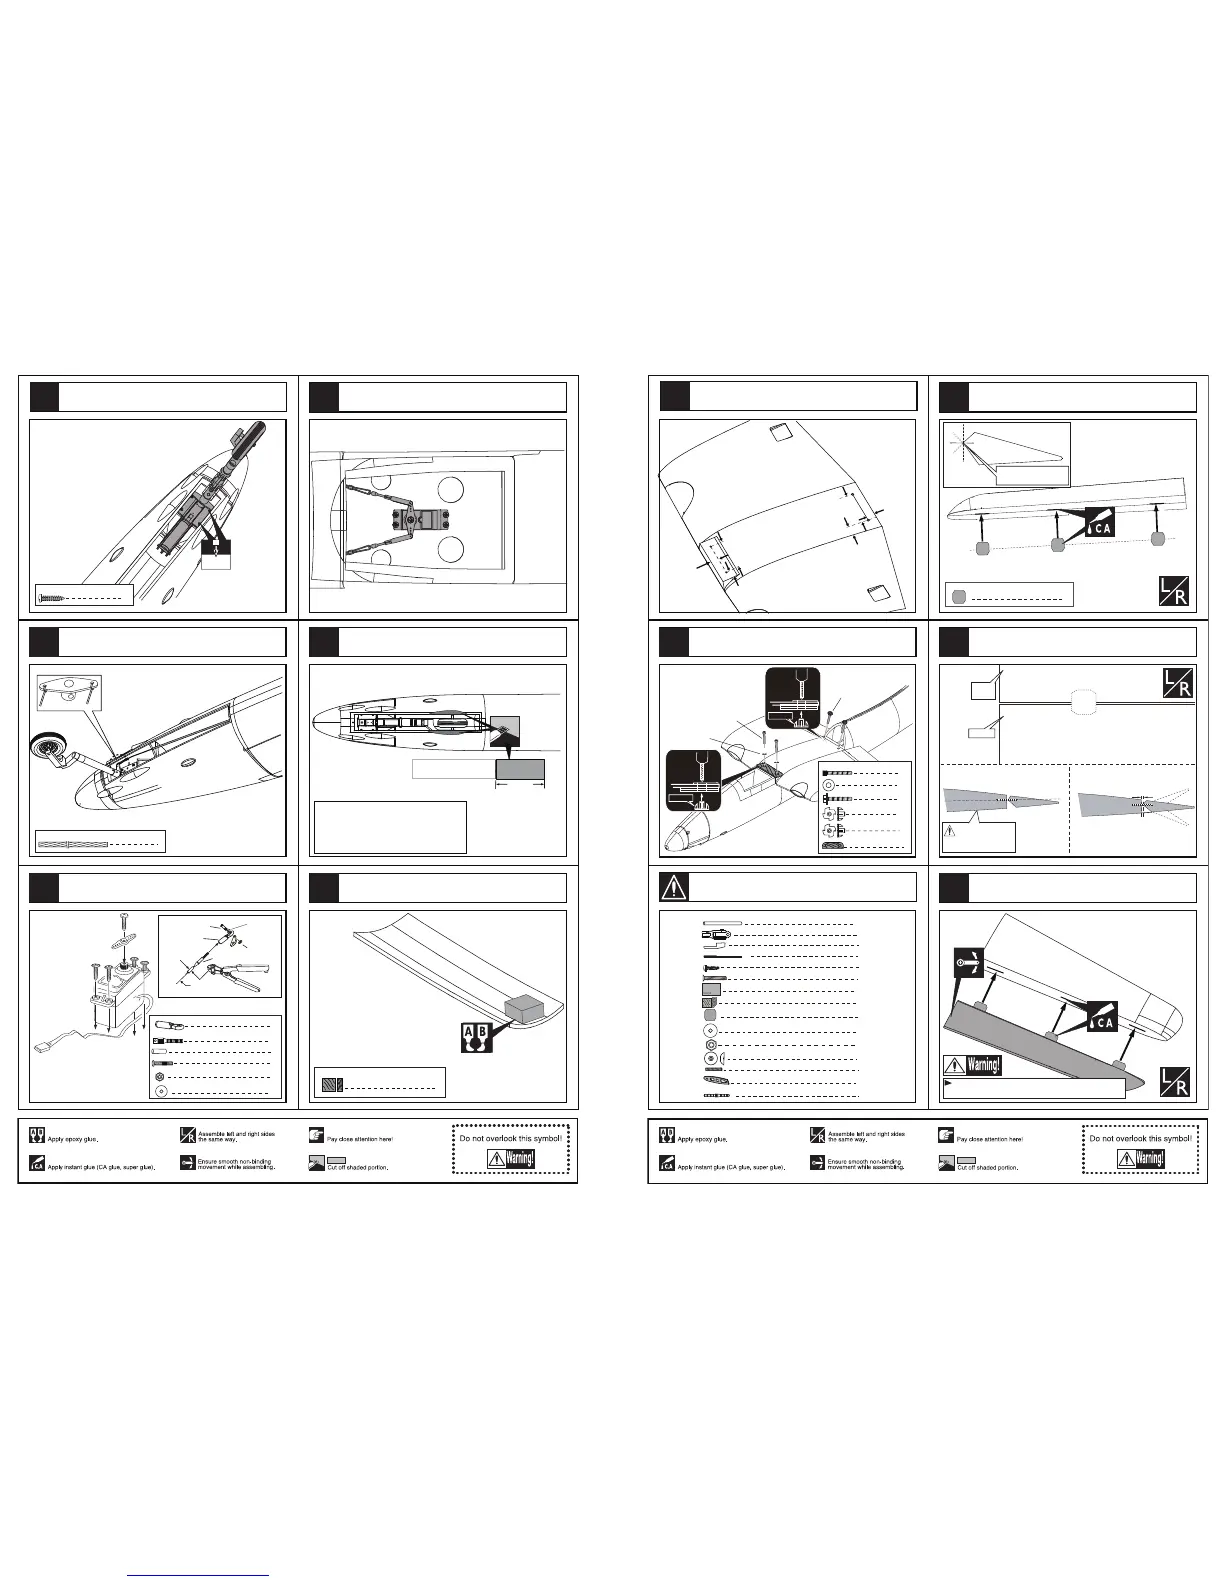
Assemble the nose landing gear to the fuselage steadily.
Pass the steel wire through the holes in the fullarm
as the illustration below.
Install the servo for the nose landing gear.
Assemble the servo to the fuselage.
The sketch map when the nose landing gear down.
Epoxy the wooden block to the appropriate
position on the nose gear door.
61
62
63
64
65
12
60
1
Stab Joiner(16x300mm)
2
2
Blind Nut (6mm)
Screw(6x50mm)
Screw(6x50mm)
Washer (4x12mm)
2
2
Screw (4x75mm)
2
Blind Nut (4mm)
Washer (4x12mm)
Screw (4x75mm)
6
Pin hinge(24x24mm)
Make sure hinges are
mounted in the same line.
8
6
2
2
4
4
4
2
4
2
Clevis
Rod (2x300mm)
Retainer
TP Screw (2.3x12mm)
Wooden Block(20x20x8mm)
Servo tray(68.5x56.5x2mm)
Pin hinge(24x24mm)
Screw (3x40mm)
Washer(3x15mm)
2
Washer(3x15mm)
Lock Nut (3mm )
1mm
Aileron
Trailing
edge
Make sure they are in
the right position while
installing.
Securely glue together. If coming off during flights, you 'll
lose control of your airplane which leads to accidents!
1
Screw (3x65mm)
1
Rib template (3mm ply)
18mm
18mm
80mm
80mm
20mm
28mm
6.2mm
Blind Nut
4.2mm
Blind Nut
Reinforcement Plate
1
3
Pin hinge(2.5x48mm)
According to the datas drill holes in the mid wing .
Assemble the centre wing to the main fuselage
as illustration.
Glue the pin hinges to the elevate with CA glue.
Keep some space about 1mm width between
the tailing edge and the elevator.
Glue the elevator to the stabilizer with CA glue.
45
44
46
47
48
9
Accessory list for the coming installation steps.