Remove the existing M.2 SSD from the M.2 socket (if applicable).
Refer to your owner’s manual for how to safely remove the existing
M.2 drive.
4.
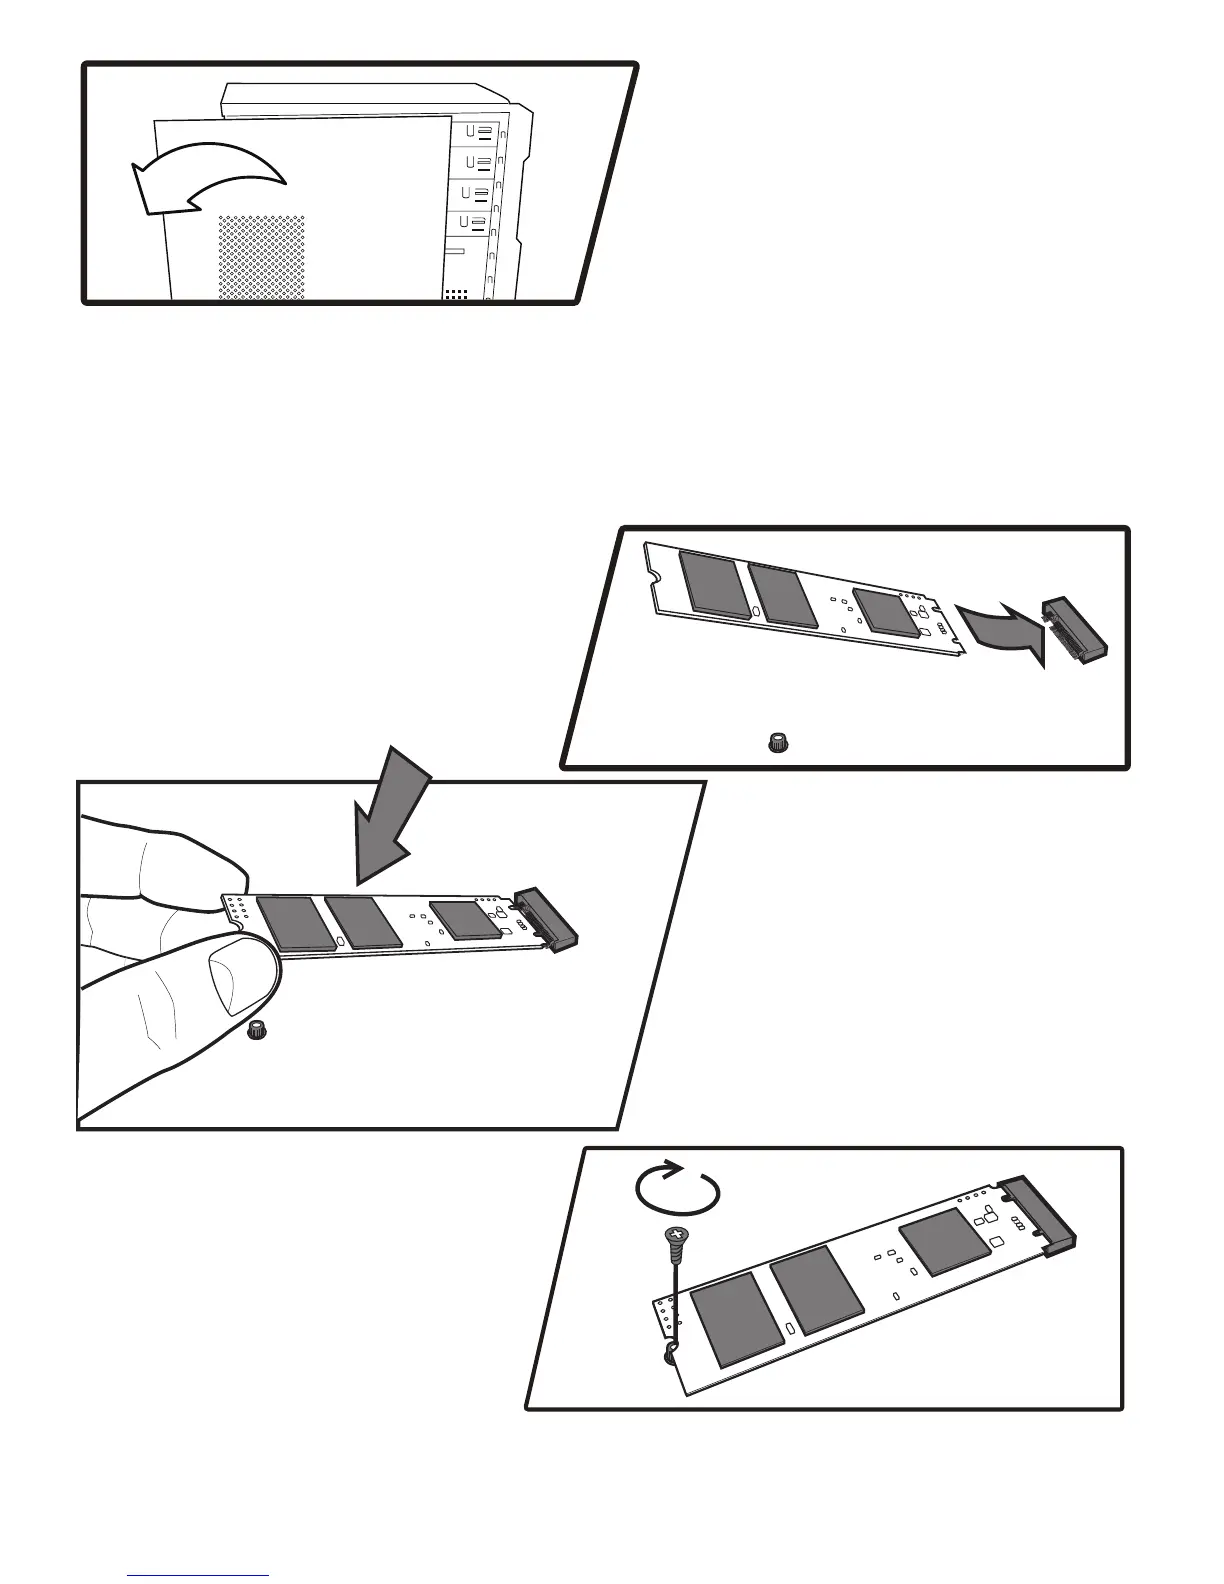
Align the notches on the KLEVV
M.2 SSD with the ridges in the
M.2 socket, then insert as shown.
5.
Hold KLEVV M.2 SSD along
the side edges and lower it
until it sits on top of the
support assembly.
6.
Insert screw into the support
assembly and securely
fasten the KLEVV
M.2 SSD in.
7.
Locate your computer’s M.2 socket on the motherboard (You may
need to consult your owner’s manual for the exact location)
3.
Open the cover of your computer.2.
* If needed please refer to the service
manual for your desktop to open the
cover safely.
Reattach the covers to your desktop.8.