2.2 Product serial Number (how to get the serial Number which uses for after-sales service)
The warranty sheet bears the detailed warranty items, the contact information for gaining access to maintenance and accessory service,
the effective date of warranty signed by your reseller, and the contact information and stamp of your reseller. In addition, a unique serial
number label is pasted on the warranty sheet.The serial number is a combination of 15-digit with ES1352- begins.
WARNING
Remember to switch off the power of ES6 and unplug the charging cable before handling and mounting of any accessory
or cleaning of the mainframe.
You could find the Serial Number from the below positions:
1
.
At the exterior side of the package.
2. On warranty sheet of the user manual.
3.At the bottom of the mainframe.
2.3.2 Preparation before assembly
Before the assembly of ES6 you should first find the hexagon wrench supplied with the product in the package. It should be well reserved for
maintenance and transportation in the future.This wrench is made in compliance with the metric standard, so that you may get one either in
your toolbox or from a tool store. It is suggested that you wear a pair of gloves during assembly so as not to pollute or injure your hands.
2.3.2 Mount handlebar and leansteer frame
NOTE
The serial number, which is unique to every ES6, and the warranty sheet shall be the only identification for gaining free warranty and
after-sale service. Please check whether the serial numbers at the above-mentioned places are the same, and if there is any absence
or inconsistency, please contact your reseller to confirm whether the product is a qualified one.
1 2 3
2
.
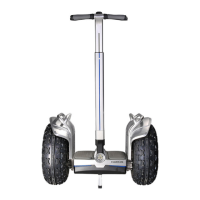
3 Install new ES6
You can assemble your ES6 by the following steps after confirming that all the parts are complete and in good condition.
Take out M4*20 screws, use 3mm hex wrench to tighten handlebar.
Insert handlebar into leansteer frame, and fasten the height adjuster nut. Insert leansteer frame into main frame, and fasten the clockwise joint.
10 11
 Loading...