GB
Put all dried parts back to the bread baker and let the lid open. Then, set the program
10-PEČENÍ (BAKING) and turn it on for 10 minutes without ingredients inserted and then
let the appliance cold. Potential short and mild smoking is not a defect and a reason for
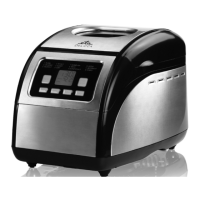
complaint. Place the bread baker on a at and dry surface (e.g. a table) at height min 85
cm, out of reach of children. Plug the power cord A7 to an electric socket. Hold the pan
B with both hands, slide it to the appliance and push to lock it in the centre of the baking
space A3. We recommend greasing the shafts and blades with suitable heat-resistant
fat/margarine for easier removal of the blades from the bread. Then, insert two kneading
blades C on the shafts in the baking pan. Slide the blades on the shafts with the at area
down and either towards or apart each other in the baking pan. Use the spoon and cup D,
E to insert ingredients in order specied in your recipe.
Please always adhere to the basic rule - first all liquid
ingredients followed by loose ingredients.
Close the lid A4. Using suitable buttons MENU (SELECT), BARVA (COLOUR), VELIKOST
(SIZE), ČAS (TIME), set the required program on the control panel A1. Then, press the
START/STOP/PAUSE button. The appliance automatically mixes and kneads the dough
until proper consistence is reached. When the last kneading cycle is completed, the
bread maker heats to an optimum temperature to rise the dough. Then, the appliance
automatically sets temperature and time for bread baking. After baking, the sound signal
(ten beeps) will be heard and the bread or speciality may be removed from the appliance.
Then the appliance turns one hour keeping warm program; if you require no keeping warm
program, press the START/STOP/PAUSE button for about 3 seconds to nish the program.
Note
- For heavy type dough, e.g. those of high content of rye flour, we recommend changing
of addition of the ingredients - first dried yeast, then flour and add water as the last
ingredient to ensure proper kneading. If you use delayed start function, the yeast must
not come in premature contact with water.
- If you are adding ingredients after the beep signal is heard, we recommend:
1) dried fruit, cheese, chocolate = cut into ca. 5 mm cubes,
2) nuts = chop finely (do not use too many of them, they degrade the performance of gluten),
3) herbs = follow the recipe, max. 1 – 2 teaspoons,
4) oily ingredients, smoked meat and bacon = cut into ca. 5 mm cubes and sprinkle them
lightly with flour, it will work better,
5) olives, fresh fruit, fruit preserved in alcohol = follow the recipe, the water contents in
these ingredients could influence the final quality of bread.
6) seeds = the use of big and hard seeds may damage (while kneading = clicking, while
baking or heating up = cracking). the surface finish of the baking pan and kneading
blade. This change however does in no way impact on the quality of the surface and is
not a reason for the appliance to be replaced for this purpose under warranty.
- The preheating function is activated depending on the surrounding temperature. If the
temperature is lower, a sensor activates heating baking area.
- With programs 7, 10 the device is previously heated and then the process of stirring and
kneading begins. It is for this reason that the device does not make any “noise” after
turning it on.
- If the bread is too light at the end of the baking program, use the BAKING program
for its further browning. Press the START/STOP/PAUSE button, then select program
10-BAKING and press the START/STOP/PAUSE button again.
 Loading...