Do you have a question about the Ethnicraft Spindle Bed and is the answer not in the manual?
| Category | Indoor Furnishing |
|---|---|
| Brand | Ethnicraft |
| Model | Spindle Bed |
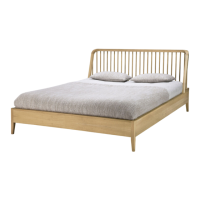
| Material | Solid Oak |
| Color | Natural Oak |
| Headboard Style | Spindle |
| Finish | Oiled |
| Assembly Required | Yes |
| Bed Size | King, Queen |
| Footboard Style | Spindle |
List of all hardware components included in the package for bed assembly.
Identification of necessary tools for assembling the bed frame.
List of major bed components that need to be assembled.
Important notes and symbols to be aware of during assembly.
Connect the siderail to the headboard using dowels, bolts, and washers.
Attach the center leg to the center support using screws.
Install the center support structure to the bed frame using brackets and screws.
Fix slat supports to the bed frame at the same level as the center support.
Install screws on the middle and sides of the bed head, without fully tightening initially.
Fully tighten all previously installed screws for structural integrity.
Position and fasten the bed slats to the frame using screws and washers.