11 English English 12
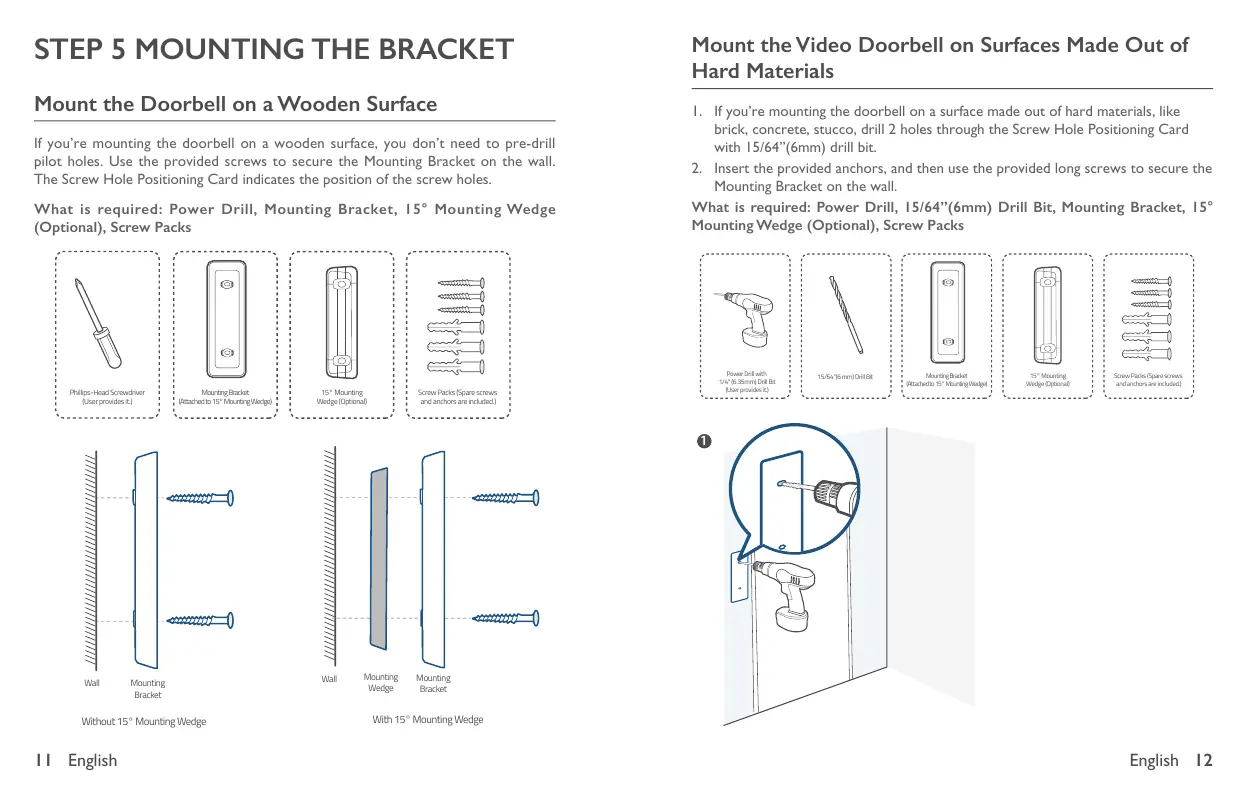
STEP 5 MOUNTING THE BRACKET
Mount the Doorbell on a Wooden Surface
If you’re mounting the doorbell on a wooden surface, you don’t need to pre-drill
pilot holes. Use the provided screws to secure the Mounting Bracket on the wall.
The Screw Hole Positioning Card indicates the position of the screw holes.
What is required: Power Drill, Mounting Bracket, 15° Mounting Wedge
(Optional), Screw Packs
Phillips-Head Screwdriver
(User provides it.)
15° Mounting
Wedge (Optional)
Screw Packs (Spare screws
and anchors are included.)
Mounting Bracket
(Attached to 15° Mounting Wedge)
Without 15° Mounting Wedge
With 15° Mounting Wedge
Mounting
Bracket
Wall
Mounting
Wedge
Mounting
Bracket
Wall
Mount the Video Doorbell on Surfaces Made Out of
Hard Materials
1. If you’re mounting the doorbell on a surface made out of hard materials, like
brick, concrete, stucco, drill 2 holes through the Screw Hole Positioning Card
with 15/64”(6mm) drill bit.
2. Insert the provided anchors, and then use the provided long screws to secure the
Mounting Bracket on the wall.
What is required: Power Drill, 15/64”(6mm) Drill Bit, Mounting Bracket, 15°
Mounting Wedge (Optional), Screw Packs
15° Mounting
Wedge (Opt ional)
Mounting Bracket
(Attached to 15° Mounting Wedge)
Power Drill with
1/4" (6.35mm) Drill Bit
(User provides it.)
Screw Packs (Spare screws
and anchors are included.)
15/64”(6 mm) Drill Bit
1