9
After Sales Support
(AU) 1300 886 649 (NZ) 0800 836 761 | info@tempo.org
Operating Instructions
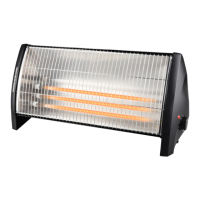
Set-up location requirements
Place the heater in an upright position on a firm, level, dry and heat-resistant
surface, taking into consideration all relevant safety information on the previous
pages. The appliance is suitable for providing auxiliary heating. It is not suitable
for use on its own to heat large spaces. Ensure that there is sufficient distance
from the wall, fixtures and other appliances. The distance must be at least 1m
at the front of the heater to exclude the risk of fire.
Connecting the heater
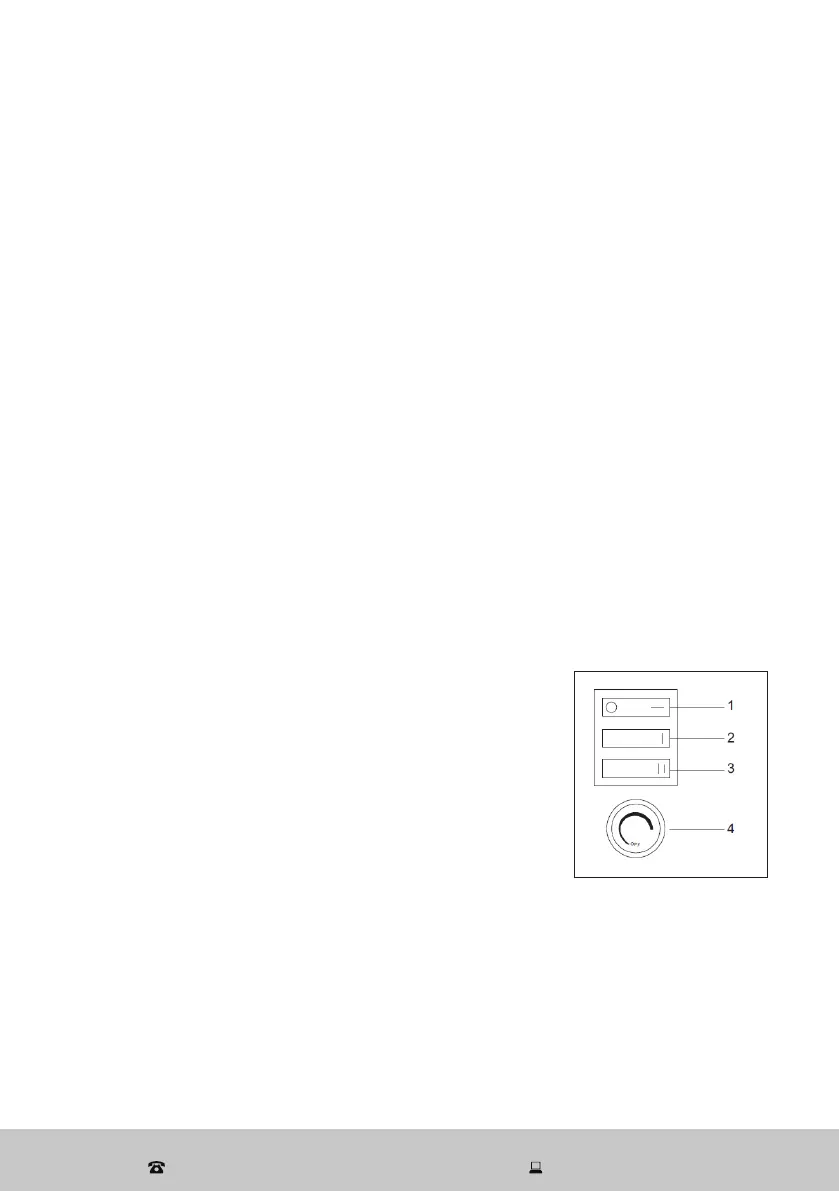
• Make sure the ON/OFF switch at the back of the appliance is in the OFF [ O ]
position, then plug in the heater and switch the power on at the outlet.
• Always use a separate socket that has no other high wattage appliances
connected at the same time – do not use a power board, socket adaptor or
extension cord.
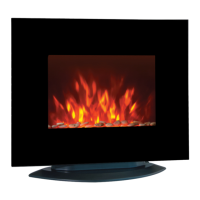
Switching on
• Once the plug is securely inserted, set the ON/OFF switch (1) to the ON [ I ]
position. The unit will start operation in ‘flame only’ mode.
• To run the appliance as a heater, you will have to select the heat output.
Selecting the heat output
• Press the [ I ] low heat switch (2) to select approximately 800W heat output
and fan operation.
• Press both the [ I ] low and [ iI ] high heat (3) switches
to select approximately 1600W heat output and fan
operation.
NOTE: You have to press both heat output buttons
for high heat output.
Setting the thermostat
• Turn the thermostat control (4) clockwise to the
maximum setting until the room is comfortably
warm.
• When the room temperature is comfortable, slowly rotate the knob
anticlockwise (turn to the left) until the heater cycles off. It will now cycle on
and off to maintain the temperature at this set level.
Switching off
• Press the ON/OFF [ O / I ] switch to switch the unit off. The flame effect, fan
operation and heating will stop.
• Unplug the heater from the power outlet.