9
After Sales Support
(AU) 1300 886 649 (NZ) 0800 836 761 | info@tempo.org
Getting Started (Cont.)
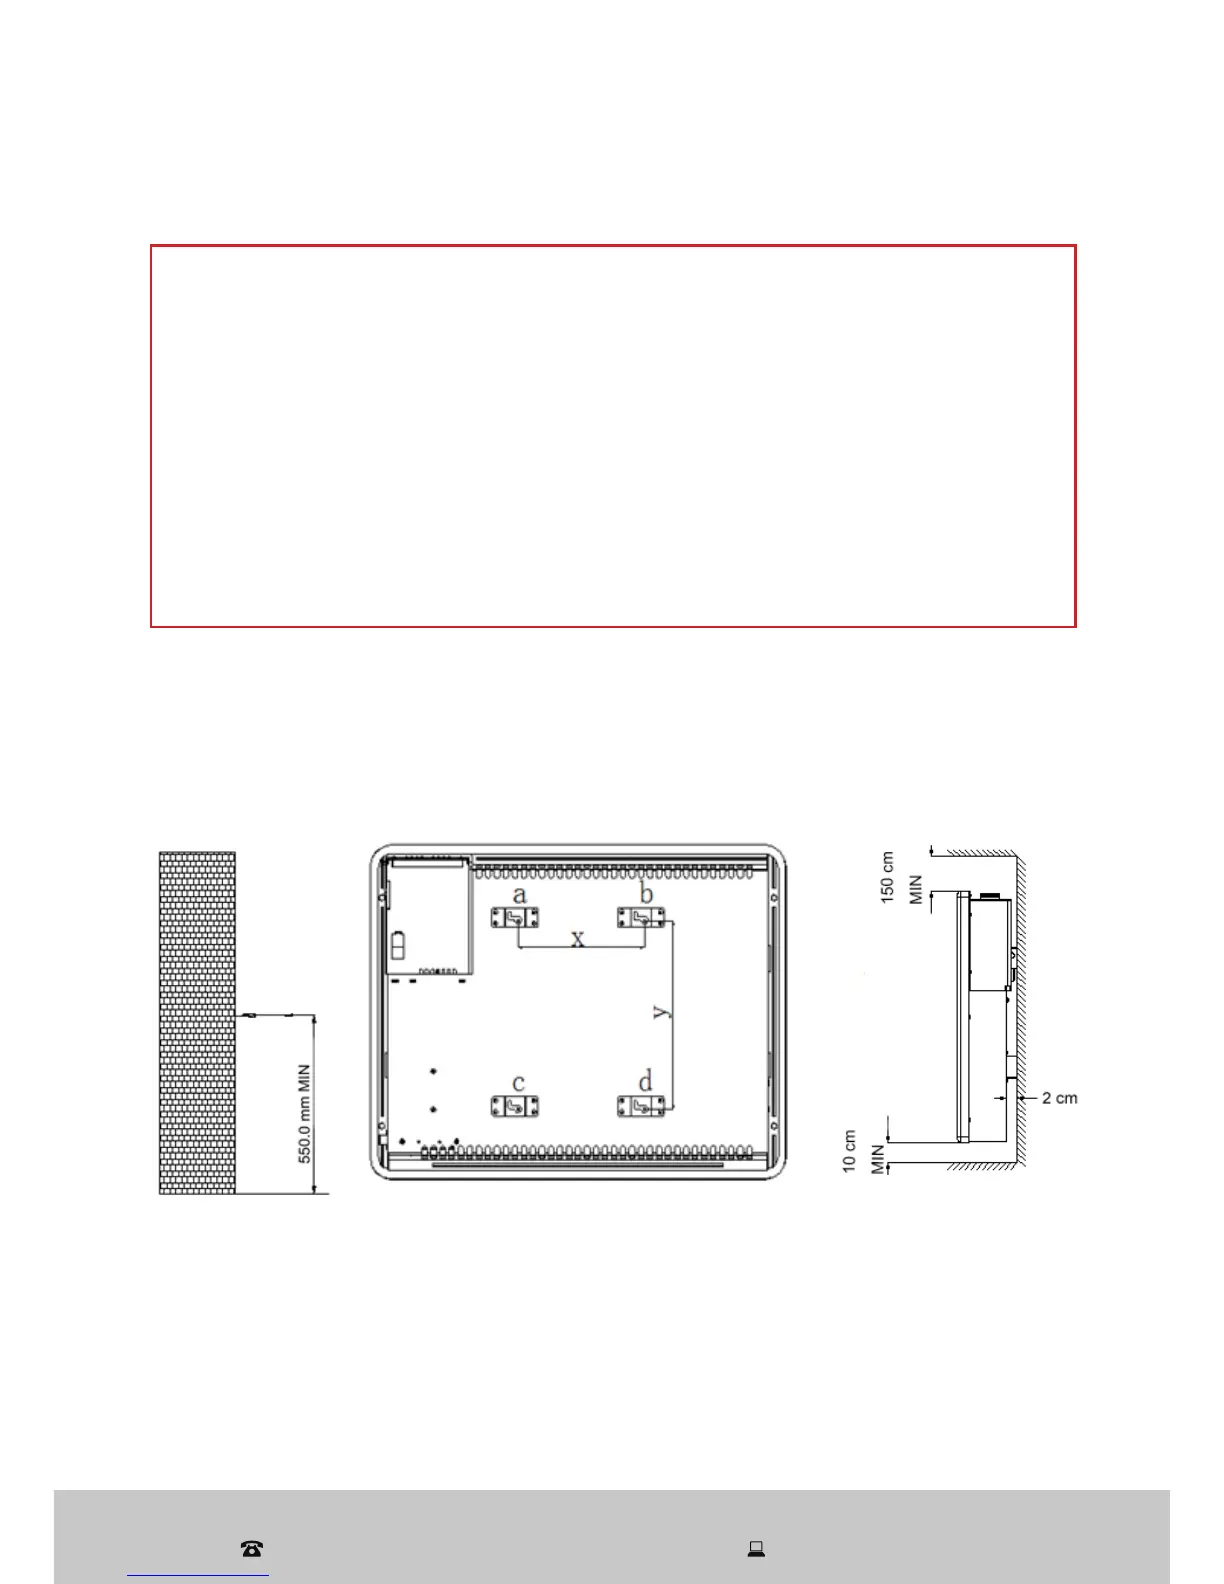
Wall-Mounting
IMPORTANT!
• Only mount this heater on a structurally sound, heat-resistant wall
area that is strong enough to hold the weight of the heater. If in doubt,
consult a builder. Do not mount this heater on the ceiling!
• The supplied installation hardware (and the instructions below) are for wall-
mounting the heater onto a masonry wall. Please obtain expert advice if
you intend to wall-mount the appliance onto any other type of wall.
• Make sure to maintain the following minimum clearances when wall-
mounting the heater: 10cm above the floor and 150cm below the ceiling.
• Do not connect the appliance to the mains power supply until
completely assembled, installed and adjusted.
To wall-mount the heater, follow the instructions below, or consult an expert.
1. If the stand feet are attached, take them off the heater. Follow the assembly
instructions in reverse order (see page 10).
2. Decide where you want to position the heater on the wall and mark the
positions for the wall plugs, following the illustration below.
3. Drill 4 holes Φ8 in the wall -- their diameter should be wide enough so they
just tightly contain the plastic wall plugs.
4. Insert the supplied wall plugs and screws into the holes, leaving the head
to protrude approximately 2–3mm.
5. Carefully position the heater over the large size of the holes in the brackets,
then slide it slightly to the left and then drop it gently into place.
x = 400mm y = 200mm