1. Secure child restraint to the vehicle seat.
• Child restraint is in Position #4 or #5 (p. 58).
• Anti-rebound Bar has been removed for forward-
facing use. (p. 28).
• Child restraint base sits flat on vehicle seat.
• To properly secure this child restraint it MUST NOT
move more than 2.5 cm (1 in.) from side to side or
front to back at the forward-facing belt path
(pages 42 and 47-48).
• Install with Lower Anchor connector Assembly
(p. 39) or vehicle seat belt (p. 45).
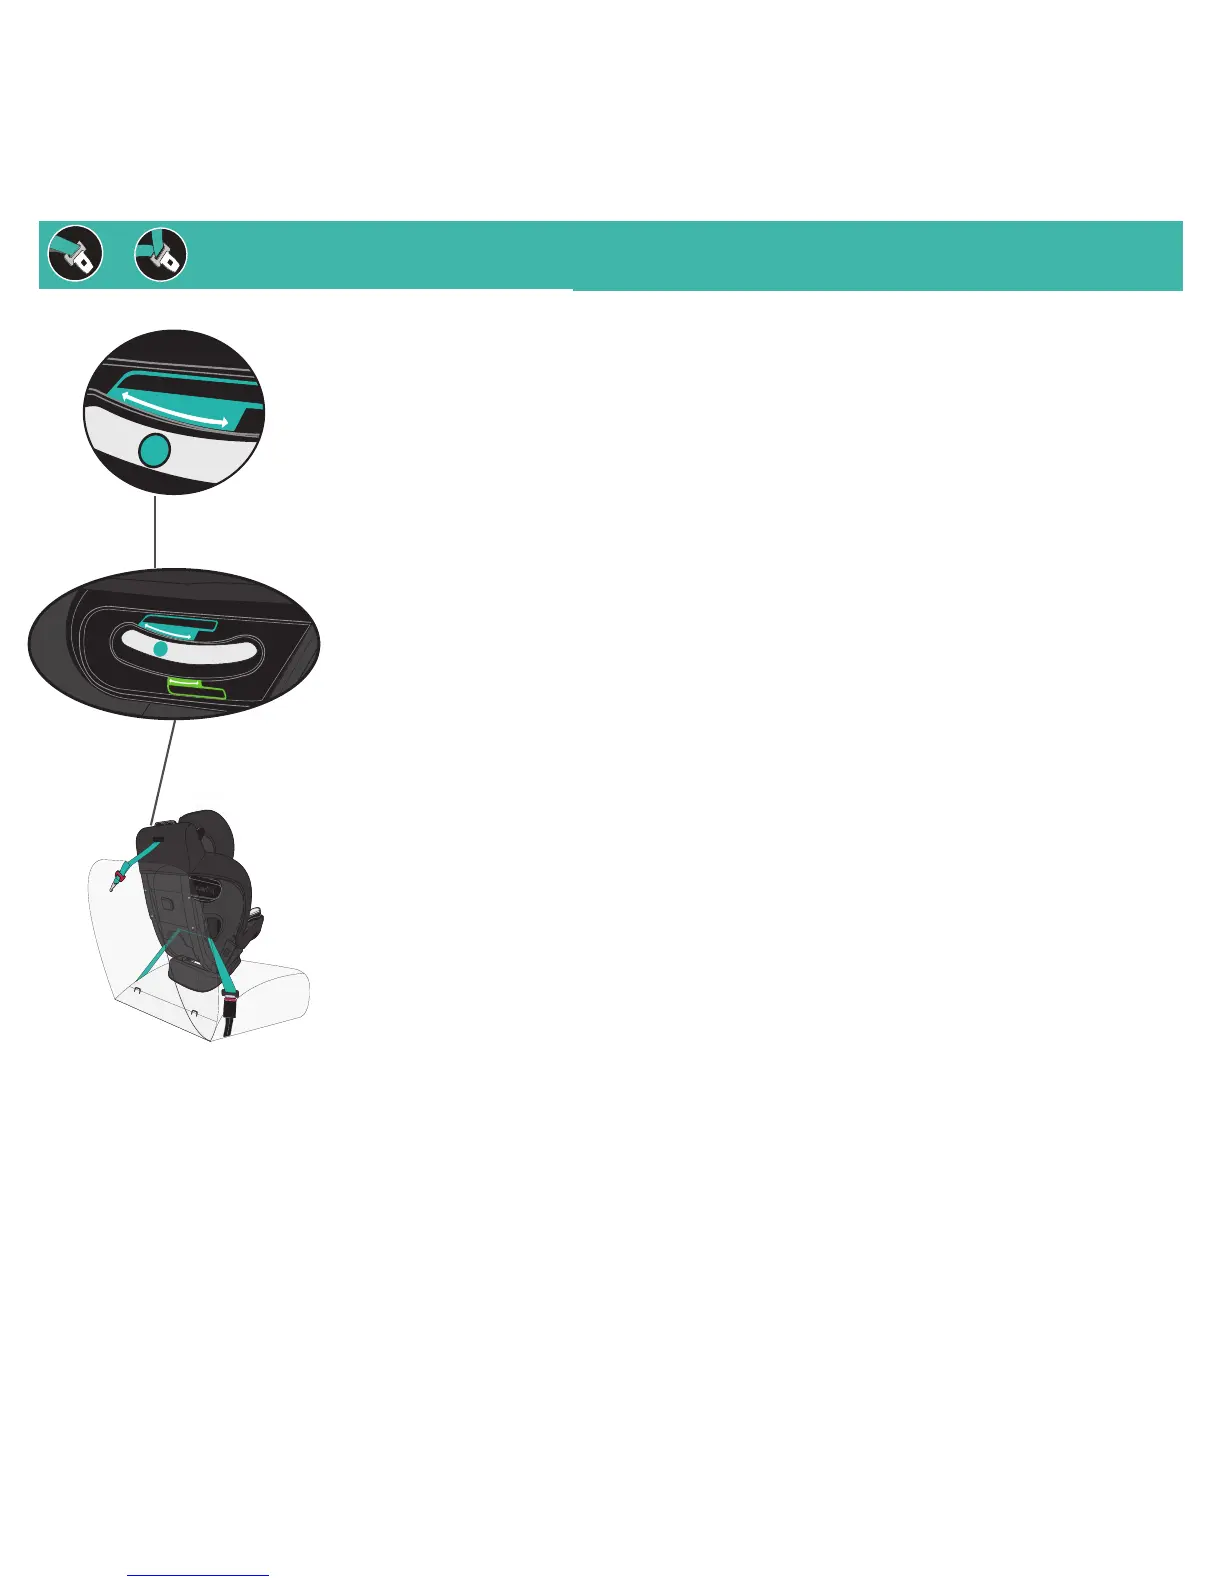
• Tether strap is securely attached and tightened
(p. 43 or 49).
• Install locking clip, if necessary (p. 13).
2. Set the child in the child restraint.
The top of the child’s ears are at or below the top of
the child restraint headrest.
• The child’s back and bottom are flat against the
back and bottom surfaces of the child restraint.
3. Fasten the buckle. Refer to page 61.
• Buckle tongues are fully engaged (p. 61).
4. Make necessary adjustments.
• Crotch strap should be snug against the child
(p. 61).
• Harness straps MUST be snug against the child’s
shoulders, with no slack (p. 61).
• Harness straps MUST start at or above shoulder
height (p. 38).
• The leveling ball is in the blue zone for
forward-facing use (pages 44 and 50).
5. Position and connect chest clip.
• Chest clip MUST be at armpit level (p. 61).
Forward-facing CHECKLIST
Forward-facing Installation
with Vehicle Seat Belt