TOOLS REQUIRED
Caulking gun Phillips screwdriver Scissors
HARDWARE REQUIRED (NOT INCLUDED)
Screws (4) Latex caulking
Use and Care Guide
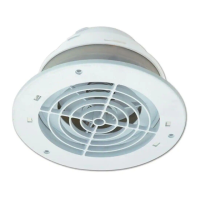
Dryer Vent Kit with Guard
Installation - IMPORTANT: Before assembly, remove the plastic strap from the cap.
1
ASSEMBLING THE
ALUMINUM PIPE AND CAP
□ Press the sides of the aluminum
pipe together and lock them into
place. Snap the guard onto the
louvered cap.
2
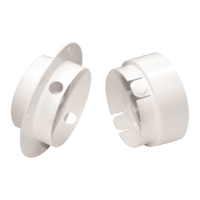
ATTACHING THE VENT CAP TO
THE PIPE
□ Attach the vent cap to the pipe.
Ensure the pipe ts snugly inside
the collar. Align the clips on the
collar (A) so they snap into the pipe
slots (B).
AB
3
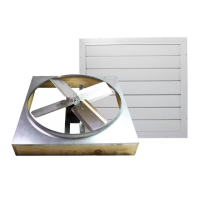
CUTTING A HOLE THROUGH
THE WALL
□ Cut a 4 ¼ in. diameter hole through
the wall, or insert a window plate
with a 4 ¼ in. diameter hole.
NOTICE: Ensure the appropriate tool is used
to cut the hole in the wall according to the type
of wall material.
4 ¼ in
10.8 cm
4
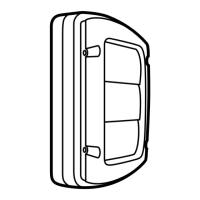
INSTALLING THE
EXHAUST HOOD
□ From the outside, pass the pipe
through the hole opening until
the vent cap lies ush against the
outside wall surface. Secure the
vent cap to the wall by screwing it
into place and/or caulking around
the reveal.
5
ATTACHING THE DRYER DUCT
TO THE CLOTHES DRYER
□ Slide one end of the duct over the
exhaust outlet of the clothes dryer,
and secure it with the clamp.
6
ATTACHING THE DRYER DUCT
TO THE TAILPIECE
□ With the dryer in its permanent
position, extend the duct, and
measure it to cover at least 2 in.
of exhaust tailpiece. Cut off any
excess duct, and secure this end
with the adjustable clamp.
Safety Information
IMPORTANT: Vent the exhaust hood outdoors through a wall or window opening as close as possible to the dryer.
Warranty
WHAT IS COVERED
All merchandise is warranted to be free from defects in workmanship and material for one year from the date of purchase. This includes normal wear and
performance failure on items. The manufacturer will replace or repair at their option.
WHAT IS NOT COVERED
This warranty only covers normal wear and performance failure. It does not cover any malfunction, performance failure, or defect arising from the misuse,
abuse, neglect, or modication of the product. Any damage or malfunction inicted upon the product by the user or other external sources, or any failure to
comply with the warnings and instructions, is not covered.
For further assistance visit www.HomeDepot.com.
Item # 609-241
Model # TD48PGKHD6
HOMEDEPOT.COM