34
SEASONING
Customized programming
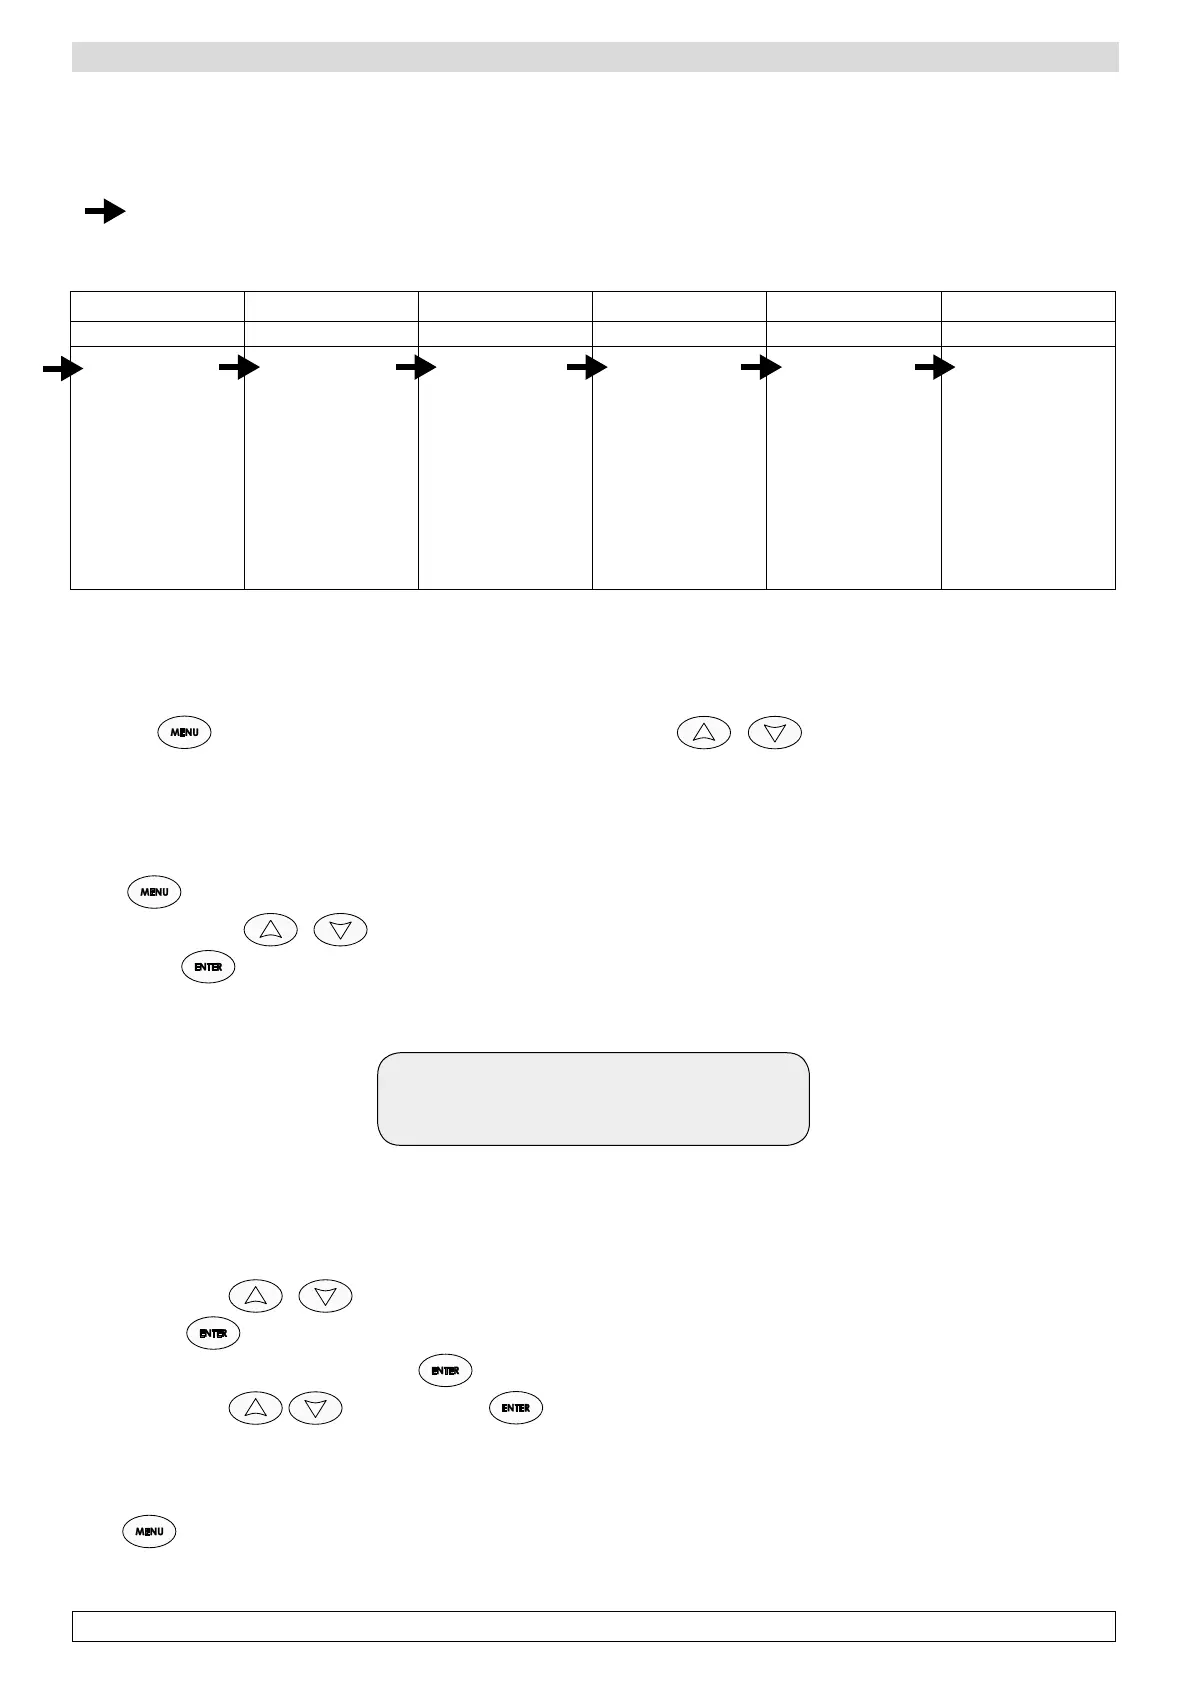
To set a customized program (2 pre-set and 18 changeable by end-users), it is useful to know in advance all the data to be entered
according to the sequence shown in the chart below.
The setting of each parameter (temperature, humidity, duration etc.) must be completed according to a horizontal way of working
(
). This means that you start setting the temperature setpoints of all the six phases, then proceed with humidity value for all the
six phases, and go ahead with all other parameters.
PHASE 1 PHASE 2 PHASE 3 PHASE 4 PHASE 5 PHASE 6
STEWING DRYING DRYING DRYING DRYING SEASONING
p Set temp. .....
p Hum .....
p Length .....
p Extr. .....
p Rest
Type:.....
Delay: .....
Duration: .....
Interval: .....
Days: .....
p Set temp. .....
p Hum .....
p Length .....
p Extr. .....
p Rest
Type:.....
Delay: .....
Duration: .....
Interval: .....
Days: .....
p Set temp. .....
p Hum .....
p Length .....
p Extr. .....
p Rest
Type:.....
Delay: .....
Duration: .....
Interval: .....
Days: .....
p Set temp. .....
p Hum .....
p Length .....
p Extr. .....
p Rest
Type:.....
Delay: .....
Duration: .....
Interval: .....
Days: .....
p Set temp. .....
p Hum .....
p Length .....
p Extr. .....
p Rest
Type:.....
Delay: .....
Duration: .....
Interval: .....
Days: .....
p Set temp. .....
p Hum .....
p Length .....
p Extr. .....
p Rest
Type:.....
Delay: .....
Duration: .....
Interval: .....
Days: .....
ATTENTION: The chart above indicates only the changeable values present in the main menu which are important for the setting of
a complete seasoning cycle. To see the other labels of the menu, please read the section “Description of Main Menu”.
DESCRIPTION OF MAIN MENU:
Press the
button to access the main Menu, to be scrolled with the buttons and composed of the following
labels:
p Set Point 01
Temperature value of each phase.
-Press ,
-Scroll the menu with until you find Menu 01 Set point,
-Confirm with ,
-The display shows:
Set 1 12° C
Current 20° C
Indicates the current temperature setpoint of phase 1 (20°C)
and the value to be modified (required temp. 12°C)
-Modify values with
-Confirm with
.
-Modify the setpoint of next phase pressing
for 5 seconds.
-Modify values with and confirm with .
-Repeat the same actions for all the six phases.
The required temperature values for each phase are set.
-Press to come back to the main menu.