7
Ver. 0517
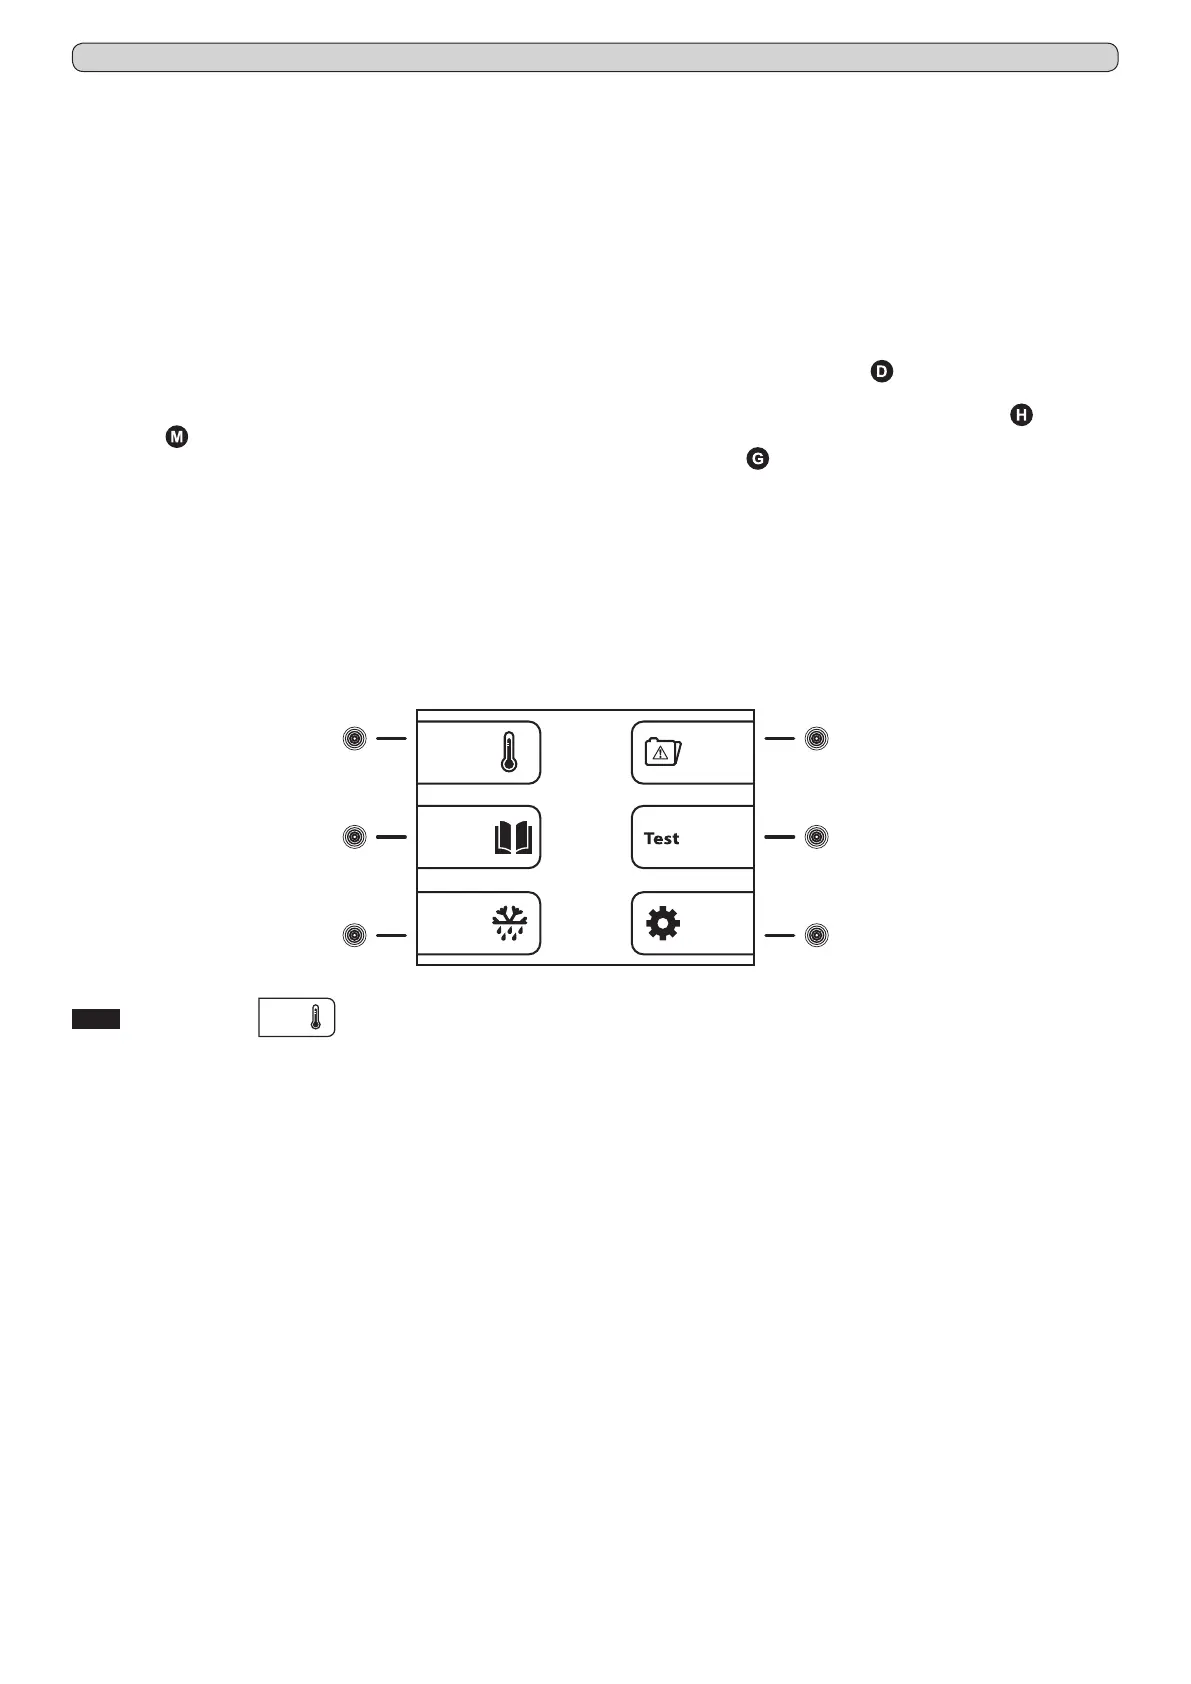
Fig.12
(5)
(6)
(2)
(3)
(4) (7)
- press the MENU touch-button (9) to access to the main menu (Fig.12)
- press the touch-button (7) to access to the setting menu (Fig.15)
- press the touch-button (2) to select the menu “Date and time”
- using the touch-buttons (3)ç and (6)è highlight the position in the calendar or in the clock that should be modied
- using the touch-buttons (4)- and (7)+ to set the desired value
- repeat the last 2 operations for all the numerical values in both calendar and clock, then press the ENTER touch-button (12)
to conrm the new settings
8.2.5 General information of the xPRO control panel functioning
The xPRO control panel surveys and has the control of all the appliance functioning parameters and devices. The PRO control panel
is provided with a back-up battery that grants its operations even in case of power failure, for about 48 (depending from the charge
status). The battery charge status is automatically controlled through a special battery charging module in order to grant constantly
the maximum battery efciency. In the top part of the main screen-shot, it is always present an icon indicating the battery status
(showing charging in progress or the actual status of charge through the number of green colour charging steps).
The xPRO control panel alerts in case of abnormal functioning status with a both a visual indication (red colour icon and alarm
description ) and an acoustic signalling through a buzzer.
The acoustic alarm has muting facilities, pressing the touch-button (6) (with icon
on display) and it is provided of automatic
re-activation facilities once passed the pre-set time programmable through the specic menu “Reactivation alarm after muting” in
case the alarm condition persists.
For further information about the alarms and their functioning check the paragraphs describing every single signalled alarm condi-
tion. Par. 8.3.4 and Par. 8.3.5.
8.3 THE MAIN MENU
To access to the Main Menu (Fig.12) press the MENU touch-button (9) (Fig.10). (enter the touch-buttons unlocking protection code
0010 if needed)
8.3.1 Setpoint Menu
(touch-button (2) Fig.12)
The appliance is factory set for operation at the following temperature:
- serie MPR xPRO: +2°C / +15°C
- serie LR xPRO: 0°C / +15°C
- serie BBR xPRO: +4C
- serie LFG xPRO: -5°C / -20°C
- serie LF xPRO: -5°C / -20°C ~ -25°C
- serie LDF xPRO: -15°C / -30°C
- serie PDF xPRO: -25°C / -40°C
- serie LCRR xPRO: 0°C / +15°C (refrigerator compartment), 0°C / +15° (refrigerator compartment)
- serie MPRR xPRO: 2°C / +15°C (refrigerator compartment), 2°C / +15°C (refrigerator compartment)
- serie LCRF xPRO: 0°C / +15°C (refrigerator compartment), -5°C / -20°C ~ -25°C (freezer compartment)
To set the desired working temperature, proceed as follow:
- from the main menu screen-shot, press the touch-button (2) to access to the SETPOINT menu
- using the touch-buttons (4)- and (7)+ to set the desired value
- press the ENTER touch-button (12) to conrm the new setting and the ESC touch-button (11) to return back to the previous
menu
Press the MENU touch-button to return back to the main menu screen-shot without making any modication to the Setpoint value.
If no touch-buttons are pressed for 50 seconds, automatically, the xPRO control panel return to the main screen-shot.