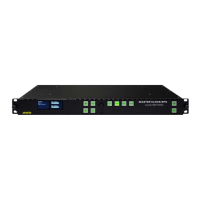
Model 5700MSC
Master Clock System
Page - 6 Revision 1.0
Ctl, Vitc Line 1, Vitc Line 2, Dropframe Ctl, Color Frame, Set Jam Time, Jam Output, Jam all
Vitc, Time offset, Time Zone, and DST enable menu items.
• Server Protocols – The 5700MSC will support Network Time Protocol and Precision Time
Protocols. These are configured by pressing the GENERAL button and entering the NTP rules,
PTP All ports, PTP GigE 1, PTP GigE 2, PTP 10G 1, and PTP 10G 2 sub-menus. The
5700MSC hosts an NTP server and also sends out periodic NTP broadcasts. NTP time should
always be UTC. PTP broadcast rates are determined using the PTP sub-menus listed above.
• Test Generator Outputs – Timecode can be “burned-in” at the bottom of any of the the
5700MSC test signal outputs. These are configured by pressing the OUTPUT button and
entering the appropriate TG menu. The time is controlled by the TC Burn In, Dropframe Ctl, Set
Jam Time, Jam Output, Jam all VitcLtc, Time Offset, Time Zone, and DST enable sub-menu
items.
1.11. FINAL STEPS OF SET UP AND SECURING ALL CONNECTIONS
Once the 5700MSC has been configured, the various STATUS screens should be checked to ensure
there are no items displayed with a red or yellow background. The left LCD screen should show “Sys
OK” and “Ref OK” with a green background in the bottom corners.
The power supply and fan modules (accessed by removing the front panel) should be secured to the
chassis by fastening the Phillips mounting screw. The GPS D-Sub connector on the back of the unit
should be secured to the 5700MSC using mounting screws. The AC power cords can be fixed to the
unit using the retaining clips provided.
1.12. ACCESS CONTROL
The engineering menu password can be changed from the default to prevent unauthorized tampering
of SNMP and menu access control settings. The SNMP Ctl menu item can be changed to SNMP off or
SNMP status to prevent remote SNMP control of the unit. Furthermore, pressing the PANEL LOCK
button can lock the front panel. This prevents accidental changes by someone bumping or leaning into
the front panel. The front panel can be unlocked by pressing the SELECT and PANEL LOCK buttons
simultaneously.