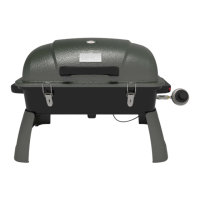
Ligh ng Main Burner
WARNING:
A
emp ng to light the burner with the lid closed may cause an explosion. Make sure there are no obstruc ons of airflow to the
gas unit. Spiders and insects can nest and clog the burner/venturi tube at the orifice. A clogged burner tube can lead to a fire
beneath the appliance.
1. Open lid while lighting burners.
2. Turn gas supply "ON" by connec
ng propane cylinder to regulator inlet fi ng.
3. Press and turn the control knob to “HIGH” then press the igniter bu
on immediately.
4.
After lighting, observe the burner flame to make sure all burner ports are lighted - a blue/yellow
flame of 2.5–5 cm (1–2 in) from the burner ports should appear.
5. If igni
on does not take place, press the igniter bu on 2–3 mes.
6. If igni
on s ll does not take place, turn the burner control knob to the “OFF” posi
on. Wait five
minutes with lid open for the gas to clear and repeat the lighting procedure.
7. Adjust valve knob to desired cooking temperature.
Using the Ligh ng S ck to Light the Main Burners
1. Insert a match into the end of lighng sck. Light the match.
2. Once lit, place the flame through the hole on le side of barbecue body to reach the burner ports.
(see diagram on the right).
3. Push and turn control knob to “HIGH” seng. Aer lighng observe the burner flame, make
sure all burner ports are lighted -a blue/yellow flame of 2.5–5 cm (1–2 in) from the burner ports
should appear.
4. If ignion sll does not take place, turn the burner control knob to the “OFF” posion. Wait five
minutes with lid open for the gas to clear and repeat the lighng procedure.
5. Adjust valve knob to desired cooking temperature.
PRECAUTIONS
:
1) Push down
2) Turn counter-clockwise to “on”
3) Turn clockwise to “off”
1. Aer lighng, check the burner flame. Make sure all burner ports are lit.
2. If the burner flame goes out during operaon, immediately turn the gas “OFF”. Open lid to let the gas clear for at least 5
minutes before relighng.
3. Before cooking on the grill for the first me, operate the grill for approximately 15 minutes with the lid closed and the
gas turned on “HIGH”. This will “heat clean” the internal parts and dissipate odour from the manufacturing process and
painted finish.
4. Clean the grill aer each use. DO NOT use abrasive or flammable cleaners. These may damage parts of the grill and cause a
fire.
Confirm that the burner is properly lit and that the flame paern is normal (see fig. A,B and C below for the proper flame
paerns). If the flame
paern is other than normal, consult Troubleshoong on page 18 for correcve acon.
”Flare-Ups”
“Flare-ups” sometimes occur when food drippings fall onto the hot heat distribution plate or burners and ignite. Some
flaring is normal and desirable as it helps impart the unique flavours associated with grilled foods. Controlling the intensity
of the flare-ups is necessary, however, in order to avoid burned or unevenly cooked foods and to prevent the possibility
of accidental fire.
between 2.5 – 5 cm (1–2 in) high.
flames – too much air. flames – too lile air.
 Loading...