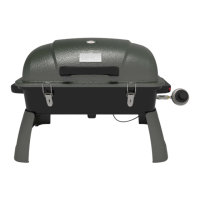
Step 6
Insert the grease cup (O) into the two guides underneath the grill and push forward
un
l it is in place.
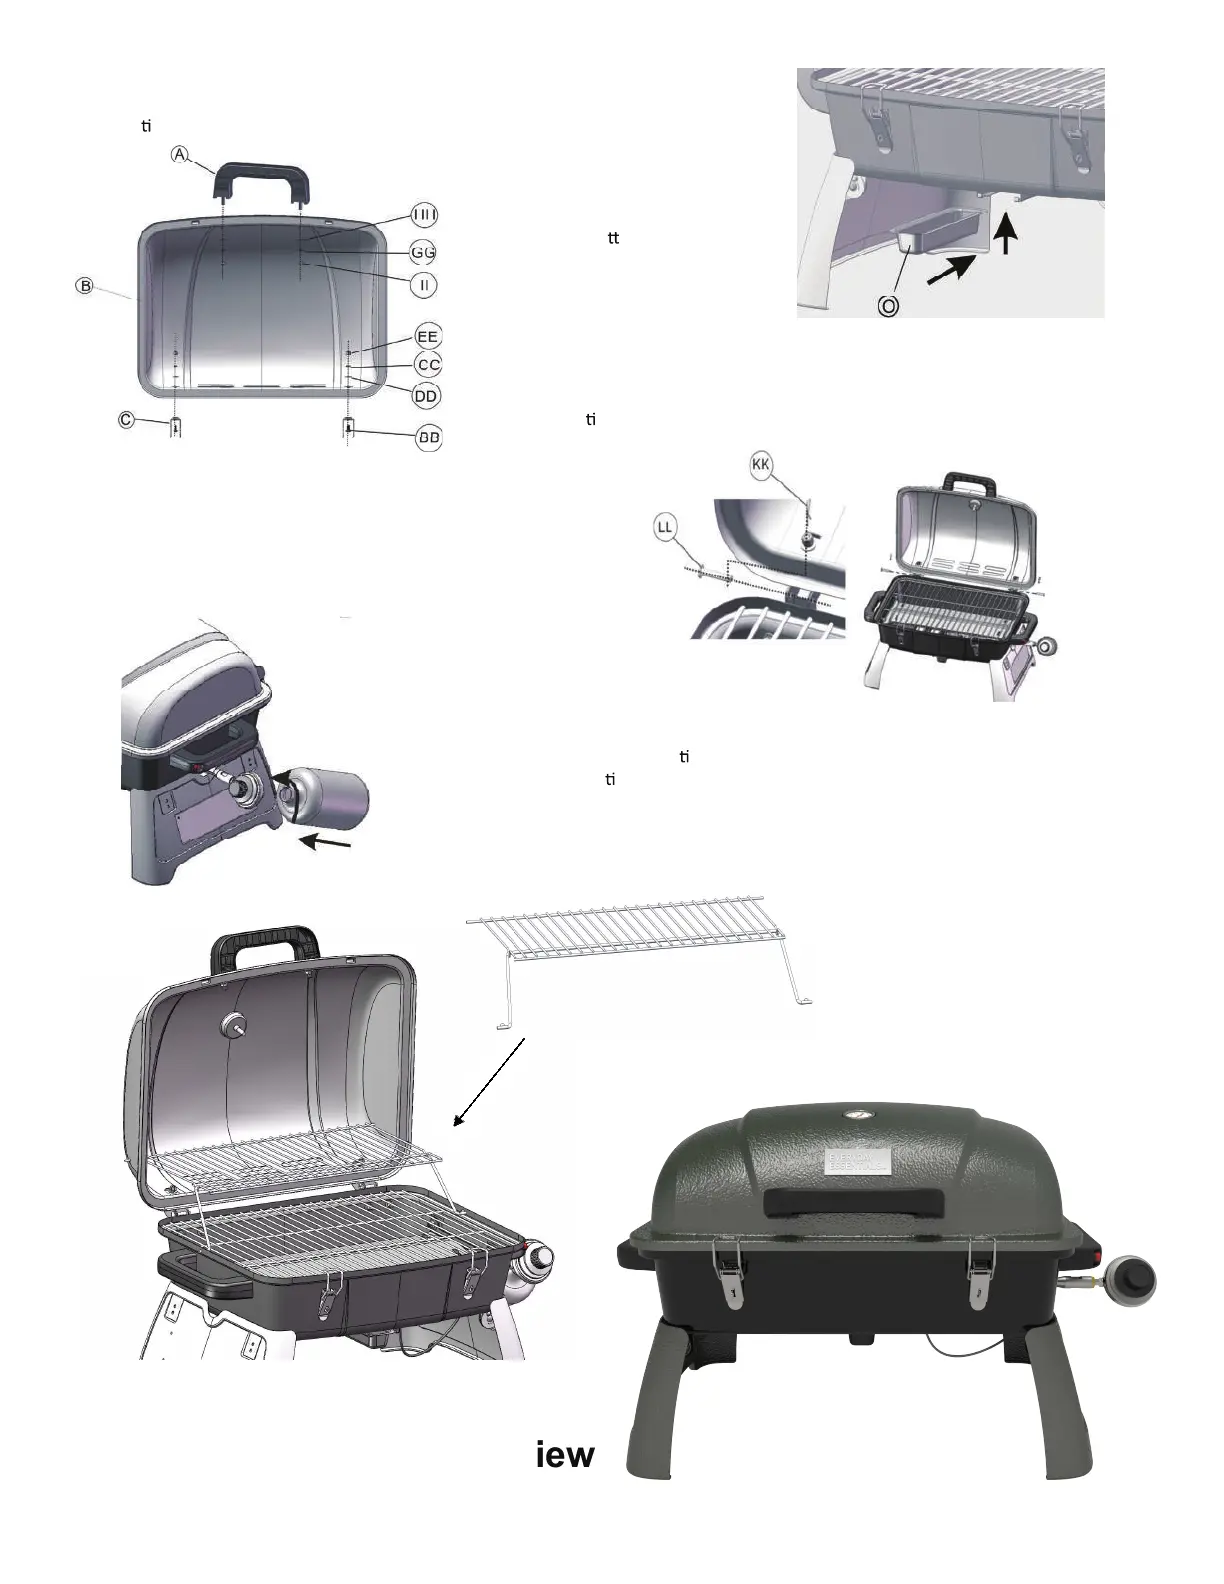
Step 7
a) Insert the pre-a ached bolts on the
lid handle (A) into the holes on the
front of the lid and seal with one flat
washer (HH), one spring washer (GG),
and one nut (II).
b) Align the holes on the back side of lid with the holes on the upper hinge (C).
c) Insert one bolt (BB) into each pre-drilled ho
le and seal with one flat washer (DD),
one spring washer (CC) and one nut (EE).
d) Go back and
ghten all the bolts using the screwdriver provided.
Step 8
a) Align the holes on the upper hinges on the back of
the lid with the holes of the lower hinges on the back
of the body.
b) Insert one lid pin (LL) into each hole.
c) Insert one R pin (KK) into the hole on the front of the
lid pin.
Step 9
a) Screw the gas
cylinder clockwise
into the thread
underneath the regulator valve un
l it is in place.
b) Make certain the connec