® BPM68 ® BPM68
Note:
Blood pressure naturally varies from one arm to the other; therefore,
measure your blood pressure on the same arm to ensure comparability
of the two readings.
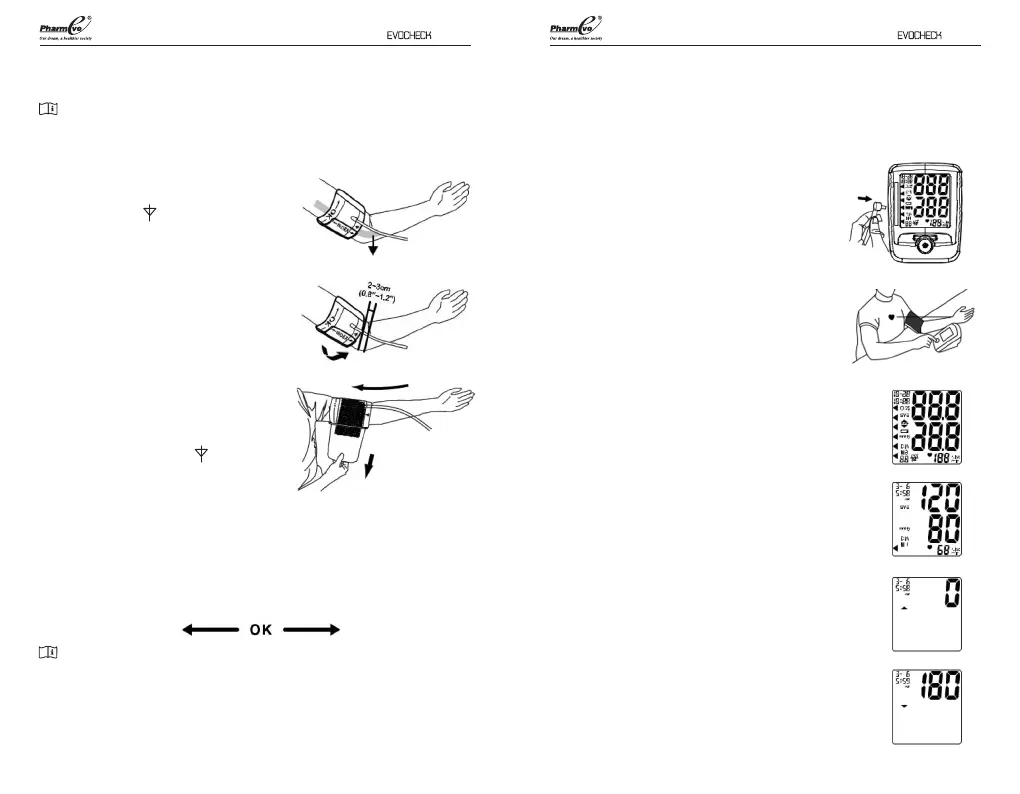
4. Insert your left arm into the cu loop.
Position the ( ) mark over the main
artery on the inside of your arm.
5. The bottom edge of the cu should
be positioned approximately one
inch above the elbow joint.
6. Reaching underneath your left arm
with your right hand, pull the end of
the cu towards your body to tighten
the cu. Wrap and secure the cu,
making sure that the ( ) mark
remains in place as shown.
7. The cu should t comfortably, yet
snugly around your arm. You should be able to insert one nger easily
between your arm and the cu.
8. The cu size is suitable for use when the vertical ‘index’ mark is within
the horizontal OK range. A dierent size cu is needed if the ‘index’
mark is outside the OK range.
Note:
If you are uncomfortable with applying your cu, please seek the assistance
of another person or work with your physician to practice the cu
application. Incorrectly applied cu may result in inaccurate readings.
Main Artery
Measurement of Blood Pressure
and Pulse Rate
Please read the preceding portions of this
manual prior to taking your rst reading.
1. Position the monitor on a at, stable surface
with the digital display in view.
2. Insert the cu tubing connector into the port
on the left side of your monitor.
3. Rest your elbow on a solid surface with your
palm facing upward. Elevate your arm so
that the cu is at the same level as your
heart. Relax your left hand.
4. Press the POWER button. This will turn the
power on.
5. After the self-test, the values for the last
reading will appear on the display.
6. The blood pressure monitor starts to
measure.
7. The cu will automatically begin to inate,
with the display showing the increasing
pressure in the cu. As the pressure
increases, an arrow pointing up will appear
on the display.
8. When the ination has reached optimum
level, the display will begin to show the
decreasing pressure; the screen will display
an arrow pointing down while you feel the
pressure of the cu decrease.
1110