16 17
www.evolutionpowertools.com www.evolutionpowertools.com
EN
NL
IT
FR
10. Replace the chip collector and securely tighten the two
thumb screws.
11. Check that the arbor lock is fully released by manually
rotating the blade.
12. Check the operation of the safety guard.
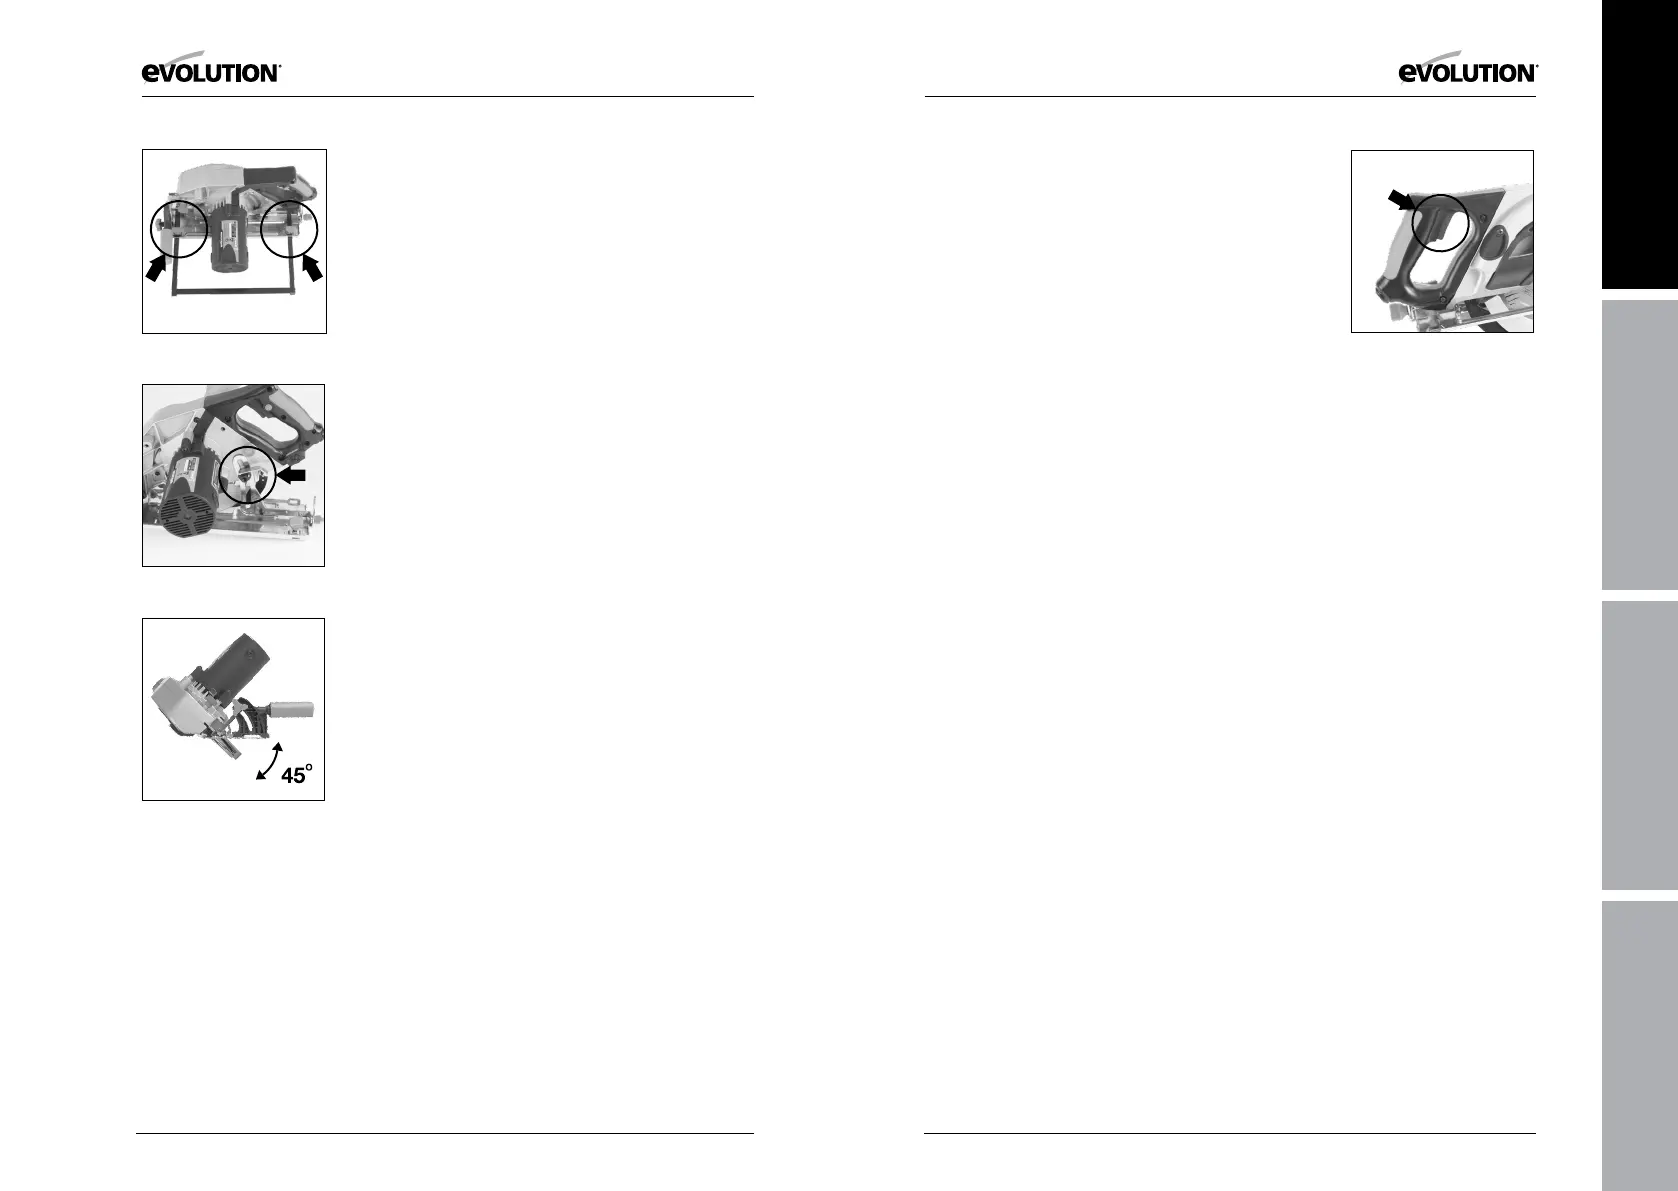
Parallel Edge Guide
A parallel guide (for help when rip cutting) can be fitted to the
sole plate of the machine The guides arms should be inserted
into the rectangular slots in the turned up edges of the sole
plate, and slid under the locking thumb screws. (Fig. 5)
Note: The edge guide can be fitted to either side of the sole
plate and should only be fitted and adjusted with the machine
disconnected from the power supply.
Adjust the edge guide so that it is at the required distance from
the blade and tighten the two thumb screws. Check that the
edge guide is parallel to the saw blade.
Adjustment of the Cutting Depth
Release the Lever Lock to adjust to the required cutting depth.
Adjust the cutting depth to the thickness of the workpiece.
Less than a full tooth of the blade teeth should be visible below
the workpiece. Tighten the Lever Lock securely to lock in the
required position. (Fig.6)
Adjustment of the Cutting Angle
1. Loosen the Bevel Locking Screw found at the front of the saw.
2. Loosen the Rear Bevel Locking Screw found at the rear of the
machines sole plate.
3. Tilt the blade to the required angle. (Fig. 7)
4. Tighten both Bevel Locking Screws securely
Note: An angle scale (0
O
-45
O
) is incorporated into the Bevel
Locking quadrant to aid setting.
Operating Advice
Carry out routine safety checks each time you use the machine.
Check that all safety guards are operating correctly, and that all
adjustment handles/screws are tightened securely.
Check that the blade is secure and installed correctly. Also check
that it is the correct blade for the material being cut.
Check the integrity of the power cord.
Always clamp the workpiece to a rigid support such as a bench
or saw horse whenever possible.
ON/OFF Trigger Switch
This machine is equipped with a safety start trigger switch.
To start the machine:
• Push in the safety lock button on the side of the
handle with your thumb.
• Depress the main trigger switch to start the motor. (Fig. 8)
Chip Collector
This machine is fitted with a chip collector to capture metal
chips. The chip collector cover plate is provided with a
transparent ‘window’ so that the operator can see the contents
and empty when necessary.
To remove and empty the chip collector:
• Loosen the two chip collector thumb screws.
• Ease the chip collector from the machine.
• Empty the contents of the chip collector by tipping the
collector upside down over a suitable waste container,
allowing the contents to fall out.
Note: To maintain operational efficiency we recommend that
the collector is emptied when approximately 60% full. Dispose
of the contents of the chip collector in an environmentally
responsible manner.
• Replace the chip collector and securely tighten
the (2) thumb screws.
Fig. 5
Fig. 8
Fig. 6
Fig. 7