14 15
www.evolutionpowertools.com www.evolutionpowertools.com
EN
NL
IT
FR
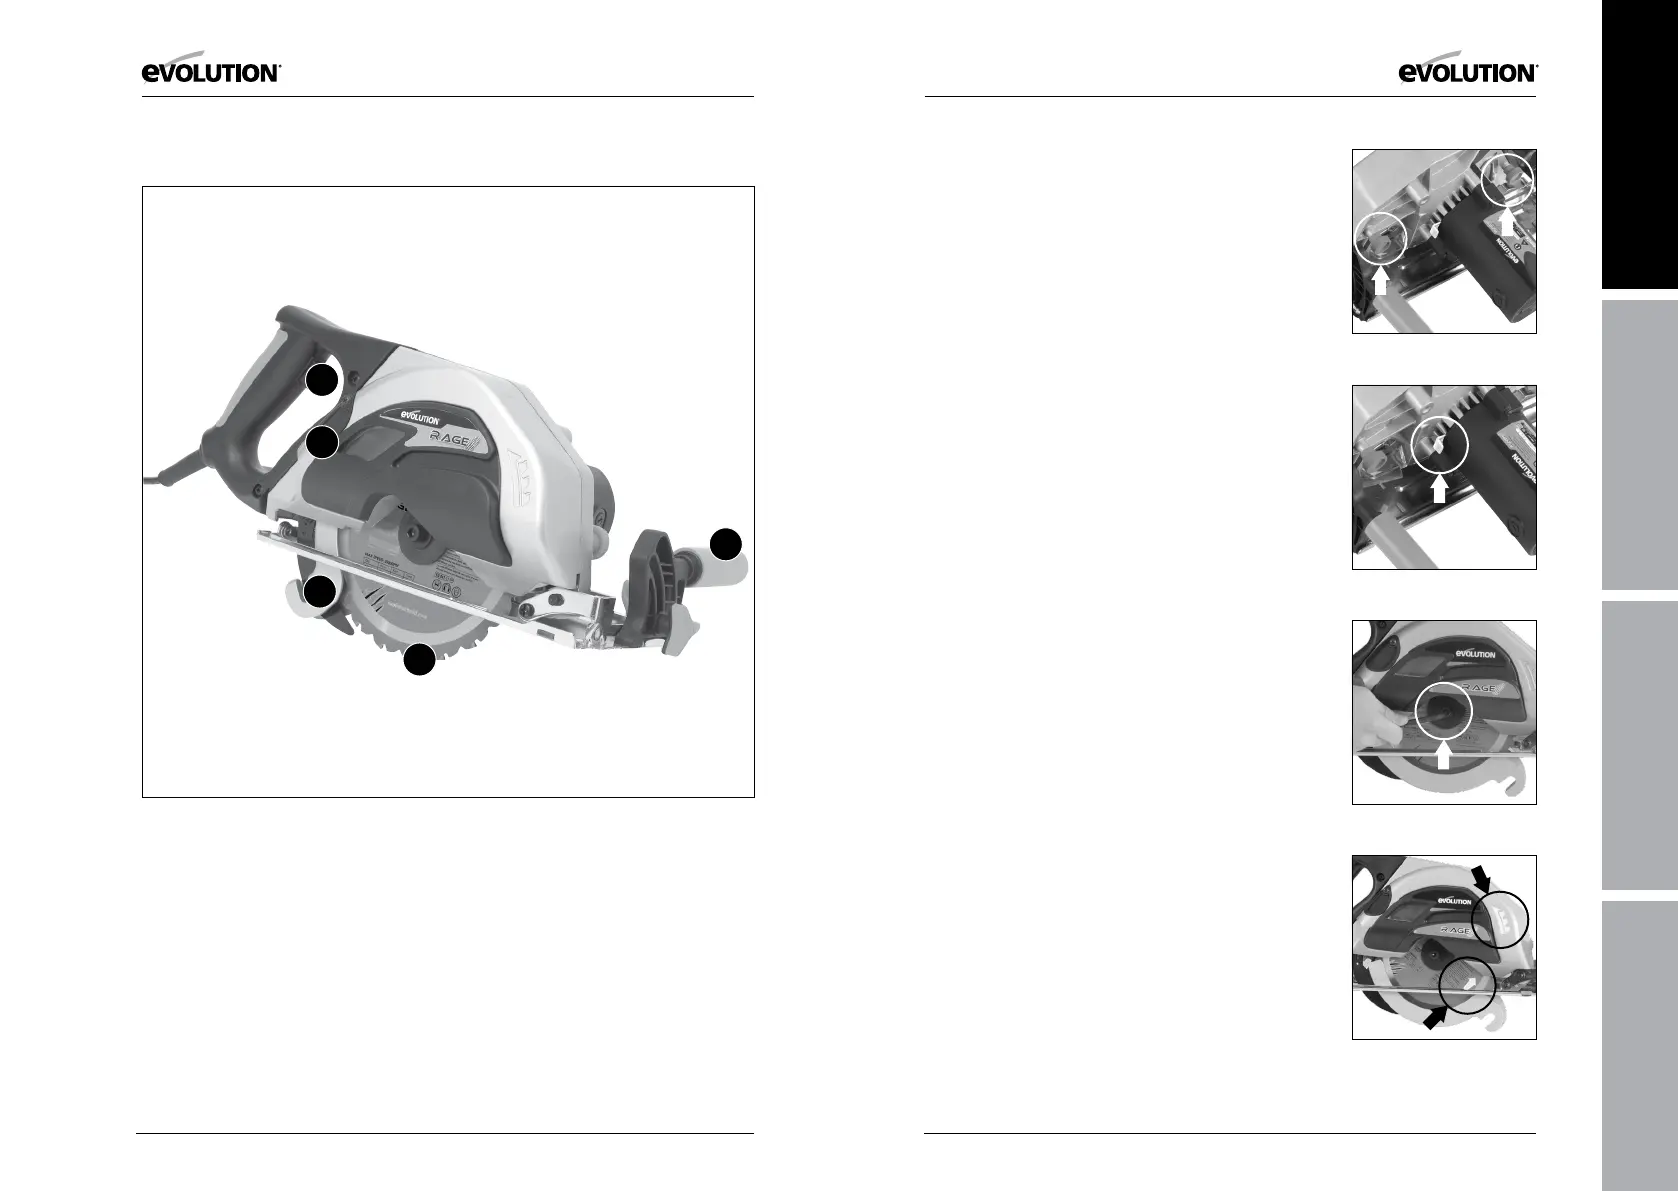
MACHINE OVERVIEW
1. ON/OFF TRIGGER SWITCH
2. AUXILLARY FRONT HANDLE
3. DISCHARGE PORT
4. LOWER BLADE GUARD
5. FITTED BLADE IN SITU
GETTING STARTED - PREPARATION
WARNING: Always disconnect the saw from the power source
before making adjustments.
WARNING: Never start the saw with the cutting edge of the
saw blade in contact with the workpiece surface. Do not retract
blade guard manually. Guard retracts automatically.
This saw is equipped with an approved cord and plug for its
intended Country of use. Do not alter or modify the power cord.
Installing or Removing a Blade
WARNING: Only use genuine Evolution blades which are designed
for this machine. Ensure that the maximum speed of the blade is
compatible with the machine. Only perform this operation with
the machine disconnected from the power supply.
Note: It is recommended that the operator considers wearing
protective gloves when handling the blade during installation
or when changing the machines blade.
1. Place saw on a level, secure surface.
2. Remove the chip collector from the machine by undoing the
(2) large thumb screws. (Fig. 1)
Note: The chip collector thumb screws are ‘captive’ and cannot
be removed from the machine.
3. Lock the machine arbor by engaging the arbor lock. (Fig. 2)
4. Using the supplied Allen Key loosen and remove the arbor
socket headed screw and outer blade drive flange. (Fig. 3)
5. Remove the saw blade.
6. Thoroughly clean inner and outer blade drive flanges and
blade mounting surface before installing a new blade.
7. Ensure that the direction of rotation arrows printed on the
blade, match the direction of rotation arrow found on the chip
collection cover. (Fig. 4)
8. Reinstall the outer drive flange and the arbor socket headed
screw.
9. Engage the arbor lock and tighten the arbor socket headed
screw securely using the Allen key.
Note : The socket headed arbor screw has a RH thread.
Fig. 1
5
4
3
1
2
Fig. 2
Fig. 3
Fig. 4