30 31
www.evolutionpowertools.comwww.evolutionpowertools.com
EN
FR
DE
NL
IT
JP
Ensure that the Crown Moulding is correctly positioned on the
rotary table before making the cut.
When cutting operations are completed, return the Cutting
Head to the vertical position and return the Crown Moulding
Pin to its outer (disengaged) positioned.
8.7
COMPOUND CUTTING Fig. 36
A compound cut is a combination of a mitre and bevel cut
employed simultaneously.
When a compound cut is required, select the desired bevel and
mitre positions as previously described.
Compound cutting with the sliding carriage system deployed is
possible. Always check that the sliding blade does not interfere
with the machines fence or any other parts of the machine.
Adjust the upper left hand section of the fence if necessary.
CUTTING BOWED MATERIAL (Fig. 37)
Before cutting any workpiece, check to see if it is bowed. If it is
bowed the workpiece must be positioned and cut as shown.
Do not position the workpiece incorrectly or cut the workpiece
without the support of the fence.
(8.9) Clearing jammed material
• Turn the mitre saw “OFF” by releasing the trigger switch.
• Allow the blade to come to a complete halt.
• Unplug the mitre saw from the mains supply.
• Carefully remove any jammed material from the machine.
• Check the condition and operation of the safety guard.
• Check for any other damage to any part of the machine e.g.
the blade.
• Have any damaged parts replaced by a competent
technician and a safety inspection carried out before using
the machine again.
(8.10) Supporting long workpieces
The free end of a long workpiece should be supported at the same
height as the machine table. The operator should consider using a
remote workpiece support in addition to the table extension bars if
thought necessary.
Fig. 37
Fig. 36
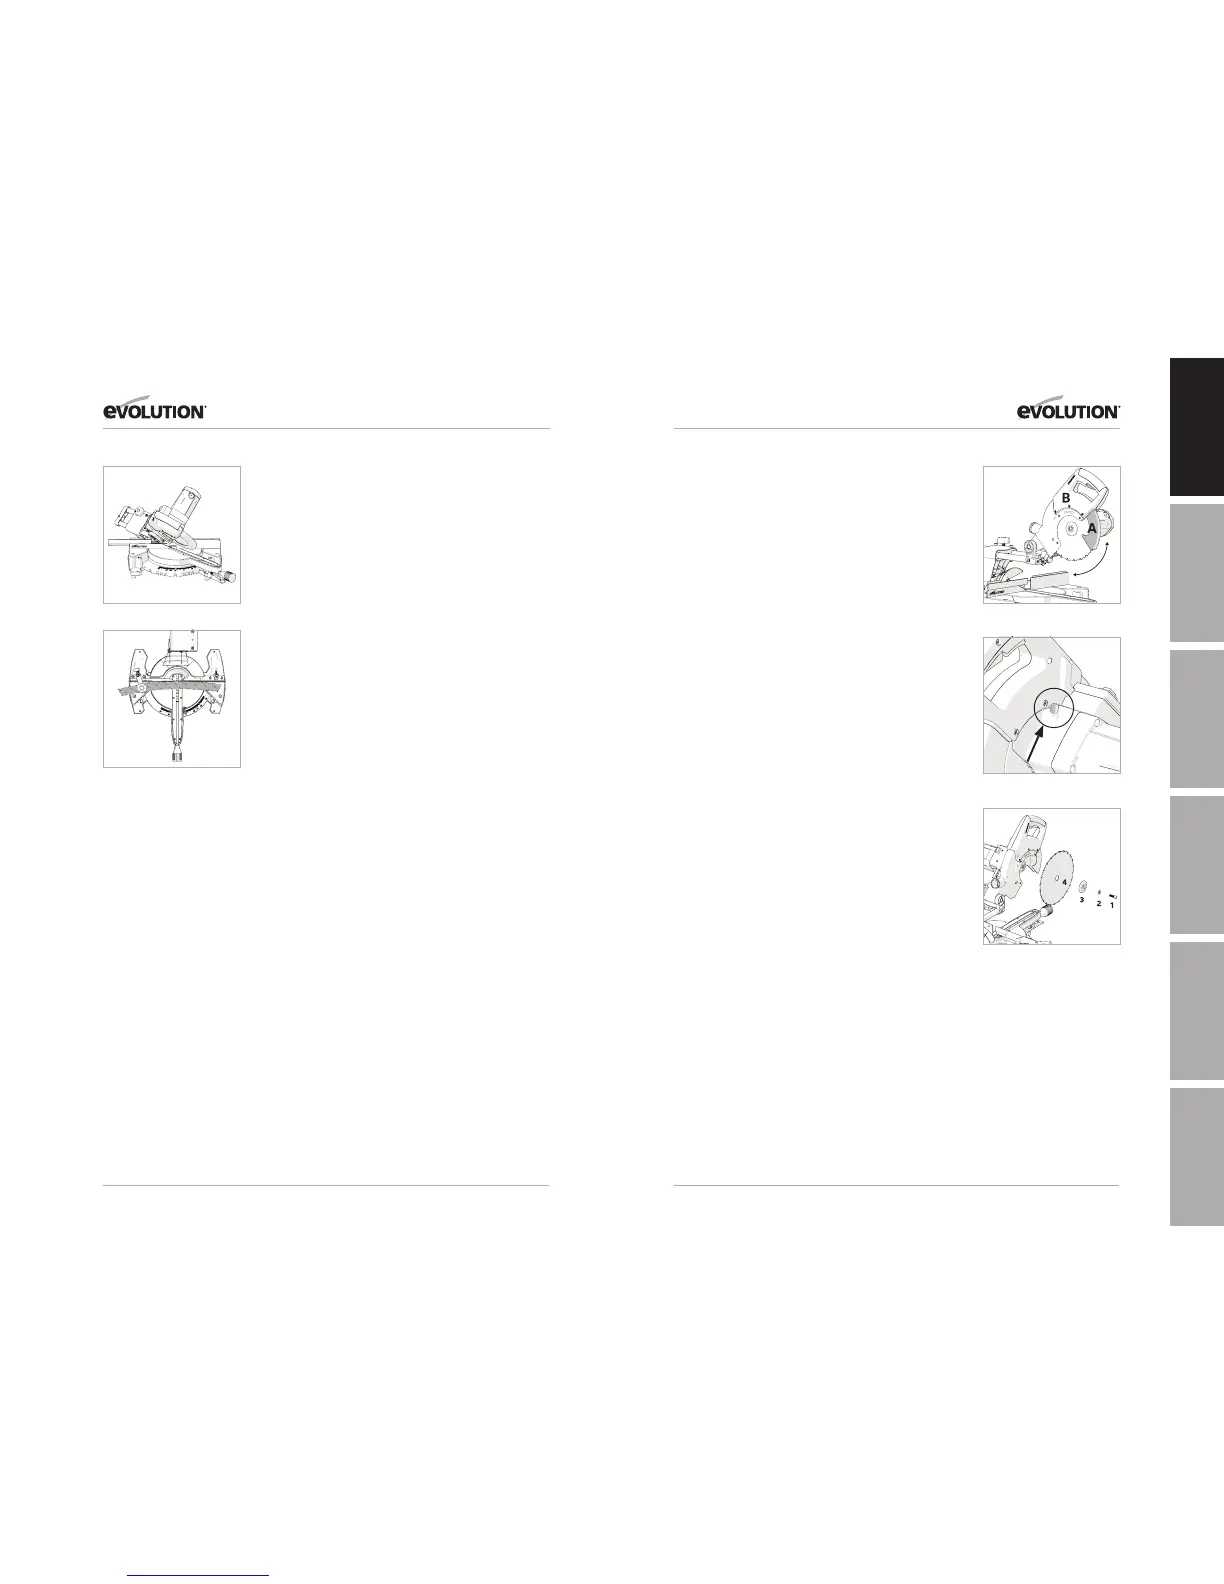
INSTALLING or REMOVING a BLADE
WARNING:
Only carry out this operation with the machine
disconnected from the mains supply.
WARNING: Only use genuine Evolution blades or those
blades specifically recommended by Evolution Power Tools and
which are designed for this machine. Ensure that the maximum
speed of the blade is higher than the speed of the motor.
Note: It is recommended that the operator considers wearing
protective gloves when handling the blade during installation
or when changing the blade.
• EnsuretheCuttingHeadisinitsupperposition.
• Rotatethelowerbladeguard(Fig. 38A) up and into
the upper blade guard. (Fig. 38B).
• Press&keeppressedtheblackarborlockbuttontolock
the arbor. (Fig. 39)
• UsingthesuppliedHexKey,releasethearborscrewand
remove the washer and outer-blade flange and the blade
from the arbor. (Fig. 40A).
Note: The arbor screw has a LH thread. Turn clockwise to
loosen. Turn counterclockwise to tighten.
• Ensurethatthebladeandbladeflangesarecleanandfree
from any contamination.
• Theinner-bladeflangeshouldbeleftinplace(except for
USA models supplied with the dual-sided inner-flange),
but if it is removed for cleaning it must be replaced the same
way round as it was removed from the machine.
• Installthenewblade.Makesuretherotationarrowontheblade
matches the clockwise rotation arrow on the upper guard.
Note: The blade teeth should always point downward at the
front of the saw.
• Installtheouterbladeflange,washerandarborscrew.
• Lockthearborandtightenthearborscrewusingmoderate
force, but do not overtighten.
• EnsuretheHexKeyisremovedandthearborlockhas
released before operating.
• Ensurethebladeguardisfullyfunctionalbeforeusing
the machine.
Note: Blade Bore Reducing Inserts should only be used
in accordance with the manufacturers instructions.
Fig. 39
Fig. 40A
Fig. 38