6
SMD810 Instruction Manual - W4386A
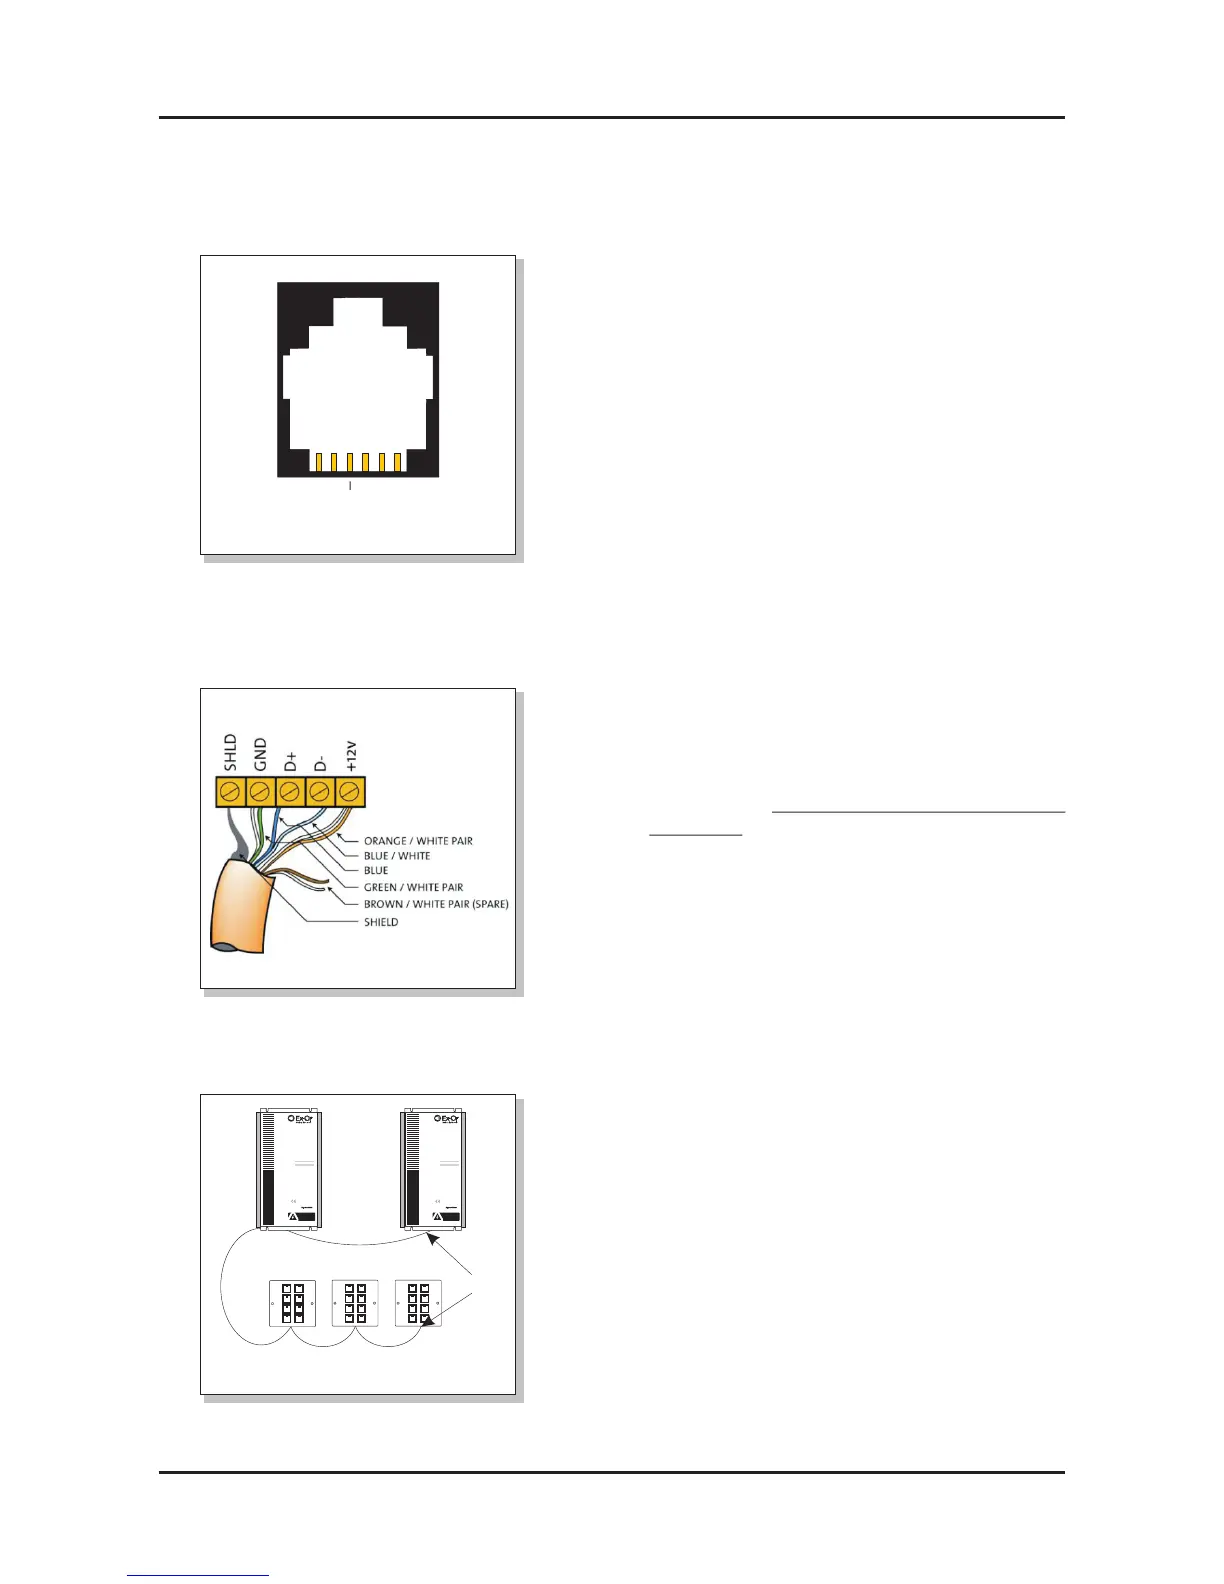
RJ12 Socket Connections
Connect Data Cable in a "Daisy Chain"
SceneSelect Bus Cable Connections
There is one bus port in the form of an RJ12
socket on the front panel. This is used for the
temporary co nn ec ti on of a PC for
programming purposes. There are more
terminals on the main circuit board for
permanent connections. Use Category 5 FTP
(screened) cable as a minimum. It should be
segregated from mains cables by a minimum
distance of 300mm. Recommended cable
types include:
Belden 9503
RS Components 368-687
One pair is paralleled for GND, one pair
paralleled for +12V, and one pair used for
DATA+ and DATA -.
Recommended Cable Colour Coding
Green/White pair paralleled for GND
Orange/White pair paralleled for +12V
Blue/White pair Blue for DATA+
White for DATA-
The colour coding scheme used is not critical,
as long as the same scheme is used
throughout the installation.
The screen of the data cable must be
connected where there is a terminal
provided.
Bus Cable Connecting Method
All devices on the SceneSelect Bus should be
connected together via a 'daisy-chain'
arrangement. 'Spurs' or 'stubs' off the
SceneSelect Bus are not permitted. Devices
may be connected in any order ensuring that
the first and last devices on the system
terminate one SceneSelect Bus cable only -
see diagram, left. Should the cable run exceed
600 metres then SBE Bus Extenders should
be used.
SPARE
PLUS
DATA --
DATA +
GND
SPARE
Serial Cable Permanent Connections
INSTALLATION DETAILS
INPUT: 230 V 50-60Hz 10 A
OUTPUT: 1 x 230V 10A
MOUNT VERTICALLY
AGAINST WALL
ENSURE GOOD VENTILATION
FOLLOW INSTALLATION
INSTRUCTIONS
Unit 6-119/133 McEVOY St. Alexandria
NSW 2015 AUSTRALIA
Manufactured by:
ISOLATE FROM
MAINS SUPPLY BEFORE
REMOVING THIS COVER
NO USER SERVICEABLE PARTS INSIDE
SERVICE BY QUALIFIED PERSONNEL ONLY
WARNING
1 cable
2 cables
2 cables 2 cables
SceneSelect II
SceneSelect II
 Loading...