Maintenance
Adjustments
Note:DisengagePTO,shutoffengine,waitfor
allmovingpartstostop,engageparkingbrake,and
removekeybeforeservicing,cleaning,ormakingany
adjustmentstotheunit.
CAUTION
Raisingthemowerdeckforserviceor
maintenancerelyingsolelyonmechanical
orhydraulicjackscouldbedangerous.The
mechanicalorhydraulicjacksmaynotbeenough
supportormaymalfunctionallowingtheunitto
fall,whichcouldcauseinjury.
DoNotrelysolelyonmechanicalorhydraulic
jacksforsupport.Useadequatejackstandsor
equivalentsupport.
DeckLeveling
1.Positionthemoweronaatsurface.
2.Stopengine,waitforallmovingpartstostop,and
removekey.Engageparkingbrake.
3.Checkthetirepressureinthedrivetires.Proper
inationpressurefortiresis13psi(90kPa).
Adjustifnecessary.
4.Positionthetransportlockinthelatching
position.
5.Carefullyrotatethebladesfromsidetoside.
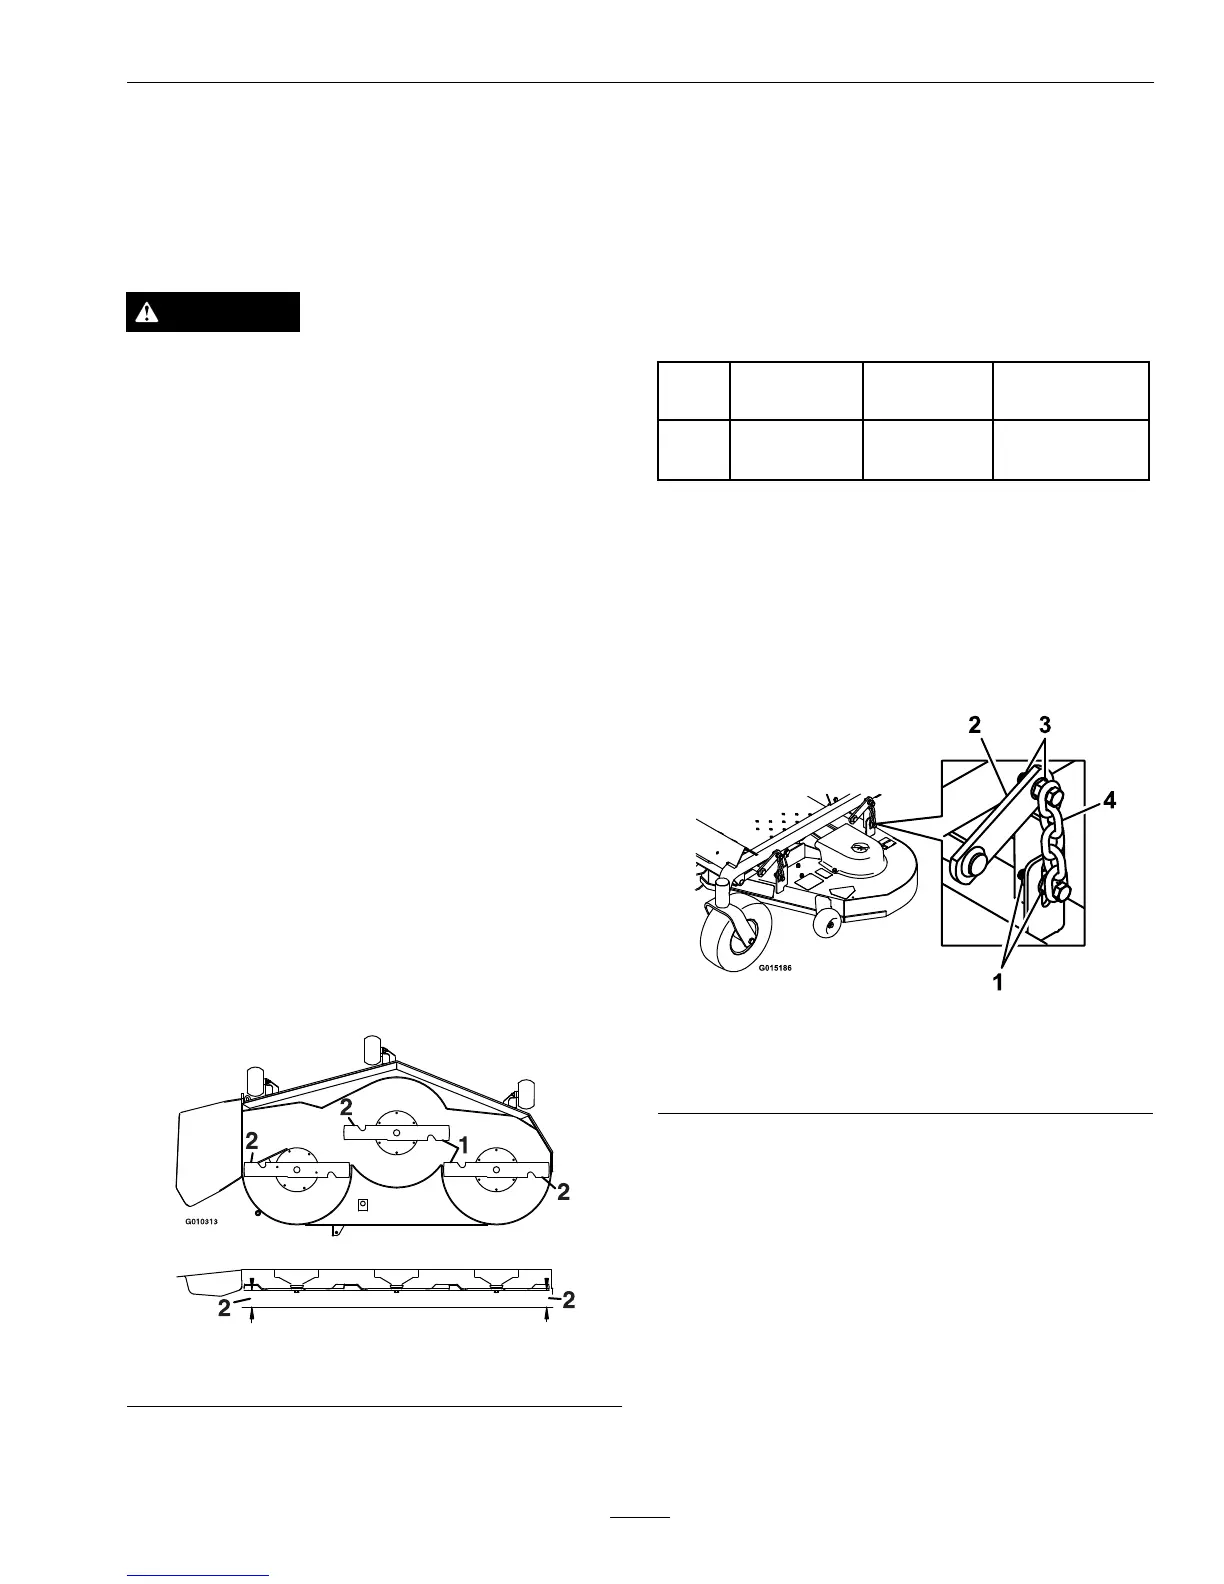
6.Measurebetweentheoutsidecuttingedgesand
theatsurface(
Figure23).Ifbothmeasurements
arenotwithin3/16inch(5mm),anadjustmentis
required;continuewiththisprocedure.
Figure23
1.Bladessidetoside2.Measurehere
7.Setanti-scalprollerstotopholesorremove
completelyforthisadjustment.
8.Settheheight-of-cutlevertothe3inch(76mm)
position.Placetwo“B”thickblocks(seeBlock
HeightandRakeTable)undertherearedgeofthe
cuttingdeckskirt;oneoneachsideofthecutting
deck.Placetwo“A”thickblocksundereachside
ofthefrontedgeofthedeck,butnotunderthe
anti-scalprollerbrackets.
BlockHeightandRakeTable
Deck
Size
FrontBlock
Height“A”
RearBlock
Height“B”
Rake“R”
48&
52
2.54inches
(6.5cm)
2.58inches
(6.6cm)
1/16–5/16inch
(1.6–7.9mm)
9.Carefullyrotatethebladessidetoside(Figure23).
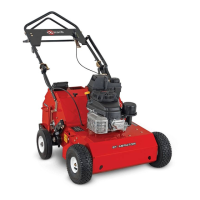
10.Loosenthelevelingadjustlockingnuts(item1
Figure24)onallfourcornerssothatthedeckis
sittingsecurelyonallfourblocks.Makesurethat
theslackisremovedfromthedeckhangersand
thedeckliftfootleverispushedbackagainstthe
stop,thentightenthefourlevelingadjustlocking
nuts.
Figure24
1.Levelingadjustlocking
nuts
3.Deckhanger
2.Deckliftarm4.Chain
11.Recheckthatblockstjustsnuglyunderthedeck
skirt.Makesureallattachmentboltsaretight
12.Continuelevelingthedeckbycheckingthe
front-to-rearbladeslope;refertoAdjustingthe
BladeSlope.
13.Recheckbladesforlevelnessandrepeatdeck
levelingprocedureifnecessary.
AdjustingtheBladeSlope
1.Checkthefront-to-rearbladelevelanytimeyou
installthemower.Ifthefrontbladetipisnot
“R”(seeBlockHeightandRakeTableinDeck
35