Do you have a question about the Extech Instruments EA15 and is the answer not in the manual?
Specifies the operating temperature ranges for different thermocouple types (K, J, T, E, R, S, N).
Defines the measurement resolution for various thermocouple types, including specific values for R, S types.
Details the accuracy specifications for different thermocouple types, including percentage of reading and fixed offsets.
Outlines the temperature coefficient effects on accuracy outside specified ranges, with different values for types.
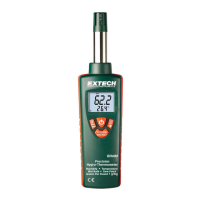
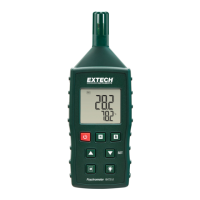
Describes the display type: Dual Display Multi-function LCD with Backlight.
Specifies the input protection limits: 60VDC; 24VAC rms.
Indicates the measurement rate: 1 time per 1.5 second.
Describes the LCD indication for over range: 'OL' appears on the LCD.
Describes the LCD indication for an open input: 'OL' appears on the LCD.
Describes the LCD indication for low battery: 'BT' appears on the LCD.
States the manual memory capacity: 98 sets.
States the datalogging memory capacity: 8800 sets.
Specifies the power supply: 6 'AAA' Batteries.
Estimates the battery life: Approximately 200 hours with alkaline batteries.
Specifies the operating temperature range: 32 to 122°F (0 to 50°C).
Specifies the operating humidity range: < 80% RH.
Specifies the storage temperature range: 14 to 140°F (-10 to 60°C).
Specifies the storage humidity range: 10 to 80% RH.
Provides the physical dimensions: 5.91 x 2.8 x 1.4" (150 x 72 x 35mm).
States the weight: Approx. 8.29 oz. (235g) with batteries.
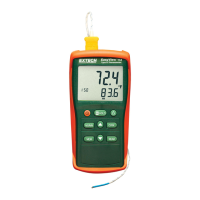
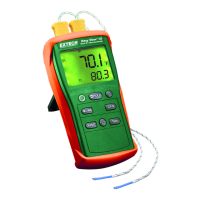
Describes the connection points for RS-232 and the two thermocouple inputs (T1, T2).
Refers to the Dual Display Multi-function LCD screen.
Details the function of the Power, Data Hold, and Backlight control buttons.
Explains the controls for Max/Min recording, display selection, and unit changes (C/F/K).
Describes the buttons for memory operations, thermocouple type selection, and reading stored data.
Identifies the SET button, used for programming intervals and other settings.
Locates the battery compartment on the rear of the meter.
Describes the scroll buttons used for navigating menus and data.
Identifies the Enter button for confirming selections.
Guides on how to connect two thermocouples with spade plugs into the meter's input jacks.
Explains the procedure to turn the meter on and the initial self-test sequence.
Details the process of selecting the correct thermocouple type using the TYPE button.
Describes how to switch between Celsius, Fahrenheit, and Kelvin units using the C/F/K button.
Explains how to cycle through different display modes for T1, T2, and their difference (T1-T2).
Explains how to freeze the displayed reading using the HOLD button, indicated by the 'H' icon.
Details how to capture Minimum, Maximum, and Average temperature values with an elapsed time clock.
Explains how to turn the LCD display backlight on and off, noting it turns off automatically after one minute.
Describes the automatic power-off feature after 30 minutes of inactivity, and how to disable it.
Instructions on how to turn the meter off using the power button.
Explains how to manually store and recall up to 98 temperature readings using the MEM and READ buttons.
Explains how to store up to 8,800 readings with programmable intervals (3-255 seconds) for later download.
Provides instructions on how to erase all data from the meter's memory.
Instructions on installing and using the supplied datalogging software on a PC.
Describes the icon for saving recorded data to a text file on the PC.
Describes the icon for opening an already saved data file.
Explains how to view data in a list format and options to save, graph, or print.
Details how to view data as an x-y graph, with options for printing and scaling.
Explains how to change the data logging interval, ranging from 1 to 86,400 seconds.
Allows viewing of minimum, maximum, and average readings for T1 and T2 in real time via PC connection.
Guides on initiating data download from the meter to the PC using the datalogger download icon.
Prompts the user to enter the datalogging start time (HR:MN:SC) when downloading data.
Details the one-year limited warranty for the instrument and six months for sensors/cables, excluding user misuse.
Offers information on repair and calibration services, recommending annual calibration for integrity.
| Display | LCD |
|---|---|
| Power Source | 9V Battery |
| Response Time | 500 ms |
| Optical Resolution | 8:1 |
| Operating Humidity | 10 to 90% RH |
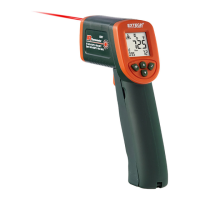
| Type | Infrared Thermometer |
| Temperature Range (Type K) | -50°C to 1370°C |
| Temperature Range (Infrared) | -4 to 572°F (-20 to 300°C) |
| Accuracy (Type K) | ±1.8°F (±1°C) |
| Accuracy (Infrared) | ±2% of reading or ±2°C (±3.6°F) |
| Resolution | 0.1°F/°C |
| IR Resolution | 0.1°F/°C |
| Emissivity | Adjustable 0.10 to 1.00 |
| Operating Temperature | 32 to 122°F (0 to 50°C) |
| Dimensions | 38 mm |
| Weight | 0.4 kg (0.88 lb) |