Installation Instructions Installation Instructions
16
5.2 Removing the glass from the side
It is not necessary to take out the glass from the side to place the
log set or for maintenance.
MatriX 800-II en -III:
• First, remove the front glass (see Chapter 5.1).
• Remove the left or right clamp strip on the top (g. 3.4).
• Place the suction cups on the glass (g. 3.5).
• See g. 3.5, number:
1. Slide the glass towards to you and to the top so the
bottom and back side will release.
2. Now, carefully get the underside towards to you and
put the glass on a safe place.
> Please note:
Replace the glass in reverse order.
Clean all ngerprints on the glass; otherwise they will burn in once
the re is used.
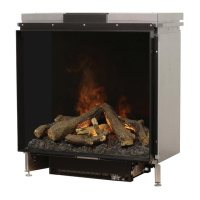
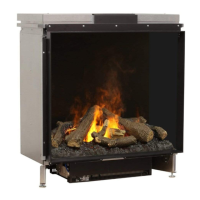
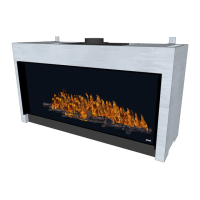
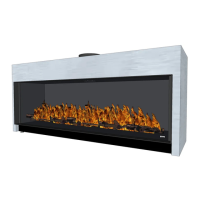
6 Placing the decoration material
It is not permitted to use other or to add more material in the
combustion chamber.
Keep the pilot light always free of decoration material!
See g. 4.0 to 4.5 or the included log set card:
• Divide the glass granulate on the perforated bottom plate.
• Place the 2 large wood blocks and make sure there is no
glass granulate underneath.
• Place the other wood blocks.
• Divide the chips on the glass granulate and the perforated
bottom plate.
• Start the re as described in the user manual.
• Assess whether the ame distribution and the Symbio-effect
is good. Move or remove any chips/glass granulate to a good
Symbio-effect.
• Replace the glass (Chapter 5) and check the re image.
7 Checking the installation
7.1 Checking the main burner ignition, pilot ame
Ignite the re as described in the user manual.
• Check that the pilot ame is well above the main burner and
not covered by chips.
• Check the ignition of the main burner on full and small
setting. (Ignition must be smooth and quiet).
7.2 Checking for gas leaks
Check with a gas leak nder or spray all connections and pipes for
gas leakage.
7.3 Checking the burner pressure and primary
pressure
Check that the burner pressure and primary pressure match with
the information listed in the manual, Chapter 14 “Technical
specications”.
Measuring the primary pressure:
• Close the shut-off valve.
• Turn measuring nipple B (see g. 1.7) some turns open and
connect a measuring hose to the gas regulator.
• Take this measurement at highest setting of the re and when
the re is set to pilot light.
• Do not connect the unit if the pressure is too high.
Measuring the burner pressure:
Check the burner pressure only with proper primary pressure.
• Turn measuring nipple A (see g. 1.7) some turns open and
connect a measuring hose to the gas regulator.
• The pressure must correspond to the value indicated in the
technical specications of this manual. In case of deviation contact
the manufacturer.
> Please note:
Close all pressure measuring nipples and check for gas leakage.
7.4 Checking the ame image
Let the re burn for at least 20 minutes at highest setting and check
the ame for:
* Flame distribution
* Color of the ames
If one or both points are not acceptable then check:
• The log set layout and/or the amount of glass granulate/chips
on the bottom plate.
• The pipe connections for leaks (in case of blue ames).
• Whether the correct ue restrictor is tted. (see g, 2.0 F, rst
remove hatch “G”).
• The outlet.
- Wall terminal right side up
- Roof terminal on the right position
- If the maximum horizontal ue lengths is not exceeded.
7.5 Flue gas analyzer
If you are in possession of a CO/CO2 ue gas analyzer, then it is
possible to check the supply air and the combustion gases.
There are two measuring pipes at the front of the re between the
mounting frame and the glass (g. 2.1).
The ratio CO2 and CO must not be greater than 1:100.
Example:
CO2 is 4% and CO is 400ppm, measured at the highest point.
If the ratio is greater than 1:100 or exhaust gases are measured in
the supply air, then also check above points.
 Loading...