EasyManua.ls Logo

Faller 130323 User Manual

Faller 130323
24 pages
To Next Page IconTo Next Page
Page #1 background imageLoading...
Page #1 background image
Sa. Nr. 130 323 1
MATERIALSEILBAHN
MATERIAL CABLE-WAY
TÉLÉCABINE À MATÉRIAUX
MATERIAALKABELBAAN
Art. Nr. 130323
Vor Beginn des Bastelns sollten Sie sich mit den Spritzlingen und der Anleitung vertraut machen.
Sollte es einmal vorkommen, dass ein Teil im Bausatz fehlt, kreuzen Sie bitte das fehlende Teil in
der Anleitung an und schicken Sie diese bitte an Fa. Gebr. FALLER GmbH, Abt. Kundendienst,
kundendienst@faller.de, Kreuzstraße 9, 78148 Gütenbach. Sie erhalten dann umgehend Ersatz.
Es kann vorkommen, dass bei einem Bausatz Einzelteile übrig sind.
Before beginning with the assembly please familiarize yourself with the parts and read the instructions carefully.
In case of missing parts please indicate these on the instructions leaflet with a circle and return
the leaflet to Gebr. FALLER GmbH, kundendienst@faller.de, Kreuzstraße 9, D-78148 Gütenbach, Germany.
You will receive the replacement by return.
It may happen in a kit that some parts are not required.
Avant de commencer le montage de votre maquette bien lire la notice et repérer les grappes.
Si une pièce manque dans une boîte, cochez la pièce correspondante sur la notice et renvoyez-la-nous à
Gebr. FALLER GmbH, kundendienst@faller.de, Kreuzstraße 9, D-78148 Gütenbach (R.F.A.).
Nous vous ferons parvenir la pièce par retour.
Dans certains kits, il est possible que certaines pièces ne soient pas utilisées.
Vóór het bouwen zou men de gietstukken en de handleiding moeten bestuderen.
Indien onverhoopt een onderdeel aan het bouwpakket ontbreekt, gelieve men het ontbrekende deel
in de handleiding aan te kruisen en deze te zenden aan Gebr. FALLER GmbH, kundendienst@faller.de,
Kreuzstraße 9, D-78148 Gütenbach. U ontvangt dan omgaand en gratis het ontbrekende onderdeel.
Het kan voorkomen dat u bij bepaalde bouwdozen onderdelen overhoudt.
D
F
GB
NL
Art. Nr. 170688
SPEZIAL-SEITENSCHNEIDER
zum gratfreien Abtrennen von feinsten Spritztei-
len.
Nur für Polystyrol geeignet.
Special side cutter for cutting off ultra-fine moul-
ded parts without burrs.
Only suitable for polystyrene.
Pince coupante spéciale pour couper sans bavure
les pièces miniatures moulées par
injection. Convient uniquement au polystyrène.
Speciale zijkniptang voor het braamloos afknip-
pen van de fijnste gietstukdelen.
Alleen geschikt voor polystyrol.
Für den Zusammenbau des Modells empfehlen wir folgende FALLER-Artikel (sind nicht im Bausatz enthalten):
For the assembly of the kit we recommend following FALLER products (not included in the kit):
Pour l’assemblage du modèle, nous vous recommandons les articles FALLER suivants (non inclus dans le kit):
Om dit model te bouwen adviseren wij de volgende FALLER producten (maken geen deel uit van deze bouwset):
Art. Nr. 170492
FALLER-EXPERT
Flüssigkleber in Plastikflasche mit Spezialkanüle
für feinste Klebstoffdosierung.
Liquid cement in plastic bottle with canule
for very fine dosage.
Colle liquide en bouteille plastique
avec bec verseur pour un dosage précis.
Vloeibare lijm in plastic-flacon met doseerbuisje om
nauwkeurig te lijmen.
Inhalt Spritzlinge
Contents Sprues
Contenu Moulages
Inhoud Gietstukken
1
1
x
1 C
1
x
2
1
x
3 A
1
x
3 B
1
x
4
1
x
5 A
1
x
5 B
1
x
Question and Answer IconNeed help?

Do you have a question about the Faller 130323 and is the answer not in the manual?

Faller 130323 Specifications

General IconGeneral
BrandFaller
Model130323
CategoryToy
LanguageEnglish

Summary

General Information and Recommended Products

Before You Begin Assembly

Familiarize yourself with parts and instructions before starting assembly.

Missing Parts Procedure

Instructions for reporting and receiving missing parts from the manufacturer.

Recommended FALLER Products

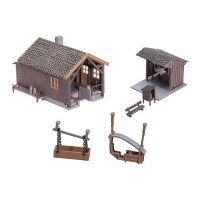
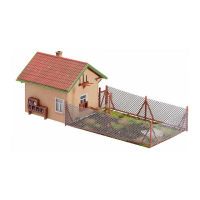
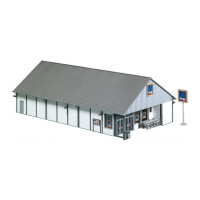
List of additional FALLER products recommended for assembly.

Core Assembly Steps

Motor and Base Assembly

Instructions for assembling the motor unit and main base structure.

Base Structure Assembly

Steps to assemble the main base structure with associated parts.

Building Facade Assembly

Window Foil Application

How to cut and apply the transparent window foil to frames.

Wall Section Assembly

Steps for assembling wall sections with windows.

Drive Mechanism and Structure Assembly

Drive Mechanism Components

Assembly of key components for the drive system.

Main Structure Integration

Integrating drive parts into the main model structure.

Main Building Finishing

Facade Detailing

Applying window foil to complete building facades.

Roof Attachment Instructions

Specific instructions for attaching the roof section correctly.

Accessory Structure Assembly

Main Building Final Gluing

Final gluing steps for the main building structure.

Small Structure Construction

Assembly of smaller supporting structures.

Supporting Infrastructure Assembly

Pole and Support Assembly

Steps for assembling vertical support poles and cable guides.

Small Shed Construction

Instructions for building the small shed structure.

Mechanical Components and Lubrication

Tensioning Mechanism Assembly

Assembly of parts for cable tensioning.

Lubrication and Part Integration

Using special lubricant and assembling mechanical components.

Final Model Setup and Notes

Overall System Configuration

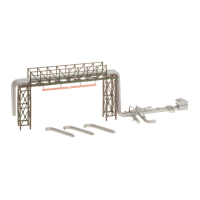
Visual representation of the fully assembled cable car system.

Important Assembly Considerations

Key considerations like non-included screws and recesses.

Gondola Carrier Assembly

Gondola Carrier Construction

Assembling the individual gondola carriers.

Thread Attachment and Length

Attaching and preparing the perlon thread for the cable.

Thread Installation and Routing

Attaching Thread to Tension Spring

Connecting the main thread to the tensioning spring.

Routing Thread Through Stations

Guiding the thread through the mountain and valley stations.

Station Final Assembly Steps

Mechanism Insertion

Inserting components without gluing.

Final Component Placement

Positioning the last parts of the station.

Variant 1: Carrier Assembly

Base Carrier Construction

Assembling the base structure for Variant 1.

Gondola Body Assembly

Constructing the main body of the gondola for Variant 1.

Variant Assembly: Slope Adjustments

Steep Slope Carrier Assembly

Assembling carriers for steep inclines (> 15°).

Flat Slope Carrier Assembly

Assembling carriers for gentle inclines (< 15°).

Variant Carrier Configurations

Steep Slope Carrier Finalization

Final assembly of carriers for steep slopes.

Flat Slope Carrier Finalization

Final assembly of carriers for flat slopes.

Variant 2: Carrier Assembly

Base Carrier Assembly (Variant 2)

Assembling the base structure for Variant 2.

Gondola Body Assembly (Variant 2)

Constructing the main body of the gondola for Variant 2.

Variant 2: Final Assembly Steps

Thread Preparation (Variant 2)

Preparing the perlon thread for Variant 2 assembly.

Carrier Integration (Variant 2)

Final assembly of carriers for Variant 2.

Cable Measurement and Marking

Cable Marking Procedure

Marking the cable's required length with a felt-tip pen.

Securing Thread Connections

Using glue to secure thread connections and parts.

Final Cable and Carrier Connections

Thread Knotting and Gluing

Knotting and gluing the perlon thread for secure connections.

Carrier Attachment to Cable

Connecting the gondola carriers to the main cable.

Gondola Alignment and Threading

Ensuring Parallel Gondola Arms

Adjusting gondola arms to be parallel for proper function.

Final Thread Knotting Steps

Completing thread knots for the longer cable segment.

Cable Tensioning and Alignment

Applying Cable Tension

Applying the correct tension to the perlon thread.

Horizontal and Vertical Alignment

Adjusting gondola carriers for proper orientation.

Electrical Connections and Operation

Control Unit Wiring

Connecting all cables to the main control unit.

Operating the Gondola System

Instructions for starting and operating the cable car.

Final Decorative Elements

Applying Decorative Parts

Adding decorative parts to the completed model.

Final Gluing Precautions

Notes on where not to apply glue during final steps.

Related product manuals