Titolo TITLE
H I
D
F
G
F
D
E
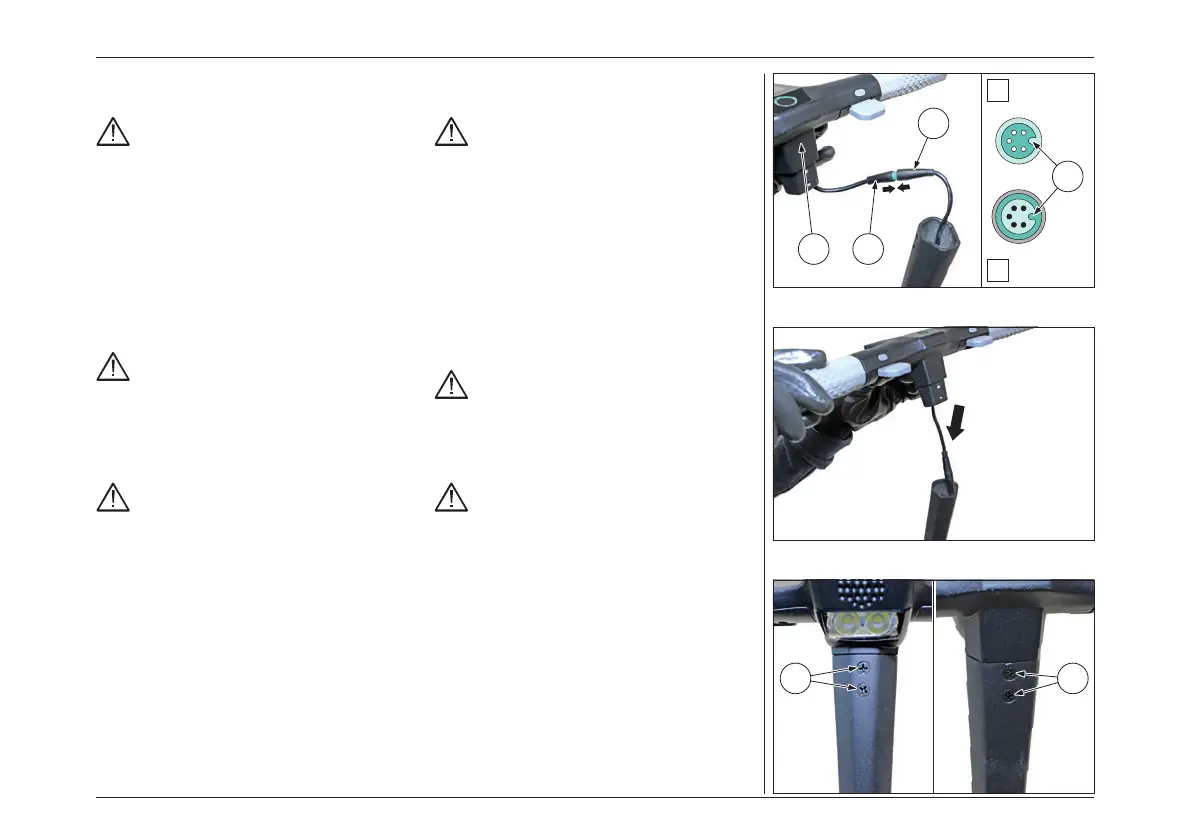
– Take the complete handlebar “E” and connect
the display connector “F” to the socket “D”;
Respect the mounting direction of the
connectors and their orientation notches
“G”.
– Insert the handlebar into the recess on the
stem;
Take great care when inserting the
display wiring into the recess of the
handlebar stem, to prevent breakage
and/or crushing of the wires and
connectors of the device.
Do not pull or drop the handlebars to
avoid breaking the wires and connectors
of the device.
– Check that the holes in the stem and handlebar
fi t together;
– Secure the handlebar with the fi xing screws
supplied in the package: two screws “H” on
the front side and two screws “I” on the rear
side;
– Prendere il manubrio completo “E” e collegare
il connettore del display “F” alla presa “D”;
Rispettare il verso di montaggio dei
connettori e le relative tacche di
orientamento “G”.
– Inserire il manubrio nella sede sull’asta;
Prestare molta attenzione mentre
si inserisce il cablaggio del display
all’interno dell’incavo dell’asta del
manubrio, per evitare rotture e/o
schiacciamenti dei fi li e dei connettori
del dispositivo.
Non tirare e non lasciare cadere il
manubrio per evitare rotture dei fi li e dei
connettori del dispositivo.
– Verifi care che i fori dell’asta e del manubrio
combacino perfettamente;
– Fissare il manubrio con le viti di fi ssaggio
fornite in confezione: due viti “H” sul lato
anteriore e due viti “I” sul lato posteriore;
UTILIZZO DEL MONOPATTINO - E-SCOOTER USE
18