4. SET UP
The Flail Mower is delivered equipped with a driveshaft and related operating manual.
When the machine is delivered, check that there is no damage to the Flail Mower or driveshaft. In case of
damage or missing parts immediately notify the Manufacturer or your Dealer.
Because of his size, the machine could be delivered with some parts to be assembled.
In this case, the assembly of such parts is an owner’s task, and must be performed carefully, with referen-
ce to the tables of the s pare parts section.
WARNING
For proper tightening torques of bolts and screws, refer to the table in this manual.
4.1. CONNECTING TO THE TRACTOR
The FLAIL MOWER is designed to be mounted on tractors equipped with 3-point Hitch Category I (ISO
730 standard).
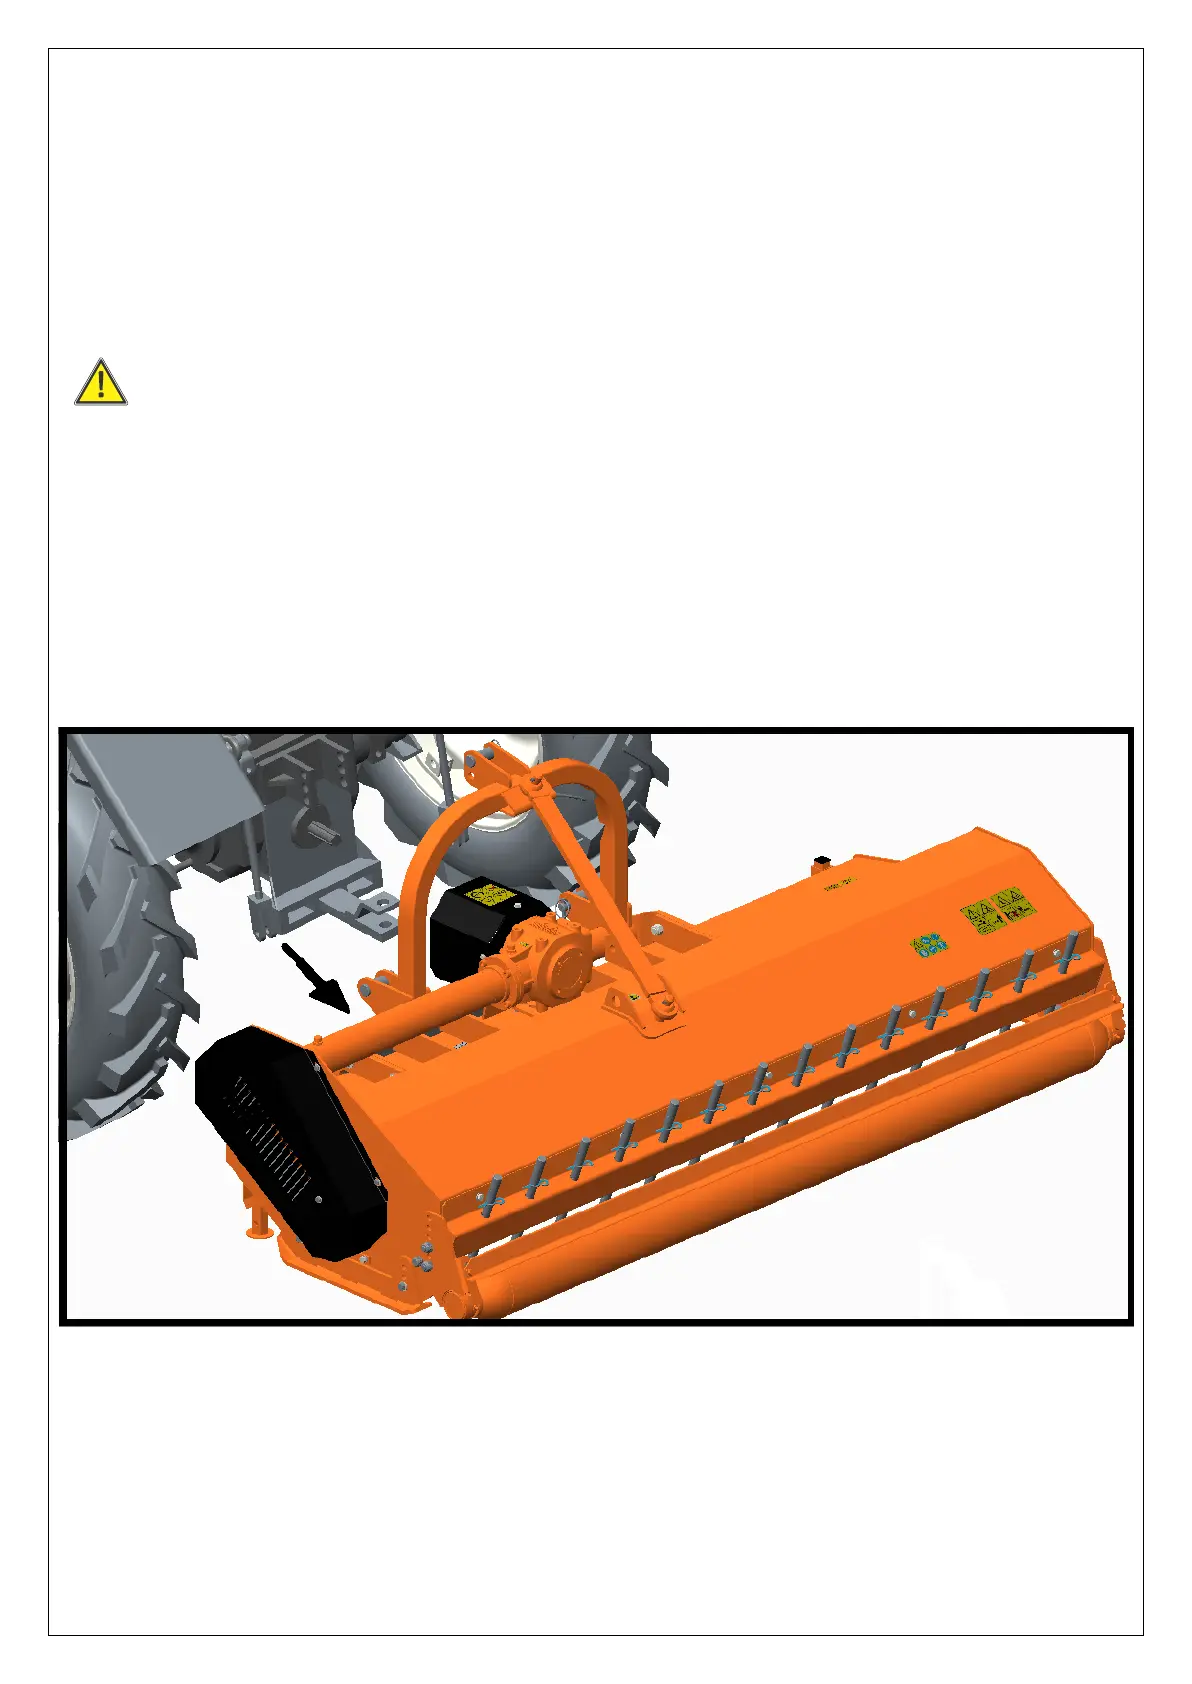
To connect the Flail Mower to the tractor the operator must do the following:
• drive the tractor in reverse, up to align the rear lifting arms to lower hitches of the Flail Mower in parking
(see picture below);
• set the tractor’s parking brake, stop engine, remove the ignition key and get off the tractor;
• connect the lifting arms of the tractor to the lower hitches of the Flail Mower, and the 3-point top link to
the upper hitch of the Flail Mower, through the use of the pins and the relative safety split pins;
• raise the Flail Mower until PTOs of tractor and machine are at the same height, then adjust the 3-point
top link so that the front of the machine is leveled to the back (the axis of the Flail Mower PTO must be
parallel to the ground), in order to limit stress transmitted to the Flail Mower through the cardan shaft;
• make sure that left side of the Flail Mower is leveled with the right, by adjusting the tractor lifting arms,
then lock the arms to prevent swinging that could compromise the stability of tractor and machine;
• finally adjust the parking stand, placing it at the highest point by means of the related elastic pin.